Using Raw Files For Portrait Photography
February 15, 2018

Pro Photographer Laura Tillinghast shows you the benefits of using Raw files
After becoming a professional photographer, I was delighted to discover that my tendency to be a “control freak” may serve me well in terms of providing consistent image quality from image to image and job to job. With Raw files, I have more flexibility with exposure and color balance which gives me more control over my final image output. I also prefer shooting in Raw format as it feels a lot closer to my roots which began with film photography.
Raw vs JPEG
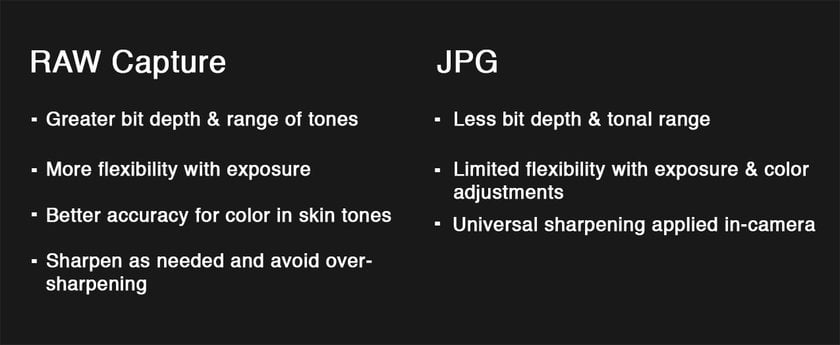
A Raw file is similar to a film negative while a photographic print is more like a JPEG file. Raw files contain a lot more data as no form of compression has occurred yet. A greater bit depth allows for more accurate color in skin tone rendering and a more dynamic tonal range from your highlights to your shadows. What this allows you to do is to make substantial changes to things like exposure and color balance without sacrificing image quality.
JPEG files have been compressed, or flattened, within the camera so they have a lot less editing flexibility and a much smaller bit depth. JPEG files are also sharpened in-camera and this can often result in an over-sharpened look. JPEG files can work well in certain situations but anytime I am shooting portraits and want to make sure skin tones are always accurate, I cover my bases by shooting in Raw format.
Developing Portraits in Luminar
I like to develop Raw files in Luminar because I can do my basic edits quickly and then go on to do my creative edits in the same place. This saves me a lot of time and improves my editing workflow by making it more efficient.
In addition to making basic adjustments to color, density and contrast, the Luminar Raw Develop filter includes a Lens Distortion feature so that I can quickly correct any distortion that may be a result of using a wide-angle lens. This comes in handy especially when background architecture behind my subjects needs to be adjusted.
Improving Skin Texture
The Erase feature within the Tools menu is a great way to improve skin texture quickly. I like to use the Add+ brush to remove dust spots and small blemishes or anything that may distract the viewer from my subject’s natural beauty. Once this tool has been applied, a new layer is created above my Raw Develop layer and this allows me to lower the opacity so that the texture improvements are natural and the subject doesn’t look too retouched.
Finishing Touches
As a final step, I like to magnify each Raw file and then apply as much sharpening as needed to make sure my subject’s eyes are in tack-sharp focus. I use the Clarity slider for this and if I go too far, I can always double-click on the slider and it will reset to 0 so that I can try again.
Saving Final Image Files
Before saving a final image, I always consider preserving my edits as a Custom Preset for future use. If I have similar images from the same portrait session, then saving a Customer Preset will allow me to quickly batch process the rest of the photos or use it as a starting point for further edits.
I always save my files in the Native Luminar file format before exporting to JPEG. Native Luminar files preserve all of your editing steps and using the History palette, you can go back and change the way you edited an image if needed. This gives me peace of mind and also serves as a great resource for future editing of portraits that may have similar lighting.
These days, all of my Raw portrait files are processed using Luminar. I hope you find it as useful and easy-to-navigate as I do. Happy editing!
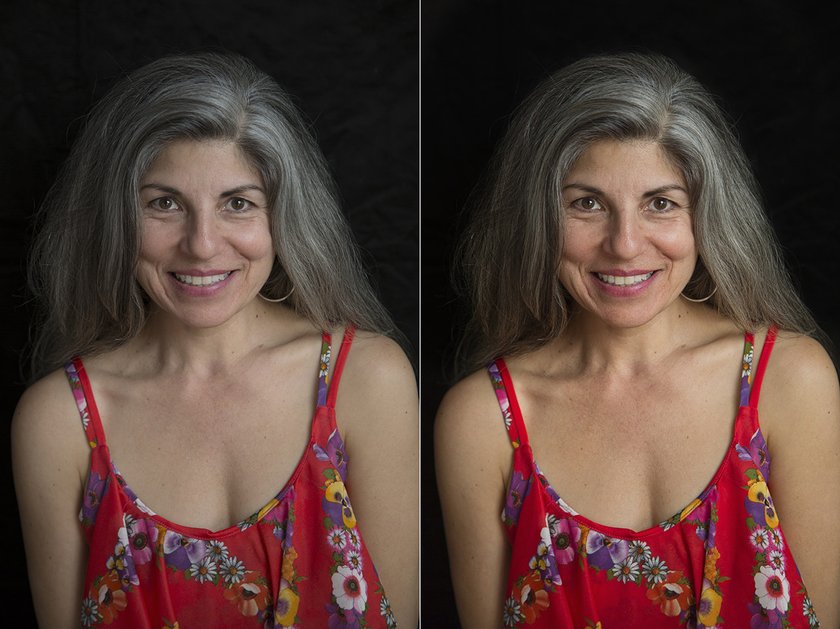 Before vs. After Images by © Laura Tillinghast


