Creative Approaches to Photographing Neon Signs
May 27, 2024

Explore the magical neon light with Steve Roe, a photographer from South Korea. In this article, you'll learn how to capture the fabulous shimmer of night-time cities. Stay turned!
There’s just something about neon signs–the warm glow, the buzz of electricity, the way they can transport you into another world. When I first arrived in South Korea, neon signs were one of the first things that caught my eye, and years later, they remain my favourite subjects to photograph. These illuminated pieces of art, hanging above restaurants and bars, and lining the streets, create perfect frames and backdrops for my subject.
Over the years, I’ve found many ways to take photos of these city lights, so join me as I share my favourite ways to approach taking photos of neon signs.
Exclusive Tools of Endless Possibilities in One AI Editor
EXPLORE NOW!Camera Settings and Techniques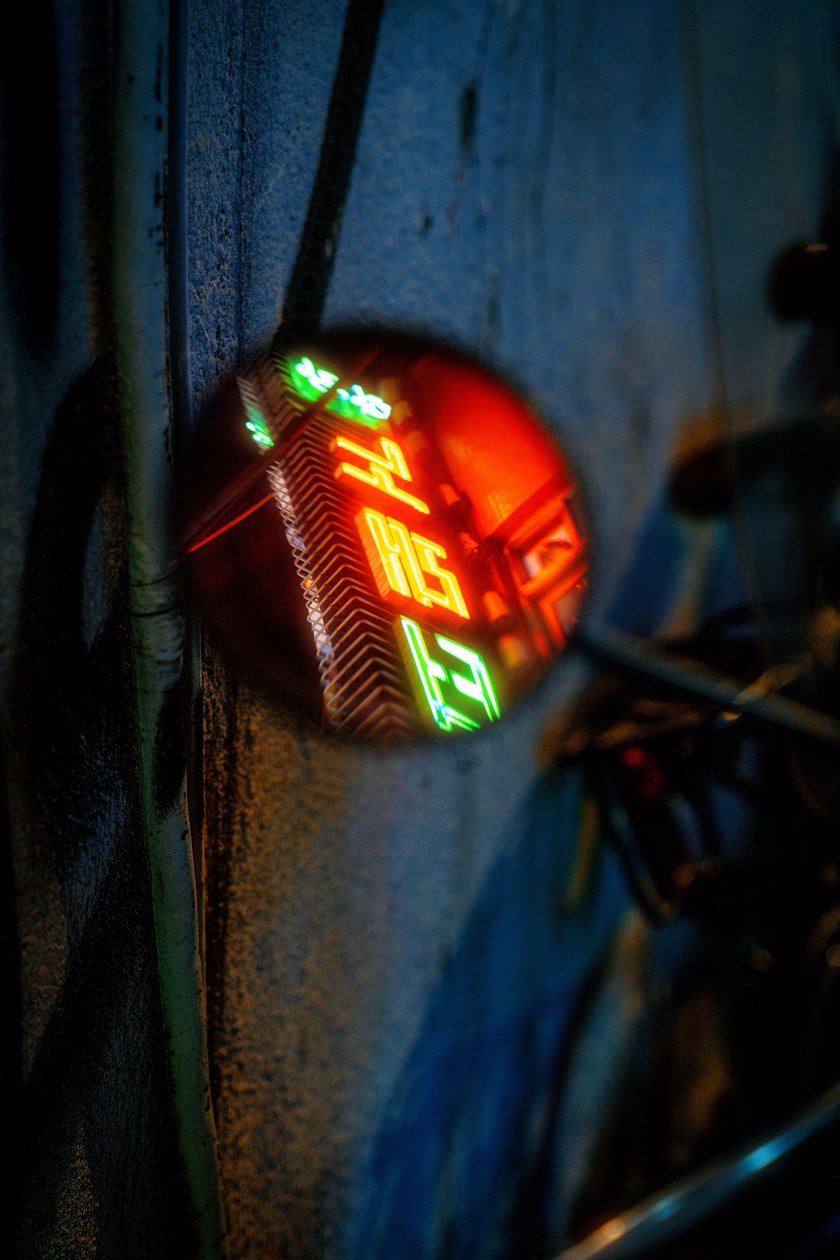
Unfortunately, due to the low-lit conditions of your scene and the bright highlights of neon signs, careful consideration of your settings is essential. The number one rule for taking photos in such conditions is to shoot for the highlights. This means ensuring that the brightest points of your scene are clearly exposed, even if this results in the rest of your scene appearing dark and shadowed.
To enhance the details in those darker areas, I highly recommend shooting in RAW mode. RAW files provide a higher dynamic range from shadows to highlights, allowing you to salvage a significant amount of detail from the shadowed areas when you adjust the shadow slider in post-processing. This adjustment typically introduces less noise than you would find in a JPEG file. You may be able to salvage over-exposed highlights but only to a certain extent.
So to avoid the disappointment of finding that a beautiful neon sign is irretrievably blown out during editing, always aim to shoot for the highlights and capture your images in RAW.
As for other camera settings, you will need to adapt to each scene. There are no universal settings that work across all cameras and low-light situations, however, you can refer to this guide to learn how to optimise your settings for night photography shots.
Creative Composition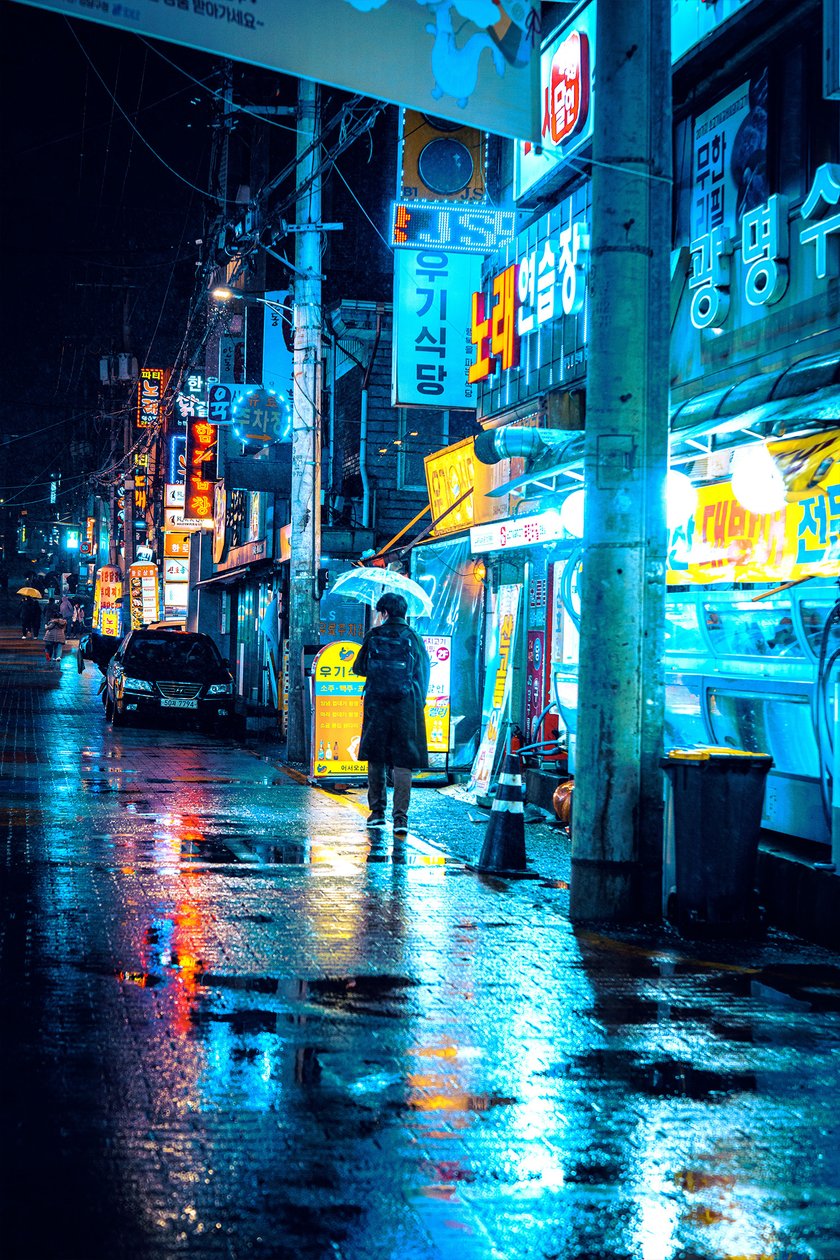
Neon signs offer a versatile element in your compositions, heavily influencing the story you wish to convey and the focus of your subject matter. Consider the environment: Are you in a scene packed with neon signs towering up above the street, or have you found a solitary diner shrouded in darkness, with only a neon sign to illuminate its presence?
Angles and Perspectives
Exploring different angles can significantly enhance the impact of neon signs in your photographs. Each angle tells a unique story—what narrative are you aiming to capture?
Low Angle: On a rainy night, consider crouching low and lining up the reflection of neon signs and city lights within your composition. From this perspective, your subject will dominate the scene, with the neon signs acting as a frame or backdrop, but more on that later.
High Angle: Just as low angles can add a new dynamic to your composition, high angles offer a great perspective too. Shooting from up high always creates an interesting shot, not only offering a fresh vantage point but also a broader context for your environment and seeing neon signs from up high is no different. I particularly enjoy umbrellas passing by underneath with the lights of the city illuminating them.
But where should you aim your camera, at the neon signs or the subject? I find it depends on the scene, but I often like to aim upwards, shooting the city lights above my subject. This creates an interesting perspective with the subject now being isolated by their surroundings—the buildings and lights towering around them. It creates a further narrative of loneliness in the modern world and can be very effective.
If your focus is solely on the neon signs, experiment with various distances and angles. Shooting from afar or close up, neon signs have a dynamic quality that is visually captivating from any perspective.
Understanding Perspective in Photography: Key Points
Learn moreFraming and Layering
One of the most effective uses of neon and city lights is to use them for framing and layering, adding a whole new dimension to your images.
Framing
Framing with neon signs involves using the lights to encircle or highlight your main subject. Position your subject centrally, and arrange the neon lights around them to draw the viewer's eye directly to the focal point. This technique not only emphasises your subject but also uses the luminous quality of neon to create a dynamic border.
Additionally, framing can be used to isolate a neon sign itself, making it the standout feature of your composition. Make use of surrounding urban architecture, windows or alleys, to frame the neon sign and add an architectural dimension to your shot.
Layering
Neon signs and city lights are a fantastic way to add layering to your image. With multiple subjects at varying distances, it can add a multi-dimensional effect. This can be applied by making use of your subjects on the street level and your signs above, creating a bustling urban scene.
Depth
Creating a sense of depth in low-light conditions can be challenging, but neon and city lights offer a solution. When arranged along a street or alley, these lights can guide the eye through the scene, adding depth. Position yourself at the end of a long street, and compose the shot so that the neon lights recede into the distance. Ensure that your subject doesn’t dominate too much of the scene, allowing your viewer to see further past them.
Advanced Creative Techniques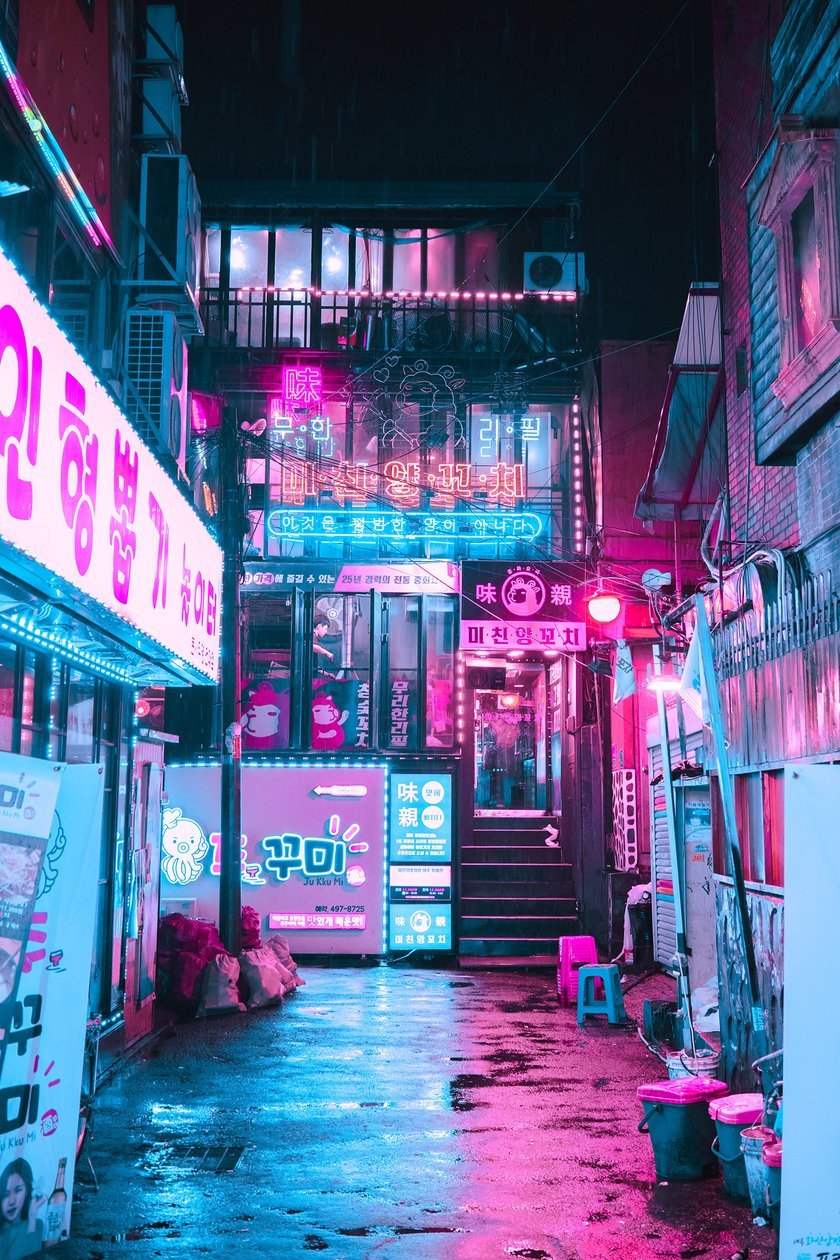
Once you have composed your shot, there are further ways to enhance your image with various techniques and equipment.
Long Exposure and Light Trails
Long exposure is a fantastic tool for capturing the energy of a city. Of course, neon lights are stationary elements, however, we can use the signs to frame our moving subjects. Positioning neon signs above busy streets allows you to capture stunning light trails created by moving vehicles, adding a luminous, colourful flow to your photographs.
Bokeh Effects
This is particularly effective when doing portraits. With your model front and centre of your frame, use the neon lights as a backdrop. Have your aperture as wide open as possible, and focusing on your model, you will begin to create a bokeh effect. The blurred and creamy textures of bokeh neons look beautiful and will compliment your scene creating stunning portraits.
AI-Perfect Bokeh is Just a Click Away in Luminar Neo
Get Started!Reflections
As mentioned above, you can make use of puddles to shoot neon signs from an interesting perspective, but the fun doesn’t end there with reflections. I use windows, wing mirrors, and other reflective surfaces to capture signs and add further interest to my shot. If you are doing a portrait shot, your model could be wearing sunglasses with the neon light illuminating the face and the sign reflected in the glasses.
Prisms
Prisms and neon lights pair perfectly with each other. I like to use prisms to create a holographic neon light effect transporting my viewer immediately into a cyberpunk world. You can experiment with different angles to add a whole new dimension to your street and portrait photography shots. It’s a very simple but effective way to elevate your neon photos. 
Post Processing
Taking photos of neon lights is the first step to creating awesome night photography shots. The rest is done in your editing program. Colour correction tools like Luminar Neo’s ‘Color Harmony’ tool will elevate your neon signs, adding vibrancy to the colours and boosting those warm tones that these lights tend to give.
Ensure first that you correctly expose your image, and then move on to the colour correction. Knowing colour theory will go a long way to creating a stunning finished piece. One approach is to detect the dominant colour within your environment and create a Split Complementary theme from there. For example, if your neon sign is orange, you can compliment that colour with cooler blues.
However, keep in mind you can hue-shift colours in your image using colour tools. That way you can try and create any Split Complementary you like. I always enjoy manipulating the colours in my photos to suit my taste, or to make a more cohesive colour palette.
The post-processing part of neon photography is immensely enjoyable, and it all comes down to experimentation. Give it a try for yourself, testing out different colour correction methods to create beautiful vibrant pieces.
The Bottom Line
The allure of neon signs captivates audiences and has the power to transform standard night photography photos. Using neon signs you can create a wonderful vibrant backdrop for subjects and models, or make use of tools like prisms to transport your audiences to a cyberpunk future. Not only that, but the editing part of this genre of photography is just as fun as shooting, with endless potential for experimentation within your shots.
So, if you have some neon signs in your area or are planning to visit a neon wonderland like Seoul or Tokyo, get ready to have a lot of fun.


