How to Cut Out an Image in Photoshop
April 14
12 min. to read
Read through the tutorial to find out how each tool differs from the rest.
Photoshop is arguably the best overall photo editor when it comes to the number of features and controls. It not only contains multiple tools to correct exposure, color, temperature, and sharpness; it also allows the user's subject selections to alter the contents of images. This means users can crop, rotate, create new layers, use brush tools and even freely transform their images or parts thereof.
Want to know how to cut out a person in Photoshop? Or maybe how to crop in Photoshop? Start with the tools and different methods that let you select parts of an image. With these tools, you can remove unwanted objects, swap the sky with a more dramatic one, or move part of an image to another image.
Note: If you’re looking for easy-to-use yet highly advanced photo editing software and don’t want to crop images in Photoshop using fancy tools, then give Luminar Neo a try instead.
Let’s take a look at how to Photoshop pictures to remove or replace part of a photo.
How to cut something out in Photoshop in 3 ways
This tutorial will help you understand how to cut out an object in Photoshop. So, let's start, open the image and follow the instructions step-by-step.
Step 1
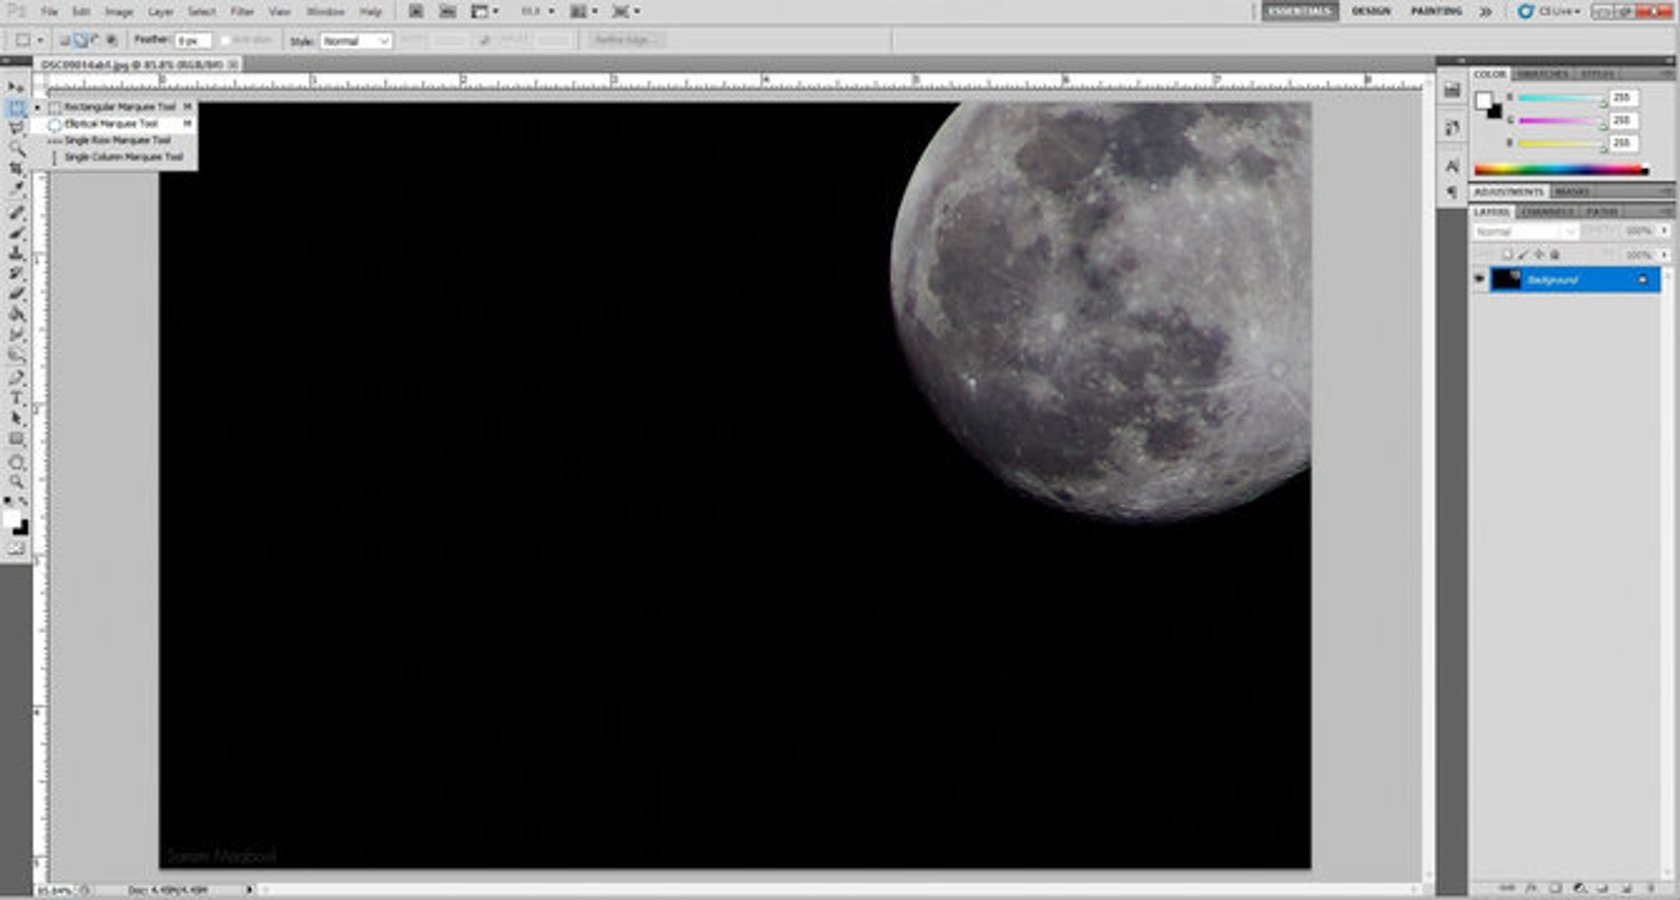
Before you cut out an image using the shaped selection tools, make sure that the part you want to cut has a defined shape or can be broken down into defined shapes. Otherwise, your selection won’t be clean.
Step 2
To use the shaped selection tools, select the shape that best suits your needs from the toolbar. Then simply draw the shape over the part of your image that you want to crop and it will be selected. Once you’re happy with your selection, press Delete to remove it from your photo.
Step 3
Fairly easy, right? If you’ve ever wondered how to cut out an image in Photoshop, you shouldn’t be worried; it’s a simple enough process once you get used to it.
How to use lasso tool in Photoshop: Step-by-step
1. Choose the Lasso Tool:
Select the Lasso tool from the toolbar. Click and hold to access the Magnetic or Polygonal Lasso tools if needed.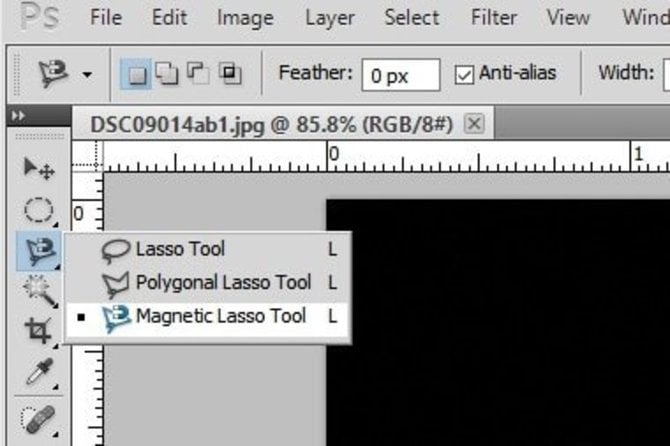
2. Make a Selection:
With the Lasso Tool, click and drag to draw a freehand selection around your object.
With the Polygonal Lasso, click to set points and create straight-edged selections. Double-click to close the path.
With the Magnetic Lasso, click near an edge and move your cursor along it; Photoshop will automatically attach the selection to the edge.
3. Refine Your Selection:
Use the “Select and Mask” option in the toolbar to fine-tune your selection edges.
4. Deselect or Modify:
Press Ctrl+D (Windows) or Command+D (Mac) to deselect. Hold Shift to add to the selection or Alt/Option to subtract from it.
5. Cut Out an Object:

Once the selection is complete, press Ctrl+X (Windows) or Command+X (Mac) to cut it out, or use it as a mask for editing.
Now you know how to crop an image in Photoshop with more control than is afforded by the shaped selection tools.
How to cut an object in photoshop with the Quick Selection and Magic Wand tools
To crop an image in Photoshop that has large chunks like sky or land, the best method is to use either the Quick Selection tool or the Magic Wand. How to cut out part of an image in Photoshop? When learning how to cut something out in Photoshop, knowledge of these tools is essential. Let us review these functions in order.
Step 1
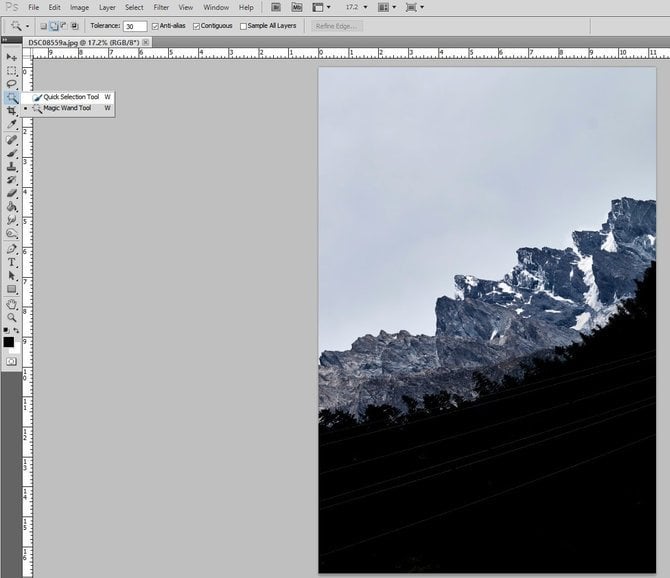
The Quick Selection tool works by selecting large (or small) areas of a similar color. The size of the selection brush can be customized based on how fine you need your selection to be.
Want to know how to cut something out in Photoshop? For example, say you want to select a mountain that’s clearly different in color from the rest of the image. Moving the Quick Selection brush over its edges will start to select the mountain’s boundary. Once the boundary is selected, simply move the brush to the middle of the mountain and the entire mountain will be selected. Then click OK.
 Quick Selection works great when you want to crop an image in Photoshop by selecting something busy like a mountain from a scene such as this.
Step 2
The Magic Wand works in a similar fashion to the Quick Selection tool, but it doesn’t work too well with portions that have smaller details like editing hair in Photoshop. This tool is perfect to cut out images with larger chunks, such as a sky. Just click the part of the image that you want to cut and the Magic Wand will select all the connected areas with the same color or tone.
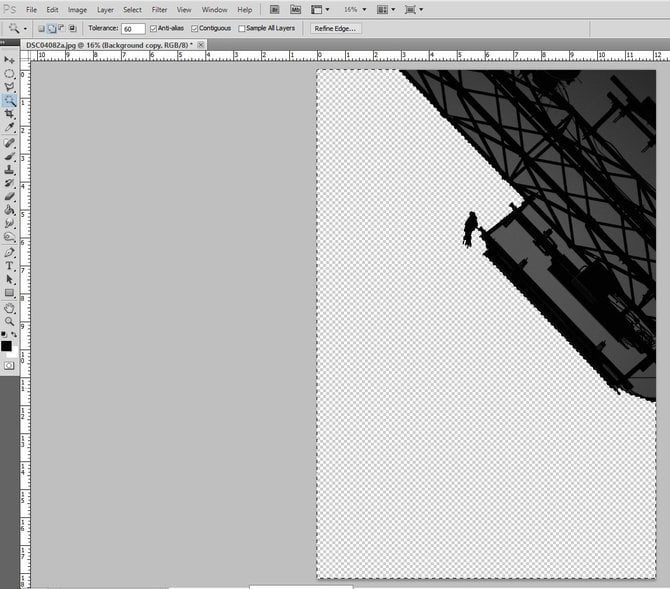
There’s an option for increasing or decreasing the tolerance of the selection when you crop pictures with the Magic Wand. The tolerance defines how wide or narrow of a color spectrum is selected. If the tolerance is higher, the Wand might select the clouds in the sky as well, for instance, as they have a bluish tint. But if the tolerance is lower, it may not select the clouds, since there’s a visible difference in their color with respect to the sky.
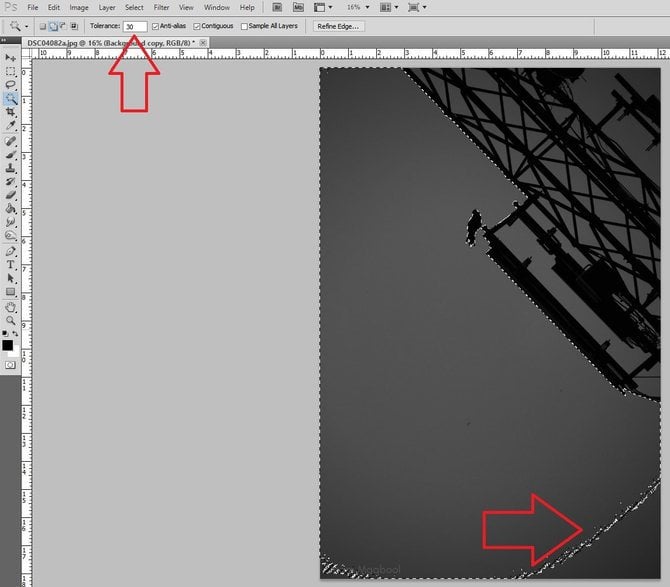
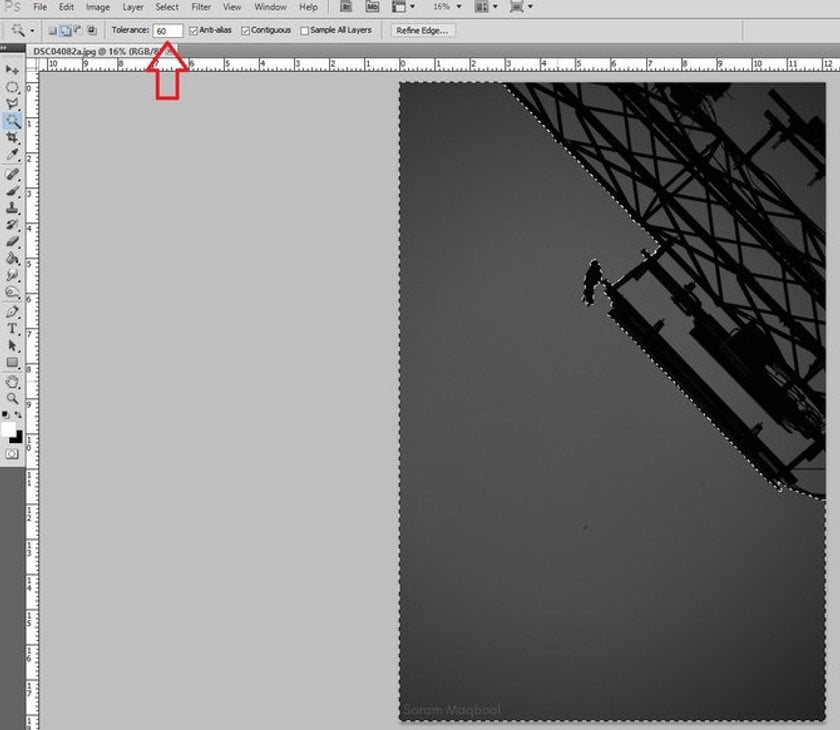 With a tolerance of 30 (left), the darker grey is not selected, but when the tolerance is increased to 60, the whole spectrum of grey is selected.
Many people want to know how to crop a picture or cut out a person in Photoshop, but as you can now see it isn’t that difficult. Once you’ve made your selection using one of the methods we’ve mentioned, simply press the Delete key to remove that part from your photo. If you need to cut the part and take it somewhere else, simply click and drag the selected part where you want it.
How to crop an image in Photoshop
1. Open Your Image
From the Menu, select File > Open… and choose the image.
2. Select the Crop Tool
Choose the Crop Tool from the toolbar on the left, which looks like two overlapping right angles, or press C on your keyboard.
3. Adjust the Crop Box
Once you select the Crop Tool, a cropping border will appear around your image. You can click and drag the edges or corners of the border to adjust the size and shape of your crop. You can also adjust the orientation or aspect ratio using the options bar at the top if needed.
4. Apply the Crop
When you are satisfied with the new crop, press the Enter key or click the check mark in the options bar at the top to apply the crop. Save the cropped image by going to File > Save As… to save it as a new file or Save to overwrite the original file.
Crop an image in Luminar Neo
Now you know how to crop a picture in Photoshop with ease. If you’re new to photo editing and Photoshop toolbar seems overwhelming, give Luminar Neo a try and crop pictures easily. Luminar Neo is an intuitive and easy-to-use editor designed to help you grow as a photographer. You don't need to spend a lot of time learning this program.
Here are the easy steps to follow to crop pictures in Luminar Neo:
- Open an image in Edit mode.
- In the top menu bar, click on Tools and choose Crop.
- The crop mode will open. In this window, you can cut the image any way you like, with different resizing options and crop ratios available.
- Click Done Apply and Luminar Neo will show you the resulting cut out image.
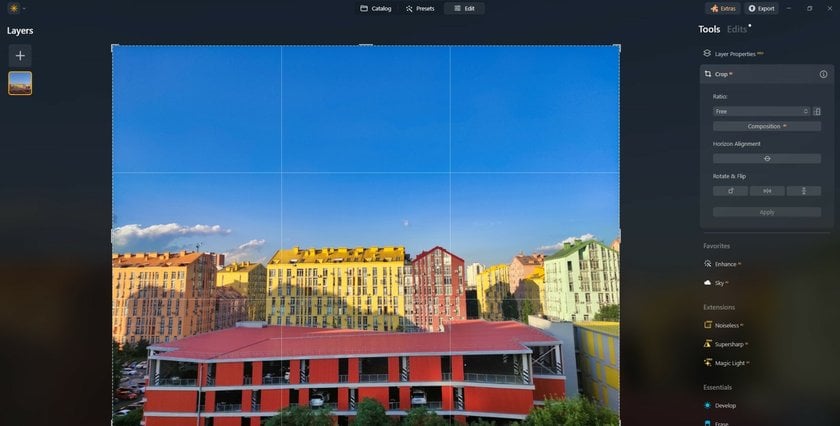
That’s all you need to do if you want to crop an image in Luminar Neo.
Thanks for reading this article about how to cut out an image in Photoshop in the best ways. By now, you’ve mastered the basics of the Lasso, Quick Selection, Magic Wand, and other tools. If you need a quick and easy way to crop pictures, consider another tool — Luminar Neo. You’ll never need to google “how to crop an image in Photoshop” ever again. Not ready to buy? There’s a trial version of Luminar Neo at your disposal. Just click here.


