Hey there! Today, we will answer the question, "What does RAW mean in photography?"
You have probably heard photographers talk about shooting in this format. So, we will explain why the RAW file is important, how to open RAW files, the different types available, and how to work with it. After reading this, you are likely to switch the settings of your camera to taking pictures in RAW!
Let's get the ball rolling!
What is RAW Image
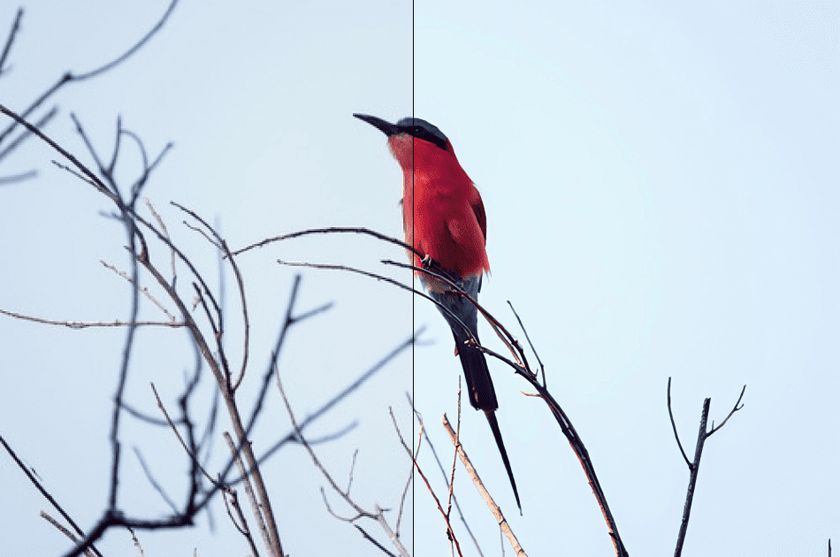
 A RAW file is much like a digital negative: it records everything the camera’s sensor sees, untouched and unprocessed. This pure form of image capture does lead to bigger file sizes, but the benefit is clear, superior quality in every photo.
RAW files set the standard for image quality because they retain all the details without the loss that comes from compressing or converting files. For those who value capturing every subtle aspect of their shots, RAW is the optimal choice. The only drawback to this high-quality format is that the files are larger than those in other formats.
Types of RAW Files
Each camera brand has its own specific RAW file format. For instance, Nikon uses NEF, Canon has CR3, CR2, and CRW, Sony works with ARW, and Fujifilm uses RAF. While there are some similarities across these formats, each brand's files are unique.
The diversity in formats is particularly noticeable across different camera models from the same manufacturer. The formats vary between models, and some cameras even allow photographers to choose from different RAW settings directly in the camera. These options might include choosing between 12-bit or 14-bit color depth or selecting compressed versus uncompressed files.
This variety means that photographers need to ensure they have compatible software for their specific camera's RAW format!
How To Open RAWs in Luminar Neo
 RAW files are unique because they remain unaltered and uncompressed, capturing the full data from the camera sensor as is. This stands in contrast to JPEGs, which your camera automatically processes to reduce file size and simplify use. To effectively utilize RAW files, they must be imported into a raw image converter such as Luminar Neo. Here, you can convert them into more widely used formats like JPEG and also fine-tune with AI tools!
Here’s how to do that:
1. Start by importing your folder of images.
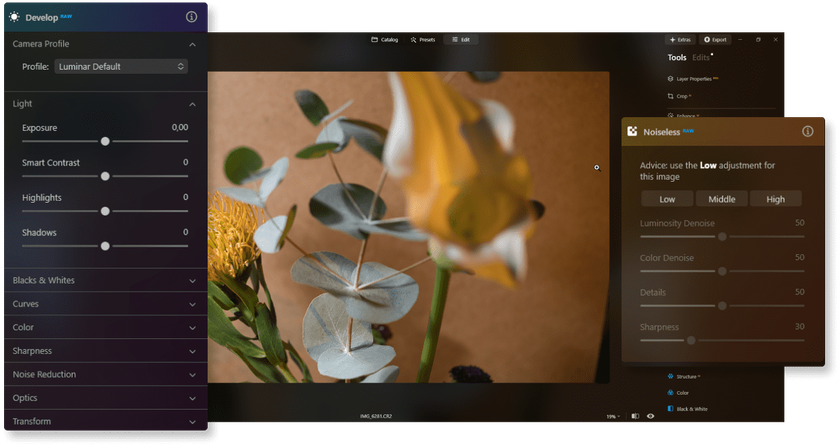
2. Then, head over to the 'Develop RAW' tool to adjust the color and tone. This is your first step in editing, and you'll know you're working on a file if you see a 'RAW' tag next to 'Develop.'
3. Once you're done editing, converting your files to more common formats like JPEG or TIFF is simple. Just a few clicks and your edits are ready for sharing or print!
Exclusive Tools of Endless Possibilities in One AI Editor
Explore Now!Benefits of Using RAW
Vivid Colors: RAW files can capture a broader spectrum of colors compared to JPEGs, enhancing the vibrancy and authenticity of your photos.
Adjustable White Balance: Missed setting the perfect white balance? With RAW, you can easily adjust it post-shoot to ensure your photo colors are spot on.
Flexible Exposure Control: RAW allows you to modify exposure after the shot. This flexibility means you can lighten or darken images without compromising detail in shadows or highlights.
Non-Destructive Editing: RAW files enable unlimited edits without degrading the image quality. This is ideal for perfecting your photos without worrying about losing data.
Precise Sharpening: Sharpening RAW images enhances detail without introducing unwanted noise or graininess, keeping your photos clear and crisp.
Smooth Color Transitions: Thanks to their high bit depth, RAW files manage color gradients smoothly, preventing abrupt color changes and banding.
Optimal Photo Enhancement: Using advanced editing software, RAW files can be transformed into stunning images that fully utilize the high-quality data captured by your camera.
Challenges to Consider
RAW files are chunky. They take up a lot more space than JPEGs, so you might need to think about upgrading your storage sooner rather than later.
Compatibility can be tricky. Different cameras use different formats, and not every editing program can handle all of them. It’s worth double-checking that your software can work with the format you have
There’s a bit more time work involved. Before you can edit or share your photos, you’ll need to convert them from RAW to something more universal like JPEG or TIFF.
Sharing takes an extra step. You can't just shoot off this file in an email; the person on the other end probably won’t be able to open it. You’ll need to convert it first.
You'll manage more files. Keeping track of both your original files and the converted ones can get a little cumbersome.
Just something to keep in mind — while RAW files give you amazing photo quality, they do ask for a bit more effort on your part.
Bottom Line
That’s a wrap on our journey through the ins and outs of RAW photo meaning in a photographer's life!
Working with RAW files implies that you'll need a bit more storage, and you'll spend some extra time perfecting your images on your computer while editing. Plus, you'll also want to double-check that your editing software is compatible with your camera's format. It may sound like a lot, but the quality of the photos is absolutely worth the effort!
If you’re looking for software to learn how to edit RAW photos, give Luminar Neo a try! It’s pretty easy to use and offers all the tools you need to bring out the best in your pictures!
So, keep experimenting with those settings and edits. Your next great photo could be just a few tweaks away!


