How to Master Tonal Balance in Your Photography
Last Updated on January 15, 2025

Tonal balance photography is the art of mastering light, shadow, and midtones to create images with depth, clarity, and mood.
Mastering tonal balance in photography is crucial for creating natural and visually striking images. Whether shooting for landscapes, portraits, or everyday scenes, realizing the interaction of light, shadow, and highlights is important for capturing the true essence in a shot while maintaining a harmonious and deep relationship. You will highlight textures and details and evoke emotion in your shots by adjusting the exposure, contrast, and tonal range. In this guide, we will explore the principles of tonal photography, offering you the tools to create images that capture a moment and convey its mood and atmosphere.
What Is Tonal Balance in Photography?

So, what is tone in photography? Tonal balance, in photography, refers to when the light, shadows, and midtones are in a picture so that it does not get too light or too dark. Tonality photography deals with how various tones combine to create mood and depth, which is one of its key elements. Proper light symmetry involves adjusting exposure, contrast, and dynamic range to preserve detail across highlights and shadows.
Why is this balance important? It enhances the clarity and mood of an image by directing the viewer’s attention to the key elements without distraction due to overexposed highlights or underexposed shadows. A well-balanced photograph adds texture and interest to the visual, whereas a bad tonal harmony gives flat and unappealing pictures. Tone photography, when well performed, adds depth and dimension, making the photograph much more engaging and dynamic.
You may also like: Midtones In Photography: Create Depth And Dimension
Types of Balance in Photography & Their Tonal Elements

Balance in photography refers to the process through which harmony and aesthetic appeal are brought about in an image. Understanding what does balance mean in photography enables a photographer to control the flow of visual elements, guiding the viewer's eye and provoking the desired emotional response. Each type of balance provides another way to create a photograph, providing its unique tonal ingredients.
Type #1: Symmetrical Balance (Formal)
Symmetrical balance is a photograph with elements evenly distributed on either side of a central axis. This would create stability, order, and harmony. In terms of the tonal elements, symmetrical proportion often employs even lighting across both sides of the image, ensuring the highlights, shadows, and midtones are all even. Here, the tone range stays in control and is even throughout. A completely processed, organized scene comes forth for display. This mainly refers to architectural photography and portraits because shots need balance and accuracy.
Type #2: Asymmetrical Balance (Informal)
Asymmetrical balance occurs when the elements of visual weight are unevenly distributed across the frame. The elements are not mirrored. Their placement creates a weight that balances the image in its entirety and can be dynamic. Asymmetrical harmony may, for example, be achieved by making use of variation in light and shadow across an image.
A brightly lit subject on one side of the frame is balanced with the tones of shade on the other, making the frame interesting and creating contrast. Asymmetry can connote movement, energy, and a more casual and spontaneous feeling. It is often used in landscape and street photography, where the goal is to capture the natural world unposed.
Using Camera Settings to Shape Tonal Balance

Using camera settings to shape tonal balance is essential for a natural, well-exposed photograph. Each setting, such as ISO, aperture, and shutter spee,d affects the tone in photography by controlling how light interacts with the sensor, ultimately shaping the tonal range.
You may also like: Photography Cheat Sheet: Camera Manual Settings (Infographic)
ISO
ISO determines your camera’s sensitivity to light.
A lower ISO (e.g., 100-400) produces less noise and helps capture a wider full tonal range, from deep shadows to bright highlights, with finer details and smoother gradients.
Higher ISO settings (e.g., 1600 or above) make the sensor more sensitive, allowing you to shoot in low-light conditions.
Yet, increasing ISO introduces more noise, reducing tonal quality, especially in shadows. Managing ISO allows you to control the exposure while preserving integrity.
Aperture

The aperture controls the size of the lens opening, influencing the amount of light entering the camera. It also affects depth of field, but in terms of tonal balance, the aperture impacts how light is distributed across the frame.
A wider aperture (e.g., f/1.4 or f/2.8) lets in more light, increasing contrast and making the highlights brighter, potentially compressing the tonal range.
A smaller aperture (e.g., f/16) allows less light, helping to retain more detail in both highlights and shadows, leading to a more pleasing range across the image.
Choosing the right aperture can help maintain detail in all tonal areas, particularly in high-contrast scenes.
Shutter Speed
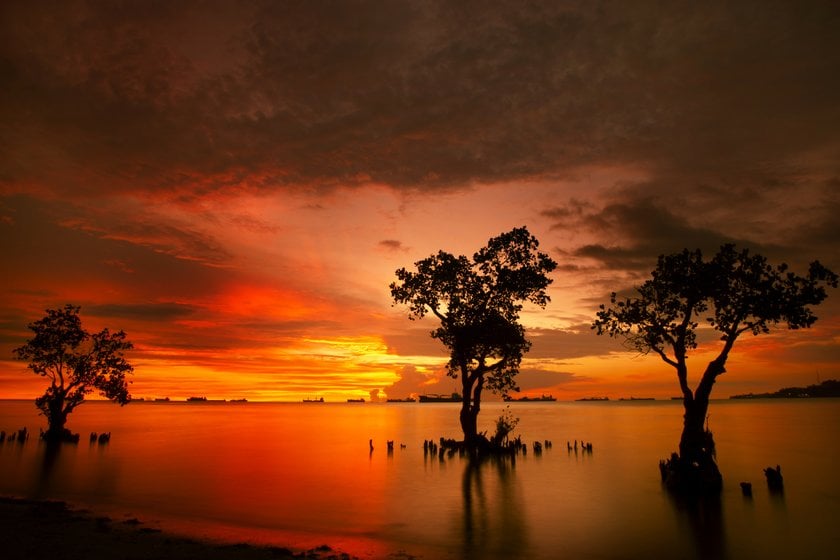
Shutter speed controls the amount of time the camera’s sensor is exposed to light.
A faster shutter speed (e.g., 1/1000s) captures less light, which can result in underexposed images with reduced tonal range in the shadows.
A slower shutter speed, such as 1/30s, would allow more light and increase exposure, potentially opening up the full tonal range.
However, at slower speeds, unless very carefully controlled, the risk of motion blur might make transitions unclear. In this way, shutter speed will always have to be used in conjunction with ISO and aperture to capture proper tonal balance for the existing light conditions.
Techniques for Mastering Tonal Balance: Post-Processing
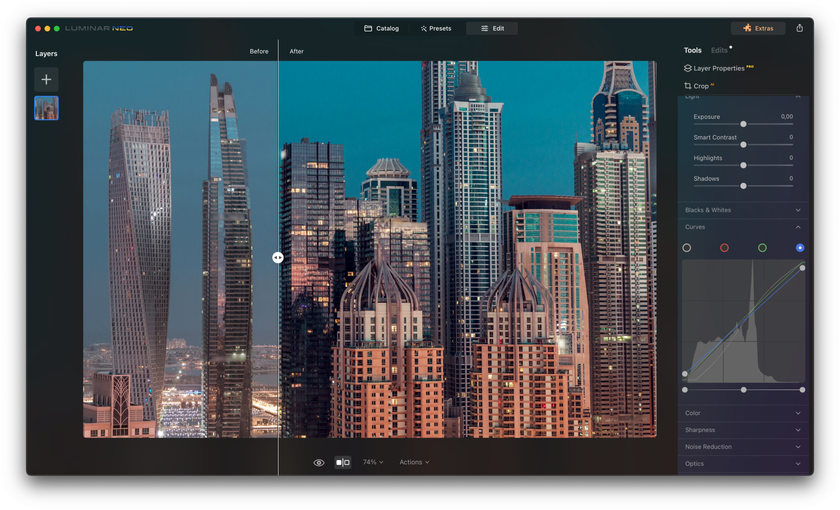
Mastering the balance of tones in photography requires effective post-processing. Each step enables you to control the tonal range photography and fine-tune how light, shadows, and highlights interact.
Post-processing enables further refinement in tonal balance. The color tone filter allows you to work on highlights, shadows, and midtones separately for total control over the spectrum scale. You can introduce depth with contrast adjustments and recover details in extreme shadows and highlights with sliders. Techniques like dodging and burning can selectively brighten or darken areas to achieve a more harmonious, dynamic composition.
The Color Toning tool in Luminar Neo is powerful and allows you to work on highlights, shadows, and midtones separately for complete control over the whole spectrum. This lets you subtly adjust the warmth or coolness of different parts of your image, creating a way more balanced and visually pleasing composition. For example, by adding cool tones to the shadows and warm tones to the highlights, you can achieve a dramatic and captivating effect.
End Notes
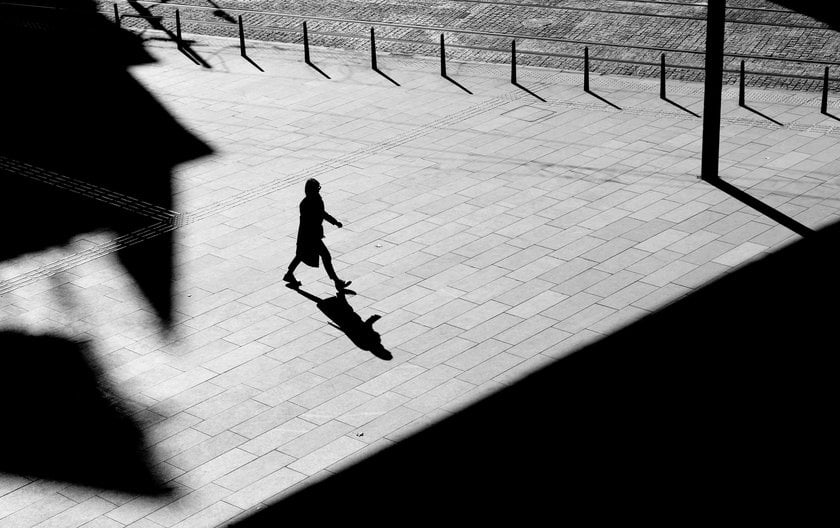
Mastering tonal balance is a critical component in making dynamic and interesting photographs. Be it with your camera or refining your image in post-processing, knowing how light, shadows, and highlights interact will elevate your work. You’ll be able to create images that capture depth, mood, and clarity by applying the tone photography definition. These techniques will give you practice in developing mundane scenes into visually striking compositions that lead the viewer's eye and tell a strong story.
FAQ
How can I improve tonal balance without expensive gear?
Basic techniques may be the simple basis for any control in tonal balance: regulating your exposure with ISO, aperture, and shutter speed. Plus, utilize natural light to your advantage by changing the angles and time of the day. In post-processing, perfect the tonal range using curves, highlights, shadows, and contrast adjustment to achieve a harmonious blend that does not require highly expensive equipment.
How does tonal balance differ from color balance?
Tonal balance is the general distribution of light, shadows, and midtones that involves brightness and contrast. Color balance refers to the truthfulness of color representation, where colors are natural and even within the shot. Both are crucial to making photos look good, but tonal balance involves light, whereas color involves hue and saturation.
Can tonal balance impact composition?
Yes, the tonal balance plays a very important role in composition. A well-thought-out tonal scale can guide the viewer’s eye, emphasize something, and add depth to the picture. Proper balance will create mood and stress for the subject, while poor tonal balance may make images distracting or flat. Handling the light and shade can create a much better impact in your photograph.


