The meaning of Saturation in photography. A guide for beginners
December 22, 2022

Social media these days is just overflowing with images that are so saturated that it seems impossible to look at such bright colors. Today we're going to understand the meaning of saturation and how to use it correctly.
Understanding the importance of color in photography and knowing how to work with it is an essential step in the development of any photographer who aspires to be a professional. One of the key features is, without a doubt, working with saturation. This visual effect directly affects the mood of your photos as well as their overall composition. As you grow in your career and fill your portfolio, the saturation of your images becomes an extremely important subject to study. But for novice photographers, this topic can still look confusing and unclear. Today we're going to look into it in detail. First, let's talk about the definition of what is saturation in photography.
Definition of Saturation
 Saturation is the clarity, depth, and intensity of the color in an image; it affects how vivid and rich the colors appear. Saturation, value, and hue refer to the key parameters used to evaluate color. Specifically for saturation in photography, the definition can be formulated as follows: saturation is the clarity, depth, and intensity of the color that appears in the image. If you want to achieve a bright effect in your pictures, then you need to increase the intensity of the color. Reducing saturation, in turn, makes the colors of the image fade in and out. By changing the level of this effect, you can influence the mood of your photos as well as the composition.
How the saturation in a photo can be changed?
In order to decrease or increase image saturation, there are several working methods, you just need to choose the most appropriate one for your case. First, by changing the settings of the photo equipment itself. Second, the use of lens filters. And the last option is image processing. Here is a review of each method.
Changing the camera settings
 Of course, in this matter, you should take into account what kind of device you use, because the parameters in different models can differ significantly. For example, certain brands of professional equipment have a function called Picture Control or Picture Style. These modes are very convenient to use because they allow you to change any parameter you want, such as brightness and contrast, sharpness and clarity, photo saturation and hue change, as well as many other settings. Of course, you can also choose the appropriate mode for your shooting, depending on your goals. Landscape, portrait, bright or monochrome, or even auto. Using them will make your photo look much better!
Change picture saturation with lens filters
 Another option for changing this setting is to use special lens filters. One of the most common examples is the use of polarizing filters. Their advantage is that they take the haze out of the photo. Thus, the photographer achieves the desired brightness and saturation of the image.
At the time of post-processing the image
Even after the shooting process the photographer can emphasize every color or make them invisible if necessary. During photo editing, we use saturation sliders, because they can quickly lower or increase the color intensity. For example, if you need to adjust saturated photos, in Luminar Neo this function is in the Essentials section, exactly in the Color tool.
Some tips about color theory
Studying the concept of saturated images, we must touch on another important topic, and that is the theory of colors. It explains their visual effects and gives a clear idea of their influence on the final result of the picture. Two important aspects are the color wheel and the color space. Let's dwell on them in more detail.
Color Wheel
 A scheme that shows the relationship between different colors is called a color wheel. From this diagram, we get the clearest possible idea of how many combinations of colors and their shades are possible. Here is an example. You need to reduce the contrast in a photo. In that case, you can start by reducing the saturation of the brightest colors, and that way you can achieve a calmer and softer effect in your picture.
Color space
 Another term you need to know when studying photography saturation is color space. It can be conventionally called a digital color palette. Among the most common color space options are sRGB and Adobe RGB.
To begin with, let's understand what this abbreviation means. RGB (Red, Green, Blue) are the base colors with which you can get all the others. In digital photography, it is preferable to use the RGB color space, as its color saturation spectrum is wider. In addition, it is RGB that displays colors as close to human eye perception as possible.
How high and low saturation affects photos
 Professional photographers are well aware of the importance of saturation in photography. In order to enhance the emotional impact, you need to manipulate the brightness of the photos. Consider the following examples:
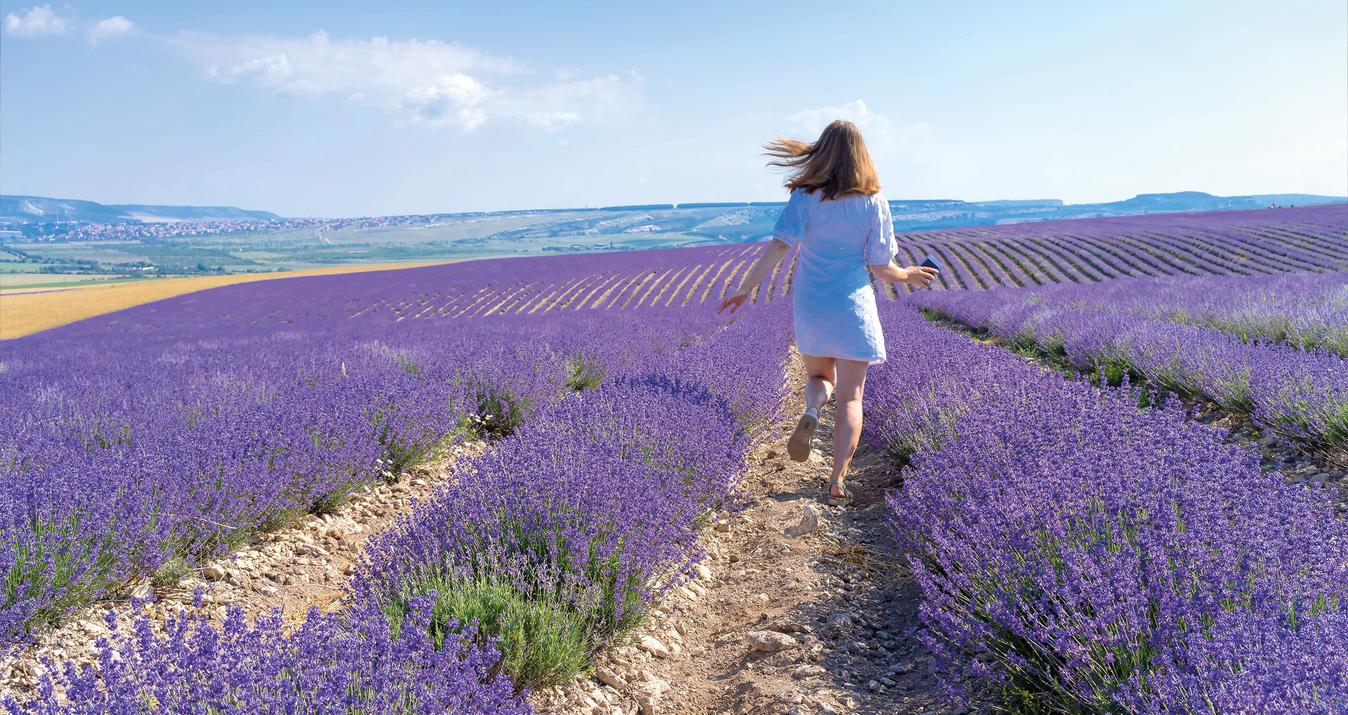
- High saturation of images. For example, you're taking a picture of a landscape. Or a sunset. Or a close-up of a flower. In that case, adding saturation will be appropriate and help achieve the desired result. Photos come out bright and vibrant.
- Low saturation images. This method is usually used to create a melancholic mood. Another option is to select certain areas while saturation editing, leaving the rest of the picture paler. This way you can focus the viewer's attention on the right part of the image.
- Emotional background. Think about what you want to talk about or what emotion to convey through the image. Bright saturation photo usually talks about extreme feelings, such as passion, love, and hatred. Muted tones, on the other hand, usually indicate restrained emotion, gloominess, or sadness.
Vibrance and Saturation. What's the difference?
 The vibrance tool is often called "smart saturation" because it enhances colors but does it selectively. In particular, this tool primarily enhances the more muted colors and ignores (leaves unchanged) the warmer colors (yellows, oranges, and reds), favoring the cooler ones (blues and greens).
Vibrance is great for photos with people - it prevents oversaturated skin tones. So whenever you're editing a portrait, it's the tool recommended for use.
You can also use the vibrance slider when you're faced with more subtle landscape and color images. But in general, a saturated picture has a more pronounced effect because it affects all colors, regardless of how saturated they are.
Use each regulator in situations where it will work best, and you'll get better results faster.
How to Get Good Saturation in Photography
Now that we know the definition of saturation in photography and the importance of its application, we suggest talking about how to use this tool so that it looks professional and does not spoil the image. Let's review the following information.
The effect of muted color
 Depending on the level of saturation, images can appear brighter, or conversely, colors will become muted when you lower this parameter. It all depends on your end goal. If you want to make the image brighter and more vivid, set it to high saturation. If you want the colors to be soft, lower the setting.
Lightness level
 The same color will look completely different depending on the brightness of the light and the original saturation of the specific color itself. It is especially important to understand and take this into account when working with artificial light. The best way to learn about it is not by theory, but by practice. Photograph under different types of lighting, and watch how colors and shades change.
So we can draw the following conclusion: it is impossible to choose a universal level of saturation image that will suit every photo. With a high level of this parameter, photos look bright and attract attention with a variety of colors and shades. However, you have to be very careful! Over-saturation is fraught with the risk of ruining the quality of the original image, too toxic colors, and in general, a strange and completely unnatural look. A low level of saturation tool makes the image softer, but somewhat paler. However, it can look appropriate and even effective when used properly.
Post-Processing in Luminar Neo
Photo processing is a very important step. If you value your time and want to perform retouching quickly and qualitatively - Luminar Neo will help you. Use this program on your PC and see how easy and exciting processing can be! The interface is very convenient both for professionals and beginners. If you want to saturate an image, nothing could be easier! Unique AI-based tools help you balance all color indicators. You will be able to do this both automatically and manually.
Final Thoughts
 To summarize, saturated photography is a very important aspect of learning. The brightness and intensity of the colors have a significant impact on the quality of a photograph. The saturation tool can both improve your photo, making it unique and expressive, and ruin it. Consider the lighting and be aware of its effect on the final result. Don't forget that the brightness of the colors also conveys the overall mood of the photo. With a low level of saturation, the photo gets an effect of calm and melancholy, while oversaturation shows emotion and strong feelings. Take pictures, try different ways to adjust the brightness and saturation of images, and find your own unique style. We wish you success in all your creative endeavors!


