Professional Menu Photography Tips That Sell
June 06, 2024

Check out our handy guide for snapping top-notch photos of your restaurant's menu. Dive in to learn how to make every dish look irresistible, drawing in more customers with stunning, appetite-whetting images!
Welcome to restaurant menu photography! If you want to boost your menu’s appeal and attract more diners, great pictures are key!
This guide offers practical techniques to enhance your food photos and ensure they look as good as the dishes taste. You just need a few simple skills that can make a big difference! Ready to see how easy it is to take photos that make customers want to order everything on the menu? Let’s begin!
Common Mistakes in Menu Photography

At first glance, menu photography might seem simple, but it's quite challenging and requires careful attention to detail. We've put together a list of common mistakes that beginners often make. You might even find some familiar ones there:
Blurry Photos
Weird Colors
Dull Images
Lack of Consistency
But don't worry — we have reliable tips on how to avoid or fix these mistakes!
Make Your Dishes Look as Good as They Taste
Edit Now!Tip #1: Choose the Right Lighting Technique
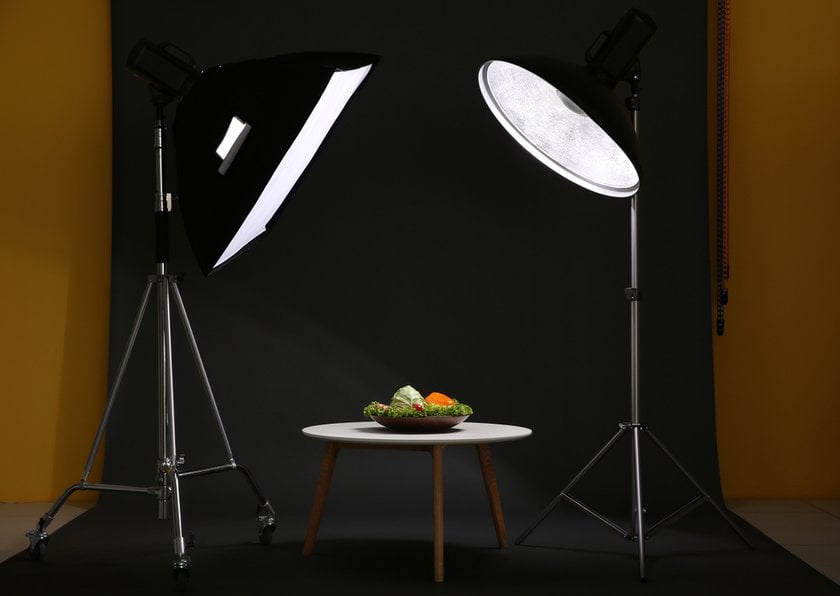
Good food photography for the menu starts with great lighting. Natural light is the best — it makes everything look fresh and appetizing. But watch out for direct sunlight; it's too harsh and can create shadows that hide the delicious details. Instead, try to shoot near a window where the light is softer. This kind of light wraps around the food, making it look naturally inviting.
When Natural Light Isn’t an Option
What if it's gloomy outside or you're shooting at night? Artificial light is your next best bet! Just remember, the goal is to mimic the softness of natural light. You can soften artificial light by covering it with a translucent material, like a thin curtain or a sheet of parchment paper. This helps spread the light evenly, reducing harsh shadows and highlights.
Tip #2: Take Care of the Background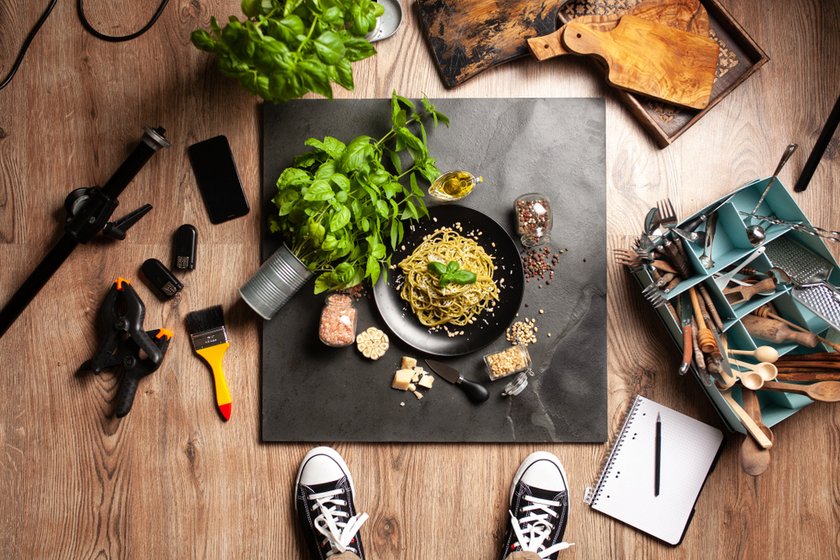

Now, let's say a few words about color. When setting up your shot, keep things simple. Neutral backgrounds are best because they don't steal the spotlight from your dish. Whites and soft grays are perfect — they make the colors of the food stand out!
But sometimes your dish does not look in a photo the way it does in real life. If you find your food doesn't pop as expected, changing the background of a picture can make a huge difference. Luminar Neo's Background Removal AI tool lets you effortlessly remove and replace distracting backdrops and focus attention right where you want it — on the food!
Tip #3: Find the Best Angle

The right angle can make a big difference in how appetizing your food looks in photos.
Get Above It: Overhead shots are fantastic for dishes where you want to show off the layout of the ingredients. Salads, pizzas, and even a full dining table set look great from above. This angle lets viewers see all the components at once, which is especially good for complex dishes or when you want to show how a meal fits together.
Side View: When you’re photographing something with layers or height, like a burger or a stack of pancakes, a side shot can be very effective. It shows off all the layers and textures from crust to filling, making the viewer see all the yummy details that might be hidden from the top.
45-Degree Angle: This is a versatile angle that works well for different dishes. It mixes a bit of the top view and the side view and is good for showing the depth of bowls, like soups, stews, or even a bowl of pasta.
Moving just a few inches to the left or right, up or down, can turn an okay photo into a mouth-watering temptation. So, take your time, try different perspectives, and see what looks best for your menu!
Tip #4: Master Composition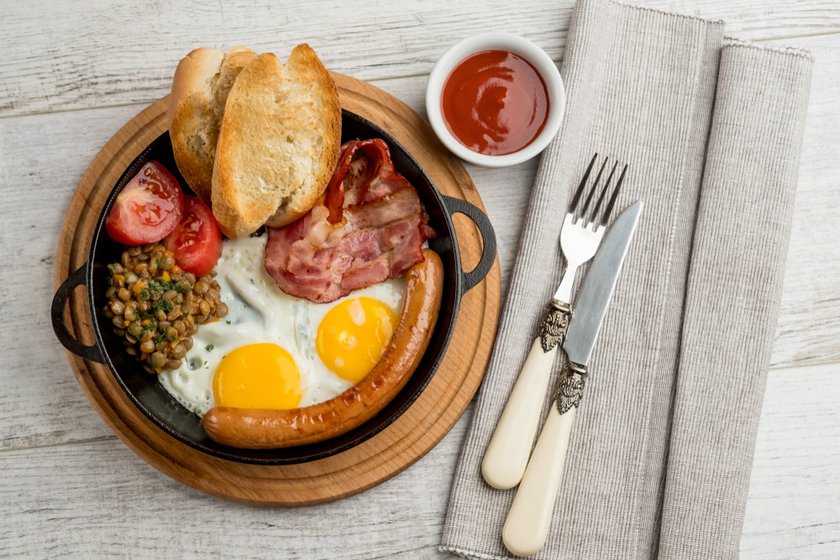

Good composition can turn a simple dish into a feast for the eyes. Here are some simple techniques!
Rule of Thirds: Think of your image as a tic-tac-toe board. If you place the main parts of your dish along these lines or where they meet, you can create a photo that feels balanced and keeps the viewer interested.
Using Lines and Layers: When you’re setting up a shot, think about how everything points to your dish. You can use things like silverware, napkins, or even a streak of sauce to lead the eye to the main event. These shouldn’t steal the show but rather make the main dish stand out more. And don’t be afraid to stack things up a bit — layers can add a sense of richness and depth.
Play with Distance: Close-ups can capture amazing textures and details, like the seeds on a bun or bubbles in a soda. But sometimes, taking a few steps back to include the setting can tell a fuller story about the meal and the experience. Try both to see which one showcases your dish better.
Negative Space: Use empty areas in your frame to highlight your main subject. This approach is especially effective in creating a clean, minimalist aesthetic that focuses all attention on the food.
Diagonal Composition: Arrange elements in a diagonal line to create movement and interest. This dynamic layout can be more engaging than straight or horizontal lines and it will guide the viewer’s eye through the image in a natural flow.
Repetition and Patterns: Repeating elements, whether they are food items or decor, can create a visually appealing rhythm in your photos. This pattern can be subtle, like a recurring color or shape, or more obvious, like multiple dishes arranged in a row.
Frame Within a Frame: Use elements within your environment to frame the food. This could be an actual window frame, an archway, or simply the arrangement of table items around the dish. This technique helps to focus the viewer’s attention and can add depth to the photo.
Tip #5: Improve Texture and Detail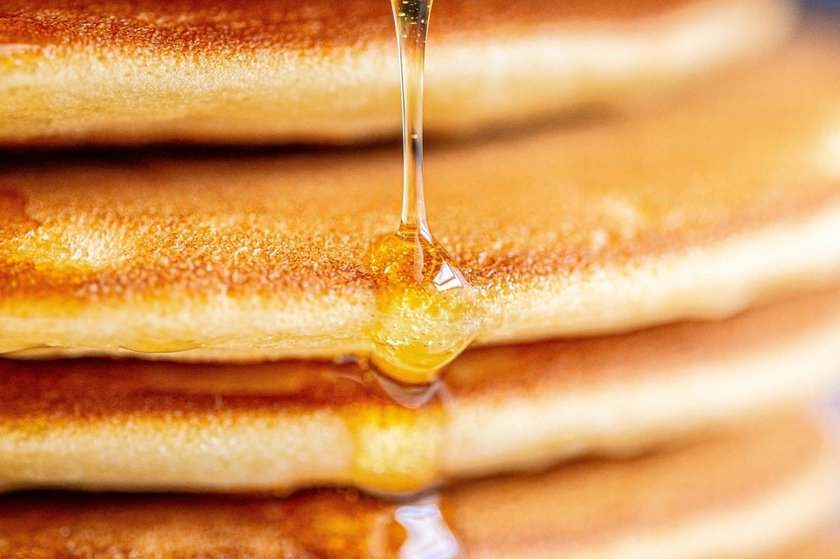

The devil is in the details — or, in this case, the deliciousness! Here’s how to nail those close-up shots and make every texture pop!
Leveraging Macro Photography
Do you want to make someone feel the crunch of that crust or the smoothness of that sauce before they even taste it? Macro photography can help you do that! If you apply this technique, you can capture the fine details like sugar crystals on a freshly baked cookie or the vibrant colors of fresh fruit!
Mastering Depth of Field
Depth of field is about focusing on what matters. By adjusting the aperture — or the opening of your camera lens — you can control how much of your shot is in crisp focus. For example, a wide aperture (a low f-number like f/2.8) blurs the background and makes your dish the star of the show. This technique works perfectly for emphasizing textures and details, like the steam rising from a hot dish or the intricate patterns in artisan bread.
So, next time you’re shooting, think about what makes your dish special. Zoom in. Play with focus. Make those details count. Your viewers will be tasting dishes with their eyes!
Tip #6: Perfect Your Plates with Luminar Neo
Food photo editing is a crucial step after capturing culinary creations. With Luminar Neo, an AI photo editor, you can touch up photos to bring out the real, bright colors and detailed textures!
After perfecting one photo, you can sync these settings across all your shots to maintain consistency. This software also offers a vast collection of presets developed by professional photographers, allowing for quick, high-quality edits that save time and boost your workflow!
Advanced yet easy-to-use photo editor
Get Luminar Neo NowWrapping It Up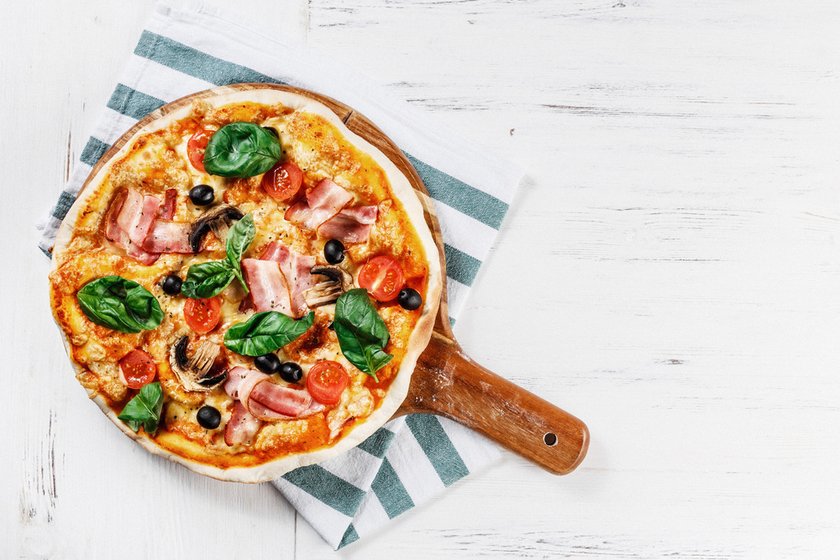

We've gone through lots of tips to help you take great photos for your restaurant menu. Fixing common mistakes, using the right lighting, finding the best angles, and playing with your photo's composition are all important. Every picture should make your dishes look so good that people want to try them.
Remember, if your food isn't standing out, using tools like Luminar Neo to change the background can really help. It's all about making each photo show off your food in the best way possible.
Keep trying out different things to see what works best for your menu. With some practice and creativity, your photos will not only look great but will also get more customers excited to dine with you. So, pick up your camera and start shooting those amazing dishes!