With Luminar AI, the sky is no longer the limit
March 03, 2021
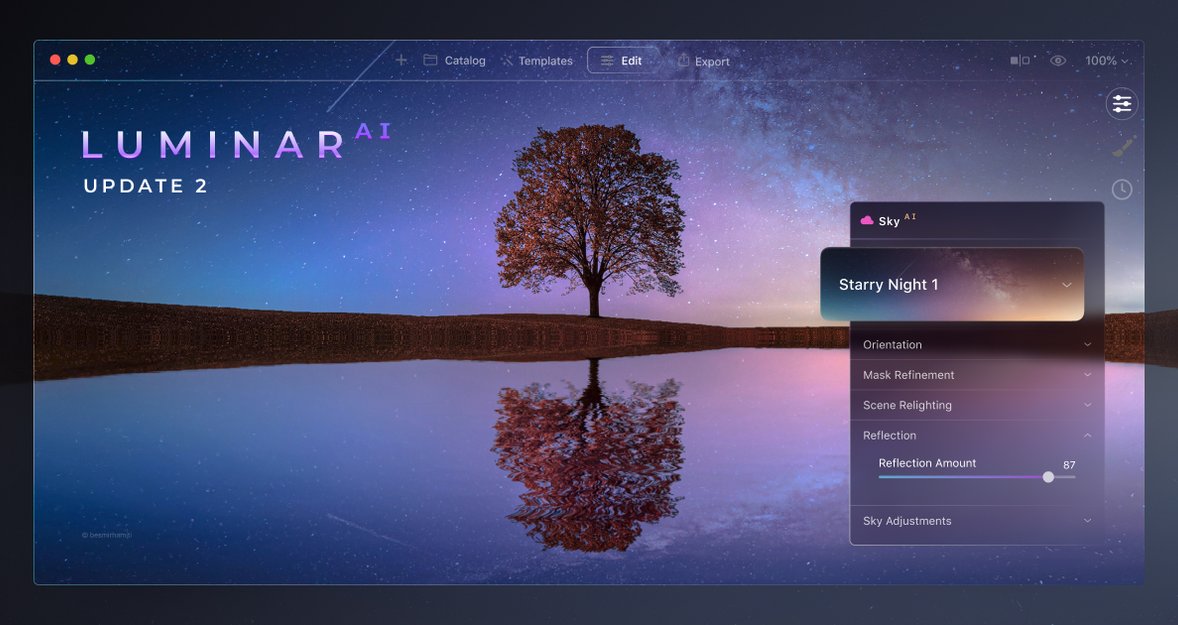
Sky AI with water reflections, improved Templates experience, and more. Are you excited?
Your editing experience is our top priority. In this update, we’ve added more power to existing tools and added many other improvements to make editing even more comfortable. Here’s what you can discover in the new update.
Welcome powerful SkyAI with reflections and MORE
Skylum created the world’s first automatic sky replacement technology. Now, building on this legacy, we’ve listened to feedback from creatives in the Luminar community and delivered a faster, more robust experience in the next generation of our SkyAI tool. Under the hood, our enhanced AI engine ingeniously creates new possibilities.
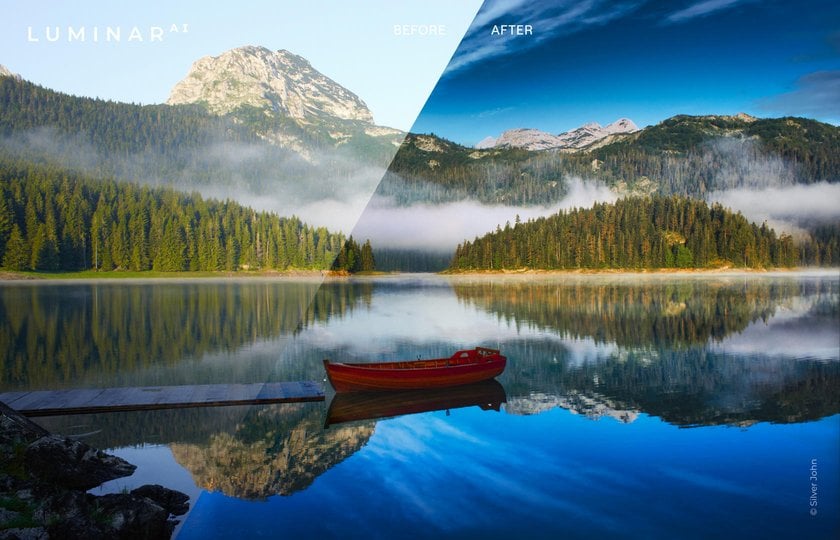
“Too often, complexity is the enemy of creativity. It adds time and frustration to a process we think should be fun, even joyful,” said Alex Tsepko, CEO of Skylum. "Update 2 builds on this work and offers more creative tools. I am excited to see what people make with it."
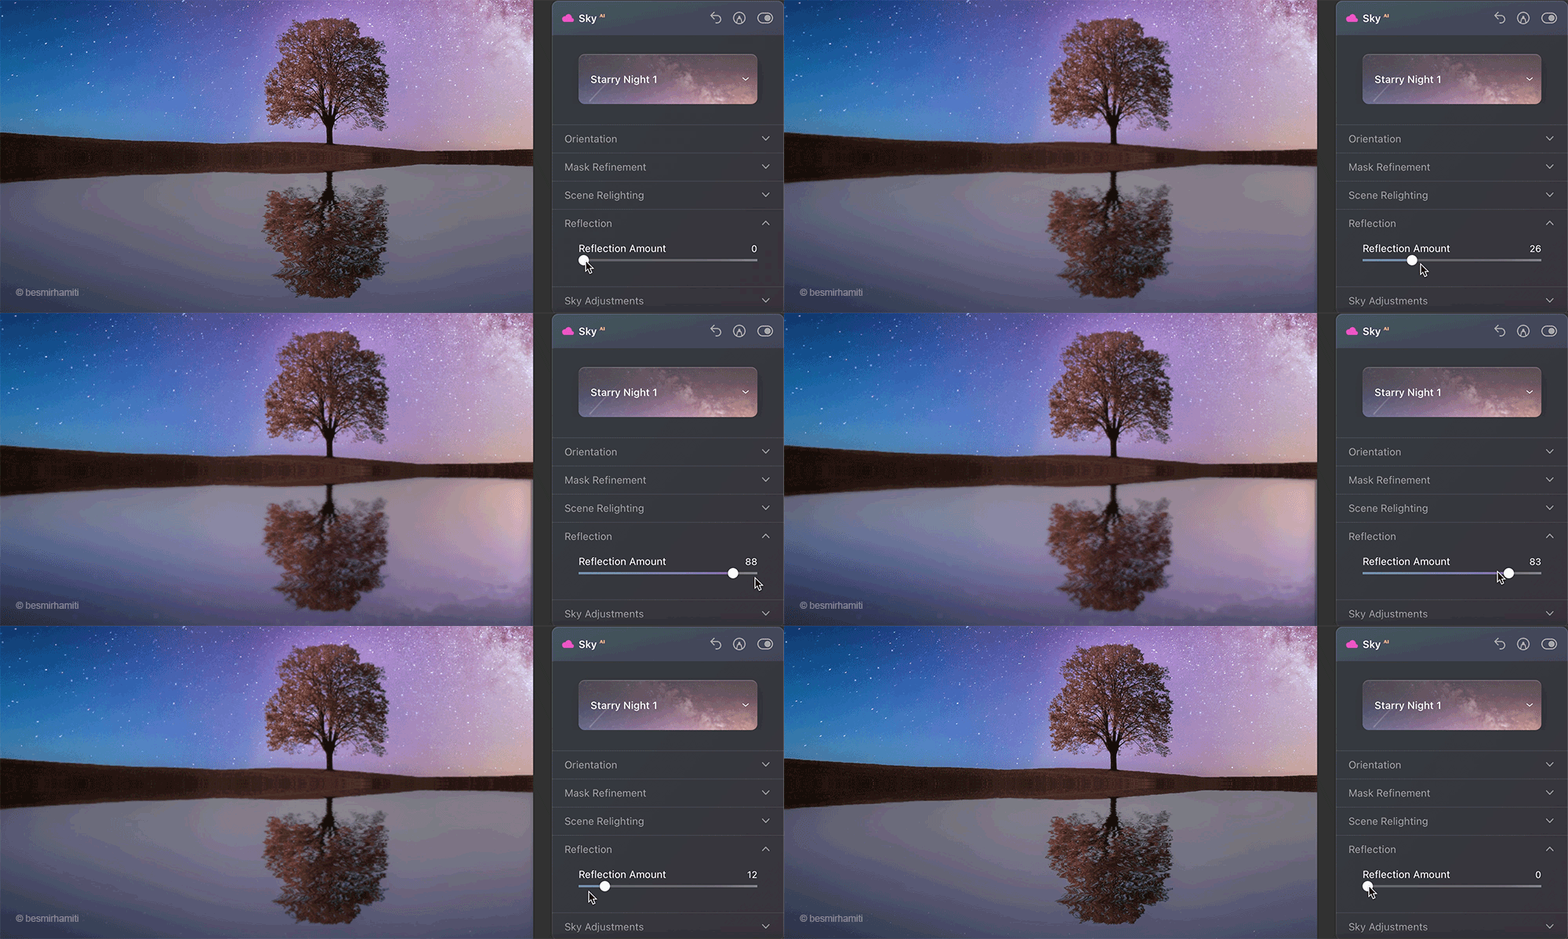
Sky reflections in water: This much-anticipated update means there’s no more worrying about sky replacement in photos featuring water! Ocean, river, lake, pool, it does not matter, Luminar AI will automatically reflect the new sky in the body of water in the most realistic way.
The new sky automatically conforms to the angle and depth of the scene to produce incredible results down to the smallest details. Once the new sky is in place, use the Reflection Amount slider to adjust the intensity of the reflection to your liking.
Scene relighting: SkyAI now provides realistic scene relighting by eliminating strong color casts from the sky on foreground objects. To control the scene relighting, use the following sliders in Scene Relighting:
- Relight Amount adjusts how the exposure of the scene matches the new sky.
- Relight Saturation adjusts the saturation of the relighting effect to add the color from the new sky to the scene realistically.
- Relight Human controls relighting for any people in the scene, matching people to the new sky for a more realistic effect. Use this slider on environmental portraits and lifestyle photos to see the drastic difference!
Seamless sky orientation: One of the toughest challenges in traditional editors is cleanly aligning a new sky to the original horizon. Use new Orientation controls to align the sky until it is positioned for a perfect fit. This is a great tool for getting the most out taken from untraditional angles, such as lifestyle photos.
- Flip your sky to change the direction of the sun.
- Rotate the new sky on the Z-axis for perfect alignment.
- You can also freely position the sky with the Vertical Sky Offset and Horizontal Sky Offset sliders. Place the sky exactly where you want it in the scene and it perfectly scales to fit.
- Horizon Blending creates the perfect blend where the sky touches the ground.
Working with Skies has never been easier: Visually select the sky you want from the dropdown list and instantly have an idea of what your final result will look like.
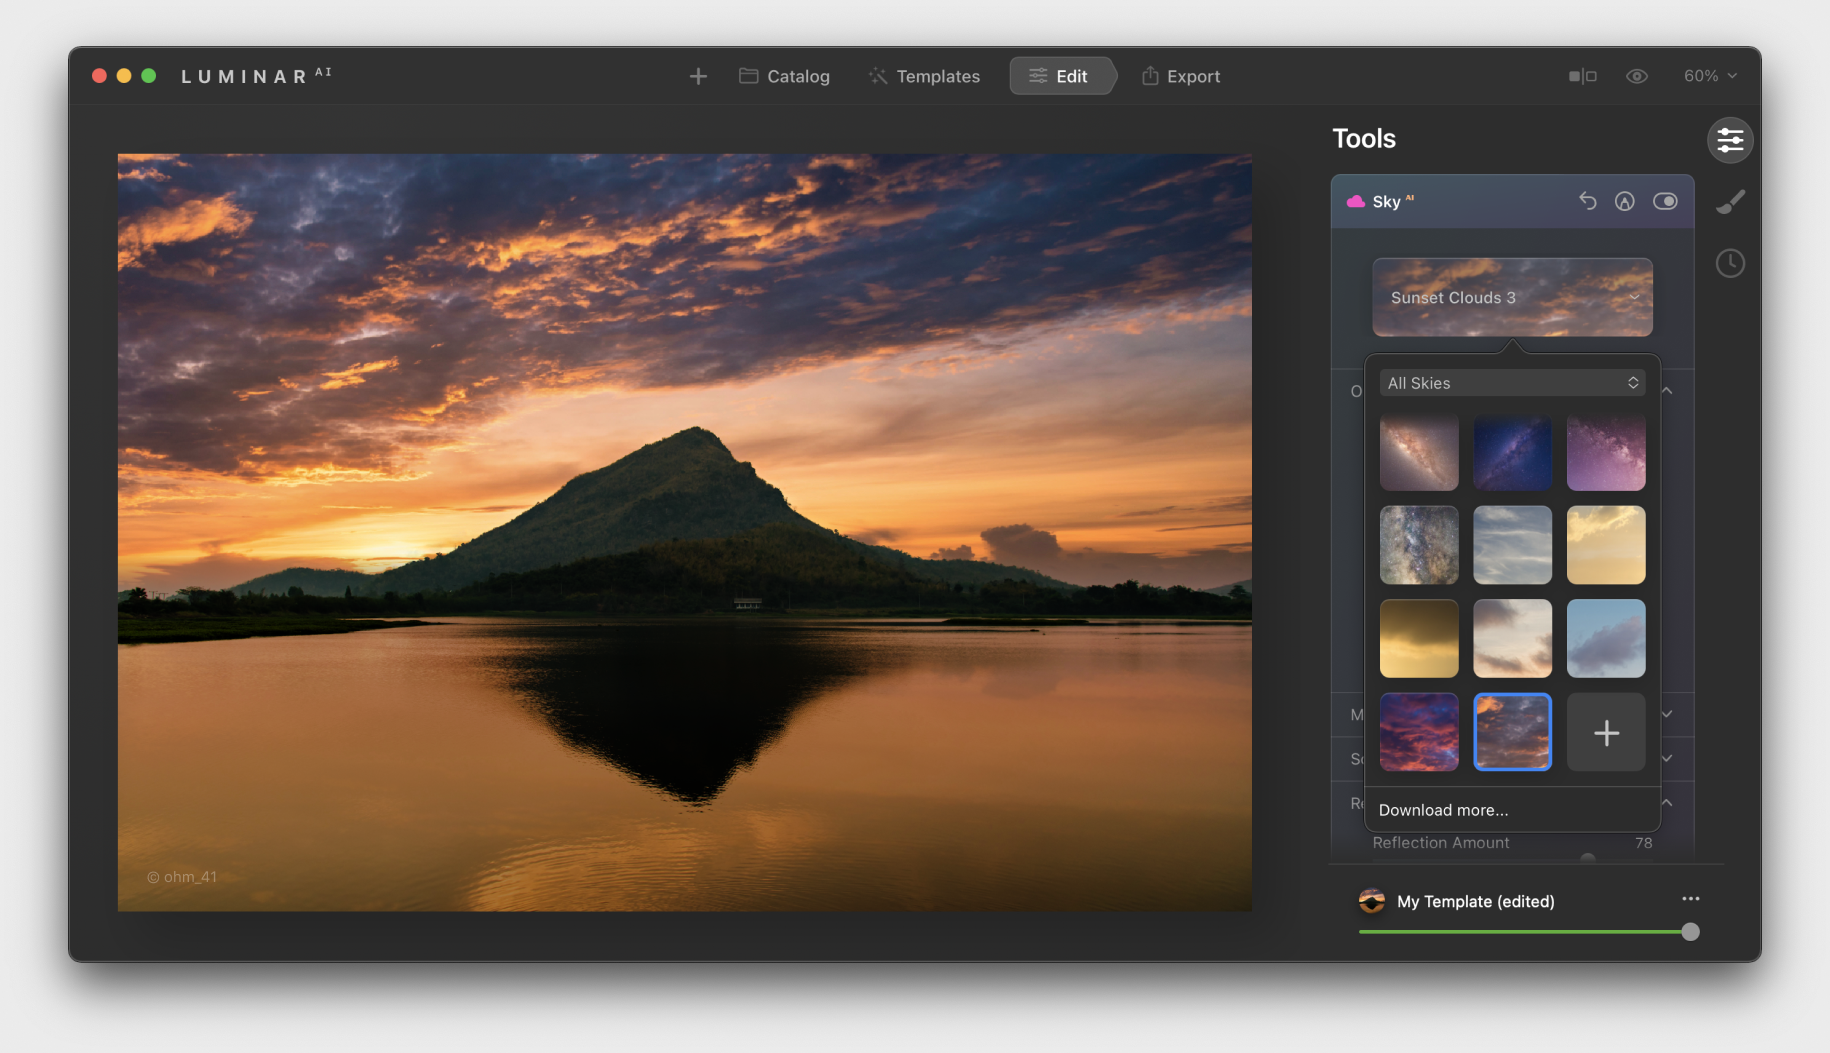
We've added six new free skies with this release and made it easier to add your own skies or add new sky packs. Upload your own Custom skies and select them visually. Copy multiple skies directly to the custom folder and instantly scroll through them in the preview window.
- Take care of the small imperfections around the edges of your new sky with the new Fix Details Slider.
- Match new skies to the original photo with the new Grain slider for a seamless, realistic effect.
- Need a broader selection of skies to create more variety in your images? Easily build your collection of skies by pressing Get More Skies, which takes you directly to the Marketplace where you can get gorgeous new Skies captured by professional photographers all around the globe.
Release your imagination with Texture Overlays
With Update 2, Local Masking adds amazing new creative abilities. The Texture tool now offers advanced controls to transform texture and image overlays. You’ll be amazed at how easily you can deliver a special message with your photos. There are no limits to your imagination!
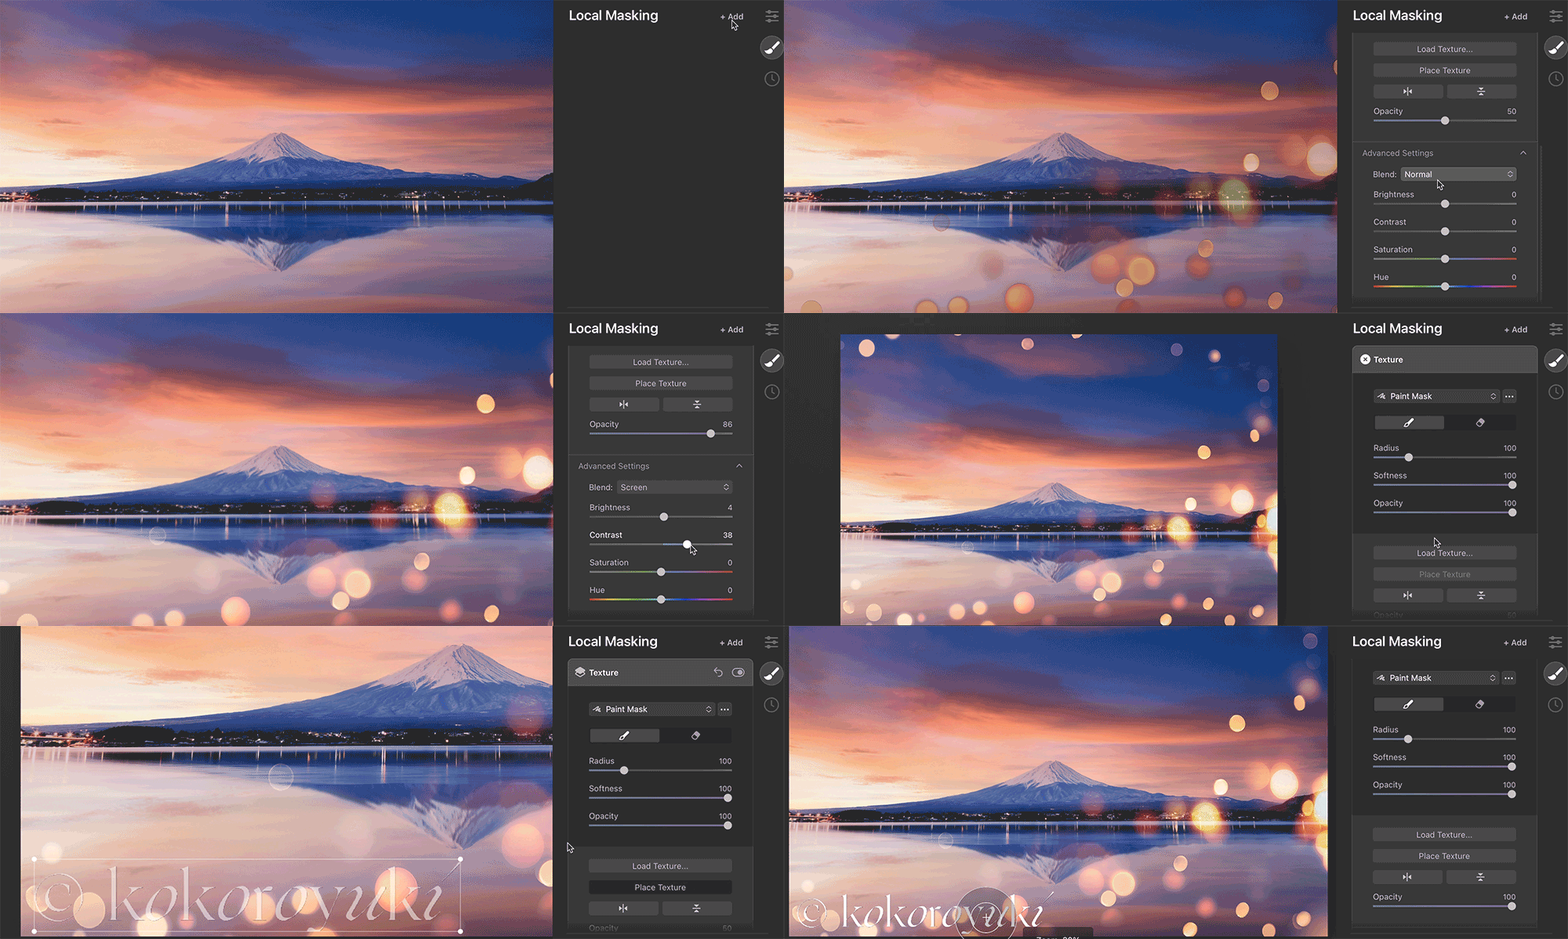
- PNG Overlays: PNG files with transparency can now be uploaded as textures in LuminarAI. These files can be used to add special effects to photos, including watermarks, text, emoticons, and other decorative elements.
- Easy placement: New overlay elements can be easily moved, flipped, rotated, resized, and placed anywhere you want. There are even blending modes and masks to precisely control how the object interacts with the original image.
- Overlays in Templates: Once applied, an overlay can be synced across multiple images or saved in a custom template for future re-use.
Discover an improved Templates experience
There are tons of exciting improvements in the Templates tab to discover! Since Templates are an essential part of the innovative LuminarAI workflow, we’re constantly working to improve your Templates experience. In LuminarAI Update 2, finding the perfect Template for your photo is even and faster.
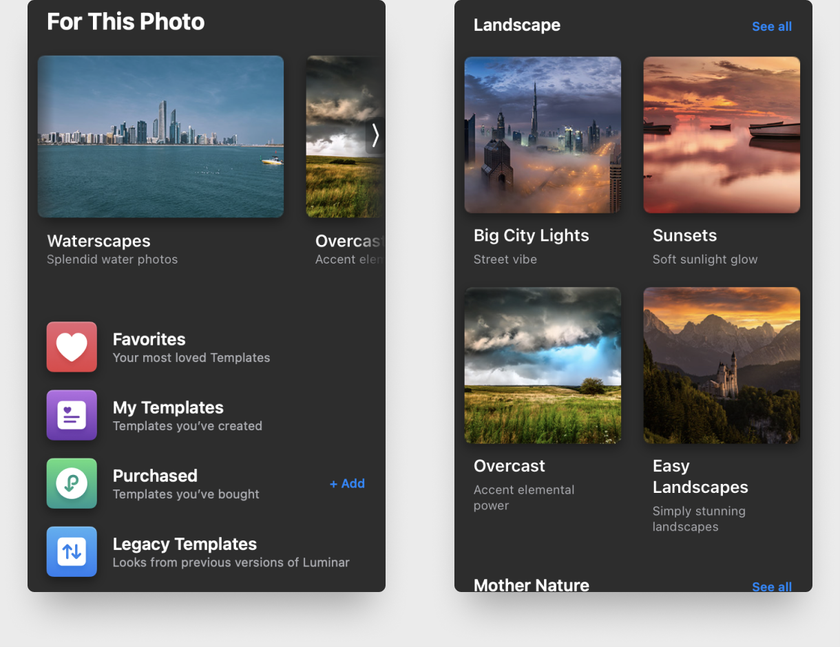
- Easy Access: To make them easier to find and use, all Templates, including Favorites, My Templates Purchased, and Legacy Templates, are now available within the main Templates tab, just beneath For This Photo.
- Easier Browsing: Template Group previews are now uniform in size to make them more visually accessible and comfortable to work with.
- Marketplace Integration: Templates purchased in the Luminar Marketplace are now automatically added to For This Photo and may be presented by LuminarAI when suggesting enhancements for your photos.
- Add External Templates with Ease: On Windows, add external Templates by simply double-clicking in File Explorer. No need to use the plus button inside LuminarAI.
Improved camera support
Update 2 brings support for new cameras and file formats to LuminarAI.
- New Cameras: Canon EOS R5, Canon EOS R6, EOS 850D, EOS-1D X Mark III (lossy compressed files), Fujifilm X-S10, Leica M10-R, S3, SL2-S, Nikon Z 5, Z 6 II, Z 7 II, Olympus E-M10 Mark IV, Panasonic DC-G100 / G110, DC-S5, Sony ILCE-7C (A7C), ILCE-7SM3 (A7S III) and Zeiss ZX1.
- New File Formats: Lossy compressed CR3 files and Lossy compressed RAF files.
Even more product improvements...
You’ll also notice these small but helpful updates throughout the software.
- Working with images in your Catalog is now easier. Click Catalog in the top menu bar to return to the Grid View from the Single Image View and select another image for editing.
- The Film Grain tool now shows the effect on your photo directly in high resolution. No need to wait for the effect to load!
- LuminarAI will now remember the metadata window (Info panel) state and the Histogram state whenever you quit the application, making it more convenient to resume editing upon the next launch.
...To top it all off, we caught some bugs!
In total, we’ve caught and fixed 70+ bugs! Here are the fixes that will definitely improve your LuminarAI experience.
On macOS:
- Maintain sharpness in your image during aberration corrections with fit to screen and 100% zoom
- Apply CompositionAI with zero artifacts or offsets on image edges
- Change the Ratio in your image without experiencing crashes
- Use Erase and Sunrays together and don’t fear artifacts
- Get instant previews of photos in the filmstrip after applying default Templates
- Don’t worry about the application of the Radial/Gradient mask in Templates, since it’s is saved even if the tool is minimized
- Smoothly export to SmugMug after exporting to Mail
- Enjoy a proportionately thin scroll bar in the Favorites, Purchased, Legacy, and My Templates instead of the default wide scroll bar
On Windows:
- Maintain sharpness in your image during any aberration corrections with fit to screen and 100% zoom
- Smoothly install all purchased Template collections in LuminarAI
- Successfully save and apply the DCP profile in your custom Template
- Use Erase and Sunrays together and don’t fear artifacts
- The File > Share > Mail menu is visible in the Catalog Grid View
- The CompositionAI tool works when using LuminarAI as a Lightroom plugin
- Sign in easily, even after signing out from the onboarding window
...And much more! We hope you enjoy the steadier and smoother experience.
Updating LuminarAI
LuminarAI Update 2 is a free update for current LuminarAI users. To update:
MacOS: Open LuminarAI. In the Top Menu Bar, choose LuminarAI > Check for updates. If you purchased via the Mac App Store, open the App Store and go to the Updates tab.
Windows: Open LuminarAI. In the Top Menu Bar, choose LuminarAI > Help > Check for Updates.
If you are running LuminarAI as a plugin with Photoshop or Lightroom Classic, it’s also recommended you rerun the plugin installer.
The LuminarAI user manual has also been expanded to make it easier than ever for users to search and find answers to questions they might have about LuminarAI.
If you’re already a LuminarAI user, don’t miss this special offer to get powerful add-ons.
We can’t wait to see what you create
With the LuminarAI Update 2, we’ve worked hard to improve even the smallest details to make your photo editing experience faster, more convenient, and more enjoyable. With significant enhancements to SkyAI, Local Masking, and Templates, you have powerful new ways to simplify your workflow and create beautiful digital art that realizes your unique vision.
Enjoy creating photos you’re proud of in LuminarAI and share them with the world!


