Indoor Portrait Photography: A Comprehensive Guide
June 20, 2024

Explore the art of indoor portrait photography with our comprehensive guide. From lighting techniques to posing tips, unlock the secrets to capturing beautiful portraits indoors.
The art of indoor portrait photography unfolds a world of endless creative possibilities, where stories come to life, stylistic moods are crafted, and stunning works of art are created. Whether you're in a studio or a themed environment, indoor portraits allow you to construct scenes precisely as you envision them. Through your mastery of lighting, thoughtful scene setup, and the strategic use of props, you can produce high-quality works that transcend ordinary photography.
This guide aims to help you master indoor portrait photography, enhancing your understanding of lighting and model direction. Let’s dive in!
Step 1. Understanding Lighting: Natural vs Studio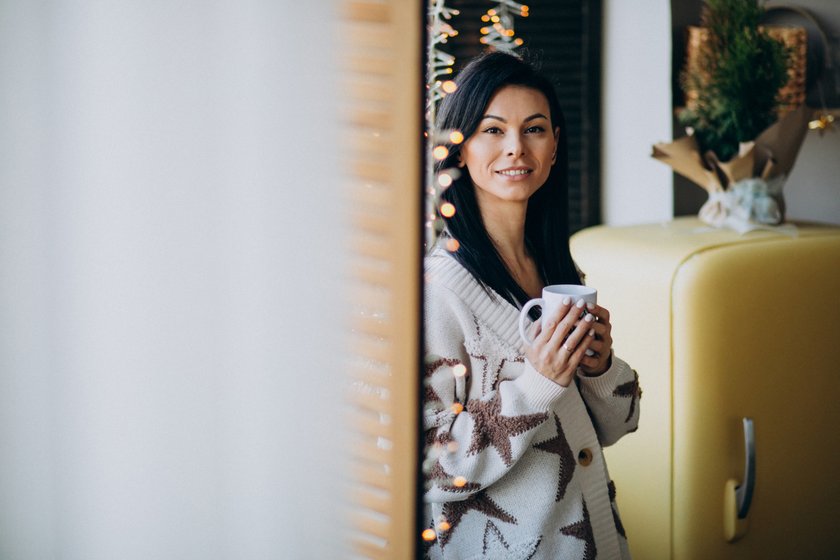

When it comes to indoor portraits, lighting is crucial—it shapes the clarity and quality of your images. Insufficient lighting can lead to noisy, unclear photos, so mastering lighting is important for achieving professional-looking portraits. While the idea of working with strobe lighting and multiple light setups might seem daunting to beginners, this section aims to assist both novice and experienced photographers alike.
Natural Lighting
The quality of natural light largely depends on the weather. Bright, sunny days provide beautiful, sharply defined shadows, ideal for experimenting with various lighting techniques, which we will discuss later. Overcast days offer diffused lighting, akin to a giant softbox, softening shadows and providing even light on your model. However, relying solely on natural light means you're at the mercy of the weather, which can significantly influence the mood of your images.
- Bonus Tip: Struggling with excessive shadows in your naturally-lit portraits without additional lighting? Use a bounce board to reflect light onto your subject. This can be something as simple as a white piece of foam board, card, or even paper, helping to achieve more balanced lighting and soften shadows on the model’s face.
Studio Lighting
At first glance, studio lighting can seem overwhelming due to the variety of lights and modifiers available. However, you can produce outstanding studio portraits with just one or two lights, provided you understand how to manipulate light effectively. For instance, positioning a light 45 degrees above the subject can create a flattering loop lighting effect, while lighting from below can cast ominous shadows, reminiscent of horror films. As you grow more comfortable with studio lighting, you can start experimenting with modifiers such as grids, snoots, scrims, and gels.
- What is a snoot? For those curious, we have a comprehensive guide on studio lighting that includes an introduction to various lighting techniques and modifiers, helping you to get started on the right foot.
Step 2. Choosing the Right Equipment

Lighting isn’t the only critical aspect to consider in portrait photography; there's plenty of equipment that you can incorporate into your shoots. However, you don’t need to empty your wallet to get started. Simple indoor shoots with either natural or studio lighting are sufficient to create high-quality work. Below, we’ll discuss some essentials for your shoots and a few extras for when you feel like getting creative.
Essential Equipment
Camera: There isn't a definitive camera that guarantees the best quality photos, but there are important features to consider for portrait photography. Cameras with larger sensors generally perform better in low light, with full-frame sensors being ideal. However, APS-C sensors can also deliver excellent results with the right lenses.
Lens: The best lens for portrait photography typically has a wide aperture to allow more light, helping to separate your subject from the background with a bokeh effect. Apertures between f/1.4 and f/2.8 are ideal.
Tripod: A tripod is essential, especially if you’re managing the shoot alone. It stabilises your camera, allowing for sharper images and giving you the freedom to direct and interact with your model.
Reflectors: Useful for reducing shadows on your model's face, reflectors are an essential tool, especially in natural light photography.
Backgrounds: A selection of plain or textured backgrounds can dramatically affect the mood and professionalism of your shoot. These can be mounted on a wall or hung using clips and a C-stand.
Gaffer Tape: Indispensable for practically every shoot, gaffer tape is used to secure backgrounds, props, and even mark positions for your model. Always have a roll on hand.
Non-Essential but Beneficial Equipment
Prisms: These can be used to refract light and create captivating visual effects, especially effective with natural light to cast interesting shadows or highlights on your model.
Gels: For those looking to get creative with studio lighting, gels can alter the mood or tone of the lighting, adding warmth or coolness as required.
Props: Integrating props can add depth to the theme of your shoot or make it more intriguing. They are fun to work with and encourage creativity.
External Monitor: Shooting tethered to a desktop or laptop is extremely helpful for reviewing images in real-time. It allows for immediate feedback from the model and can enhance collaboration, pushing the quality of your shoot even higher.
Smoke Machines: Adding a smoke machine can introduce a dramatic and mysterious effect to your images, enhancing the interplay with lighting to create a compelling visual atmosphere.
By equipping yourself with these tools, you can enhance your ability to capture stunning and professional indoor portraits, whether you're a beginner or a seasoned photographer.
Step 3. Setting the Scene

With all your gear and equipment ready, it’s time to set the scene. Proper preparation, including a detailed plan for your shoot, will lead to a smooth and successful collaboration between you and your model.
Backgrounds and Outfit
These elements are crucial and should be considered together due to their impact on colour harmony. It’s essential to coordinate your model’s outfit, including the colour, with your background to ensure they complement each other. Understanding colour theory is key here; for instance, if the background colour overpowers the outfit, it might draw attention away from your model. Colour theory can be complex, but a solid grasp will help you make informed decisions. For further guidance, refer to our guide on colour theory.
Props
Based on the planned theme of your shoot, consider which props could enhance the scene. Whether it's natural elements like fruits and flowers or more structured items such as mirrors and furniture, having these prepared and ready to go can add layers of interest to your photographs.
Lighting
Have a preliminary lighting setup in mind before the shoot begins. While adjustments are often necessary as the shoot progresses, starting with a well-thought-out arrangement allows you to begin efficiently and make the most of the time while your model is energised.
Step 4. Working with Models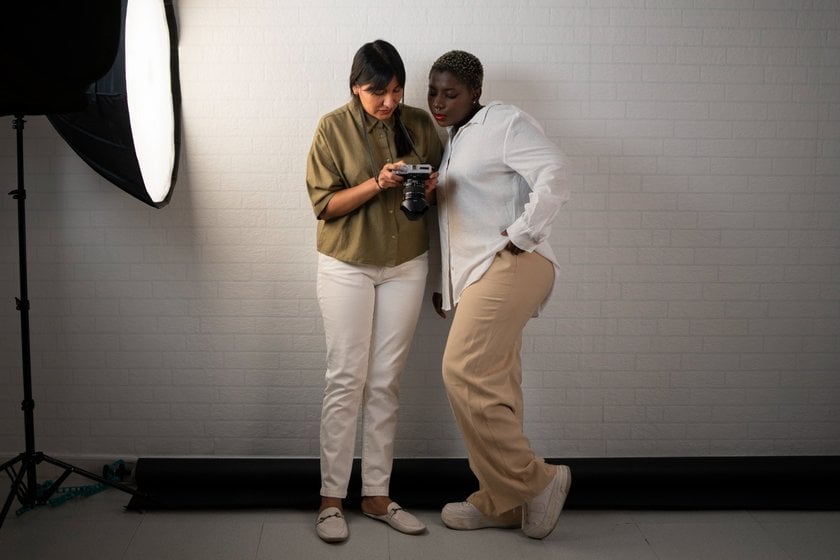

Working with models, especially for the first time, can be quite daunting. To ease into this aspect of photography, consider collaborating with someone you know who has an interest and some experience in modelling. This can help you become more comfortable with directing, and an experienced model can offer valuable pose suggestions.
Building Rapport
It’s crucial to establish a comfortable environment for the model. Rather than diving straight into the shoot, take the time to welcome your model, discuss the shoot details, and let them settle in. A relaxed and happy model is more likely to perform well, contributing significantly to the success of your shoot.
Directing Subjects
Preparation is key when directing models. Before the shoot, compile a list of poses or create a mood board and share it with your model. This preparation helps both experienced and inexperienced models transition smoothly between poses. Experienced models typically have a choreographed pose routine that they seamlessly move through after each shutter click, while newcomers might need more guidance. Providing visual references not only enhances efficiency but also boosts the model’s confidence in executing the poses.
HMU (Hair and Makeup)
Working with hair and makeup artists can elevate the professionalism of your shoots. They not only enhance the appearance of your models but also assist throughout the shoot by making necessary adjustments, which can significantly reduce the need for extensive post-processing. While not essential for beginners, collaborating with new HMU artists can be mutually beneficial. They often welcome opportunities to work together on shoots to expand their portfolios, just as you're looking to build yours. This collaboration can add a significant layer of polish to your portraits, helping both of you to showcase your best work.
By incorporating these practices, you can foster a professional and supportive atmosphere that enhances both the experience and the outcomes of your portrait sessions.
Advanced yet easy-to-use photo editor
Get Luminar Neo NowThe Bottom Line

The world of indoor portrait photography might seem complex at first glance, but in reality, stunning work can often be crafted with minimal equipment. Natural light is a fantastic resource to leverage, and sometimes, simplicity provides the best results. For those inclined towards studio lighting, there's no need to start with a complex 5-light setup. Begin with one or two lights and progressively build more intricate scenes as you gain confidence. Get creative by envisioning scenes that you can bring to life through your lighting and setup, and don't hesitate to incorporate props to add depth and interest to your compositions.
If you're apprehensive about working with a model for the first time, remember that it's a common feeling. The more experience you gain, the more comfortable you'll become at building rapport and directing models to fulfil your creative vision. Indoor portrait photography is not just a technical challenge; it's a creative journey. So dive in, start experimenting, and enjoy the process—you’re sure to have a great time!