How to Work with Presets in Luminar Neo
June 21, 2024
Learn how to effortlessly enhance your photos using presets in Luminar Neo. Elevate your photography skills and create stunning visuals in just a few clicks.
We are glad to welcome you to our guide. Today, we will explore the possibilities of Presets in Luminar Neo. If you are already on this article, you probably know what presets are. But, just in case, let's recap the definition. Presets are a selection of adjustments preprogrammed in advance so that you can edit your photo quickly with well-proved settings that will look good together.
These presets can be created by professional photographers or everyday users. In Luminar Neo, you'll find a wide variety of professional presets tailored to suit different styles and tastes. You can also customize these presets and save your adjustments for future use.
With such vast possibilities, all you need to do is learn how to use presets effectively. That's what we'll talk about next.
Finding the Presets Tab
To find Presets in Luminar Neo, click the Presets tab at the top central menu between Catalog and Edits. Your selected photo will open, and you’ll see the Presets selection on the right side.
Let's look at the sections in the Preset tab. First, you’ll have a block with suggestions for your photo, that our system has chosen for you based on objects or scenery in your image. You can scroll through them and choose any pack by clicking on it.

Then, you have other options for Presets databases:
X-Membership: Our special subscription-based membership system gives you access to many wonderful creative assets, including presets.
Favorites: Appears only when you start adding your most liked presets to favorites for quick access.
My Presets: Your own self-made presets or any customized presets that you saved.
Purchased: All the presets you have obtained from our marketplace.
If you scroll through the Presets panel, you’ll see different packs divided by topics: Essentials, Landscape, Portrait, and so on. Topics exist for your convenience because some presets work best with portraits and others with landscapes.
Important: Each preset bears its own edits and adjustments, so if you edited your photo beforehand, your edits will be replaced with the preset’s edits. If you want to add your own adjustments beside the preset, you’ll need to do it afterward.
Now, let’s dive into customizing a preset!
Customizing a Preset
Once you’ve applied a preset to your photo, you might want to customize it to suit your photo in the best way possible. Here's how to do it:
1. Open the Edits Tab
 After applying a preset, switch back to the Edit tab. Then, open the Edits tab on the right-side tools panel.
2. Adjust the Preset Edits

Look through the edits that came with the preset. You may open each of them and adjust the amount sliders until you are satisfied with the look. Some tools have many other settings that will help you to customize your editing.
If you want to add a tool that is not on the list of the preset’s edits, come back to the Tools tab and select the tool.

3. Edit Overlays in Layers
You can also edit overlays in Layers if a preset contains them in its settings. Locate the Layers in the top left corner and click on the layer with overlays. Adjust settings in Layer Properties if needed.

4. Save Your Preset
Continue editing and export your photo when it’s ready.
You can also save the customized version of a preset, or if you are using some particular effects frequently, you might want to create your own preset. Let’s see how it’s done!
Creating Your Own Preset
So, we have figured out where to find presets in Luminar Neo and how to customize them. Now, let's find out how to create new presets based only on your visions and preferences:
1. Save Your Custom Preset
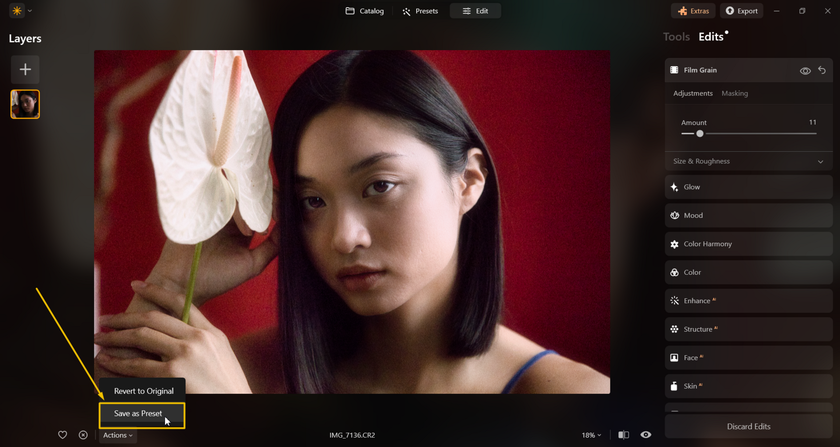
When your edits are complete, find the “Actions” button in the bottom panel of the Edit mode. Click on the button, and you’ll see an option “Save as Preset.” After you click on it, you’ll be transferred to the Presets tab, and “My presets” tab will open.
2. Name Your Preset
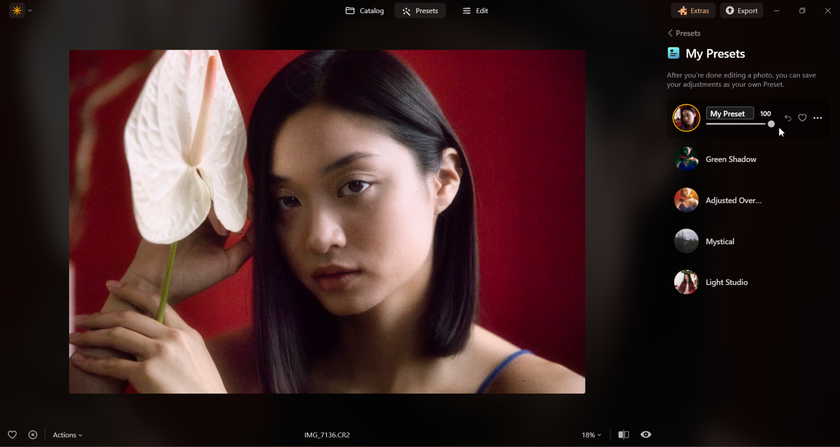
Now, it’s time to choose a name for your preset so that you can quickly identify it when you need it. y default, it’s named “My Preset,” but you can use any name you like. The preset will have an icon of your current photo, making it easier to identify visually.
3. Manage Your Preset
You'll see a settings button (three dots: "..."). Click on it to access options:
Edit: Transfer back to the Edit tab to continue editing the photo.
Rename: Change the name of the preset. Don’t forget to press Enter to save the new name.
Delete: Remove the preset from the list.
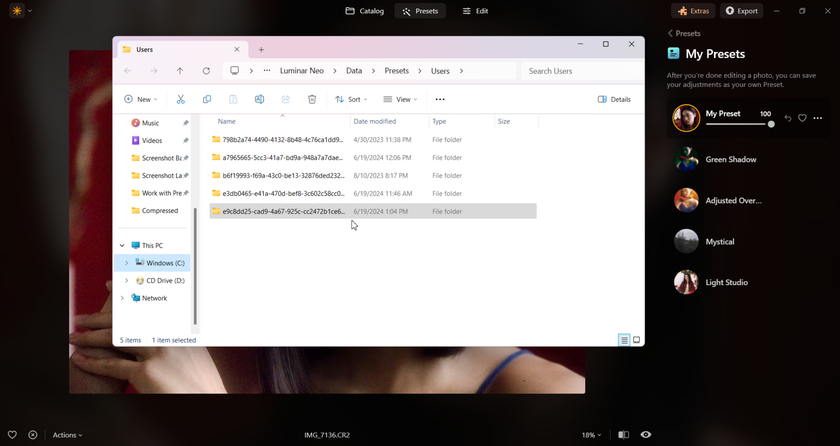
Show in Explorer: Open the path to the folder where the preset is stored on your computer. This is useful for backing up your preset or transferring it to another computer.
Advanced yet easy-to-use photo editor
Get Luminar Neo Now
Marketplace Presets: How to Purchase
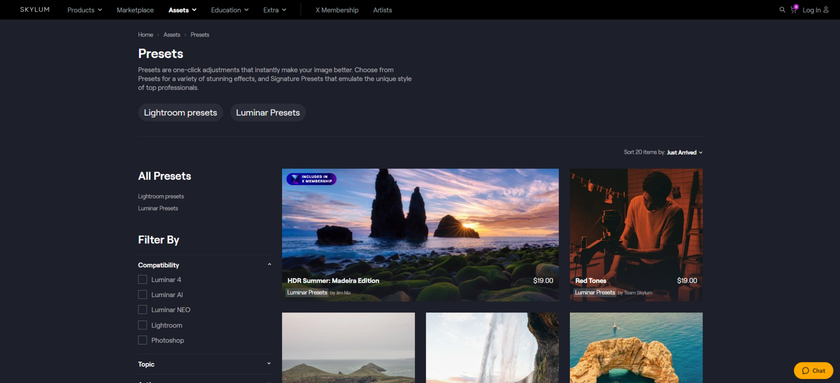
How about exploring hundreds of available presets in our community? You can obtain a preset by purchasing it in our marketplace:
On the left side, you’ll see an incredibly useful Filter panel, which will help you find exactly what you’re looking for.
Choose “Luminar Neo” or other apps in Compatibility.
Then, select from various topics and authors. To confirm your choice of filters, scroll down and click “Apply.”
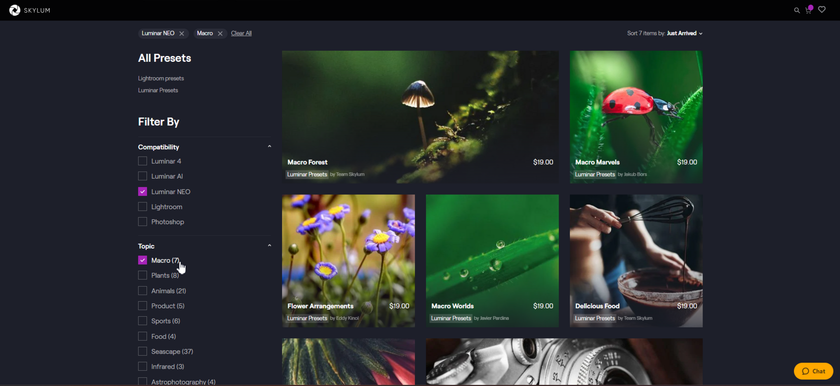

You can find many wonderful presets from our team and other creators. There are so many genres that you almost definitely will find something for yourself
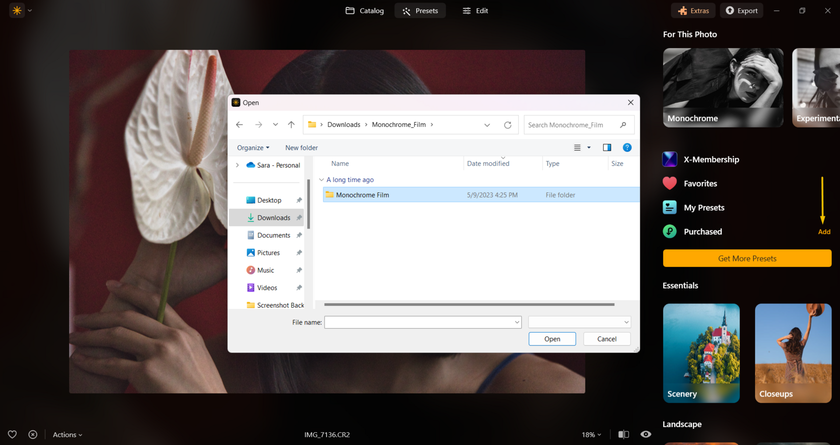
- Tip: If you have a preset file on your computer and don’t know how to make it appear in Luminar Neo, click “Add” near the Purchased button and find the preset file with the .lnpc extension on your computer. In the top left corner, you can also select File from the main Luminar Neo menu and click “Add Luminar Neo Preset Collection”.
That's it! Today we've learned how to work with presets in Luminar Neo. You now know how to find presets, customize them, and even create your own unique presets based on your personal style.
For more guides, check out our blog or visit our YouTube channel. See you later!