How to Get Smooth Skin in Your Images: Simplest Ways for Beginners
August 31, 2023

Smooth, radiant skin is often considered a sign of health and vitality, making it a highly sought-after quality in portrait photography.
Whether you are a beginner trying to improve your photography game or just someone looking to enhance your selfies, knowing how to edit skin can make a dramatic difference in your images. Yet, the process of achieving incredibly smooth skin in photographs can seem daunting for those just starting out.
The good news is that it doesn’t have to be overly complex or require professional expertise. In this blog post, we will guide you through beginner-friendly methods to edit skin and achieve a smoother appearance in your images. From understanding the basics and prepping the skin before the shoot to post-processing techniques and best practices, we will cover everything you need to elevate your photography game.
So, let’s get started!
Importance of Smooth Skin in Photographs
 In today's visually-driven world, every image you capture tells a story. A story where smooth, radiant skin plays a starring role, symbolizing youth, health, and beauty.
It can transform your subjects, giving them a polished, professional aura that immediately captivates your audience. That's why photoshopping skin has become an industry norm, from dazzling fashion editorials to eye-catching advertisements and memorable personal portraits. But beware – it’s a fine line between perfection and artificiality!
Over-edited skin can venture into the uncanny valley, while under-edited skin may not do your subject justice. Thus, grasping the importance of smooth skin in photographs and honing your skills in photoshopping skin is not just valuable but vital for anyone aiming to craft impactful, high-quality images.
A Single Image Lighting Tool for Portraits & Landscapes
Explore in Luminar NeoCommon Reasons for Uneven Skin Texture and Tips on Getting It Right in Camera
 The uneven texture is a common challenge for photographers, often due to various factors:
- Poor Lighting: Insufficient or harsh light can highlight flaws, resulting in a rough and uneven appearance. Tip: Utilize soft, diffused lighting to reduce shadows and emphasize the natural texture.
- Low-Quality Camera: Cameras with lower resolution capture fewer details, which can lead to a blotchy or grainy appearance. Tip: Employ a higher-resolution camera and ensure it is set to the highest quality setting.
- Incorrect Camera Settings: Incorrect settings can lead to noise, resulting in a grainy appearance. Tip: Use the lowest possible ISO setting and a wider aperture to create a shallow depth of field that will soften the appearance.
- Skin Conditions: Conditions like acne, dryness, or wrinkles can lead to uneven texture. Tip: Some conditions can be addressed with makeup before the shoot, while others can be softened during the editing process.
While addressing these issues during the shoot can significantly improve the appearance of the skin, some imperfections may still need to be addressed in post-processing!
Importance of Skincare and Makeup
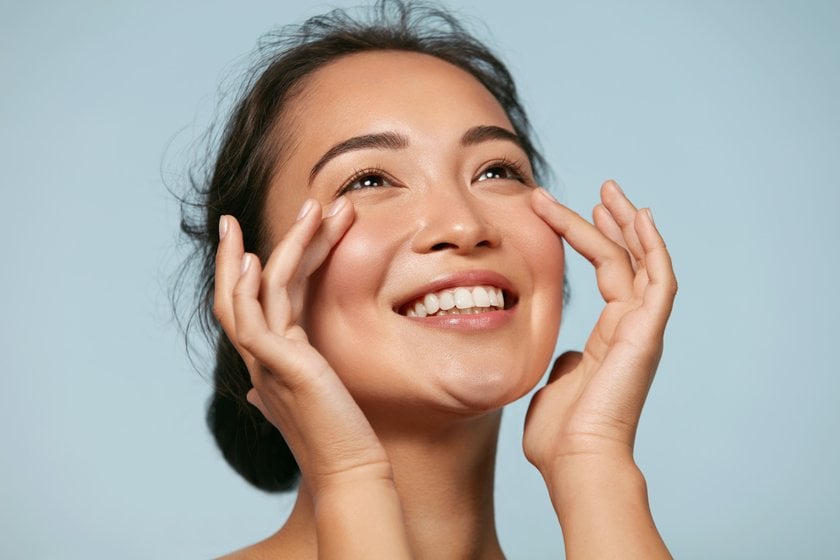 Before diving into the world of post-processing and skin retouching, it’s essential to understand the role of skincare and makeup in achieving smooth skin in photographs. A well-prepared canvas can drastically reduce the amount of editing needed and result in a more natural-looking final image.
Skincare
Proper skincare is the first step towards smooth skin. Encourage your subject to follow a good skincare routine in the days leading up to the shoot. Hydrated, well-moisturized skin will naturally look smoother and healthier on camera.
Makeup
Professional makeup can work wonders in evening out skin tone, concealing blemishes and reducing the appearance of pores and wrinkles. However, it’s important to not overdo it. Heavy makeup can look cakey on camera and actually highlight imperfections rather than conceal them. Opt for a natural, matte finish and avoid products with SPF, as they can cause flashbacks in photos.
Remember, the goal of skin retouching is to enhance the natural beauty of your subject, not to create an entirely new face. Proper skincare and makeup application can provide a solid foundation, making the skin retouch process much more straightforward and effective!
Step-by-Step Guide on Skin Smoothing Using Luminar Neo
Luminar Neo is a powerful photo editing software that comes with a range of features to enhance and retouch your photos. One of its strengths is the ease with which you can smooth skin and achieve a professional finish. Here's a step-by-step guide on how to do it:
One-Click Solution for Removing Imperfections in Portraits
Try Skin AI Now- Open Your Image: Start by opening the image you want to edit in Luminar Neo.
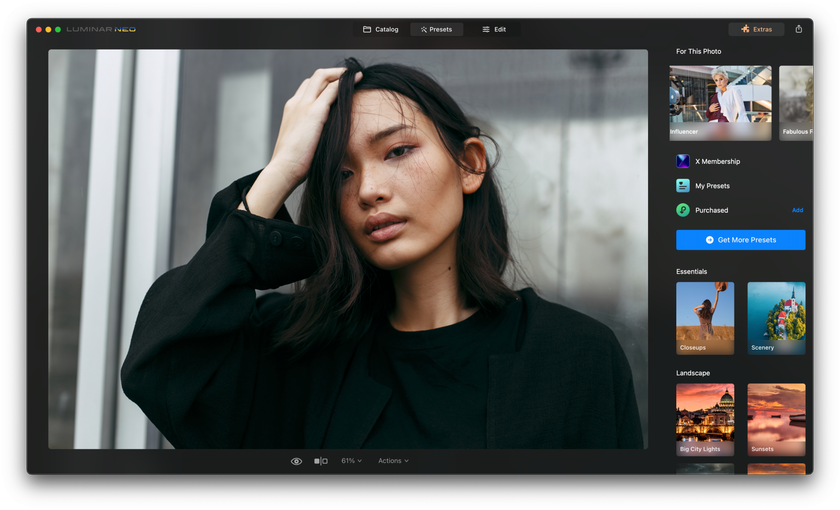
- Select the ‘Portrait’ Tab: On the right-hand side of the screen, you will see a series of tabs. Select the ‘Portrait’ tab.
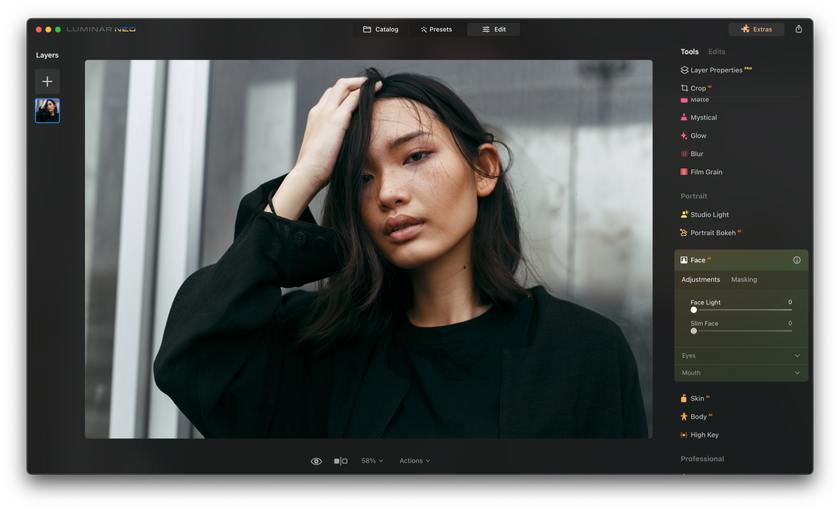
- Use the ‘Face AI’ Tool: Within the 'Portrait' tab, you will find the ‘Face AI’ tool. This tool automatically recognizes and enhances the face in your photo. Increase the ‘Face Light’ slider to brighten the face, and use the ‘Slim Face’ slider if you wish to slightly slim the face.
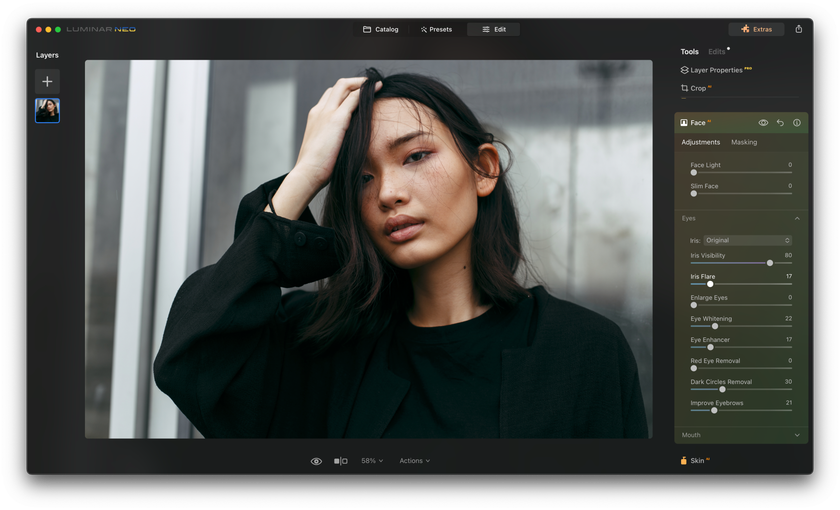
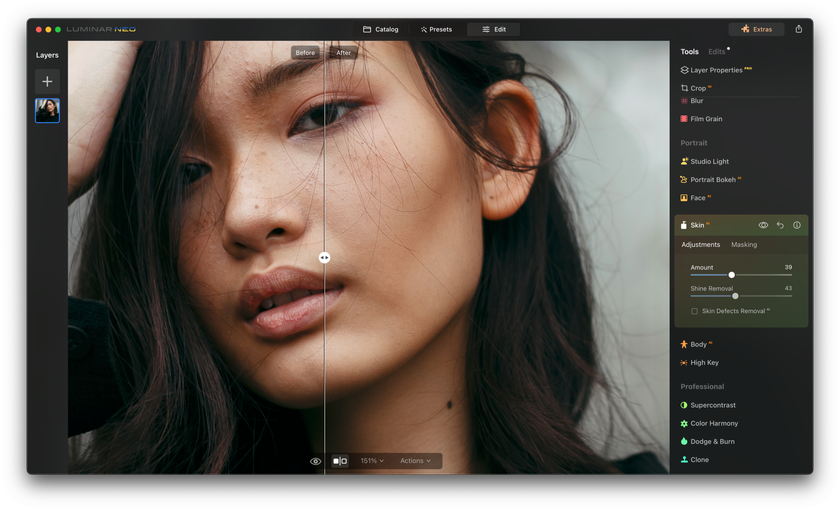
- Use the ‘Skin AI’ Tool: Below the 'Face AI' tool, you will find the ‘Skin AI’ tool. This is where the magic happens. Increase the ‘Amount’ slider to smooth the skin. The ‘Skin AI’ tool will automatically smooth the skin while retaining its natural texture. You can also remove blemishes by increasing the ‘Skin Defects Removal’ slider.
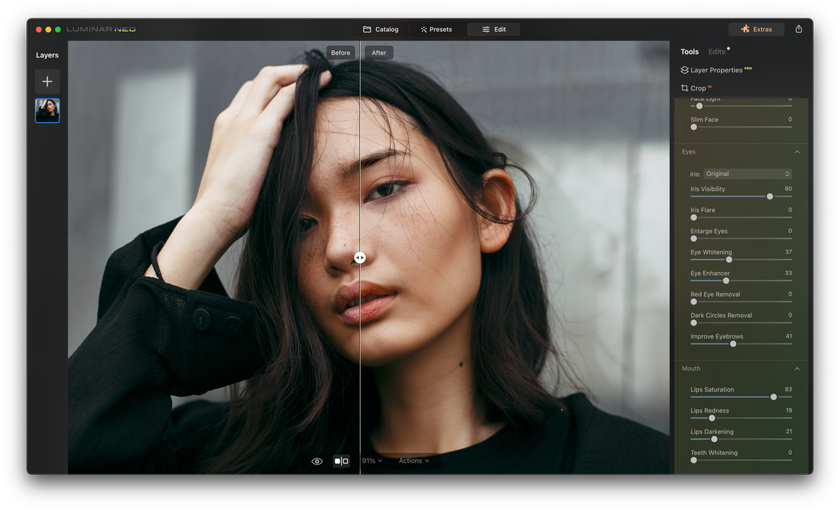
- Adjust the Eyes and Lips if Necessary: Luminar Neo also has tools to enhance the eyes and lips. Use the ‘Eye Enhancer’ slider to make the eyes pop and the ‘Red Eye Removal’ tool if necessary. You can also adjust the color and brightness of the lips using the ‘Lips Saturation’ and ‘Lips Brightness’ sliders.
- Preview and Adjust: Toggle the before and after view to see the changes you have made. Make any necessary adjustments until you are satisfied with the result.
- Save Your Work: Once you are happy with the result, save your work. Luminar Neo allows you to save your image in various formats and sizes.
Subtlety is key when it comes to skin retouching. It’s always better to under-edit than over-edit. Practice and experimentation will help you find the right balance and achieve the best results.
Download Luminar Neo and Get a 7-day Free Trial
I'm in!Advice on Avoiding Over-Smoothing and Maintaining a Natural Look
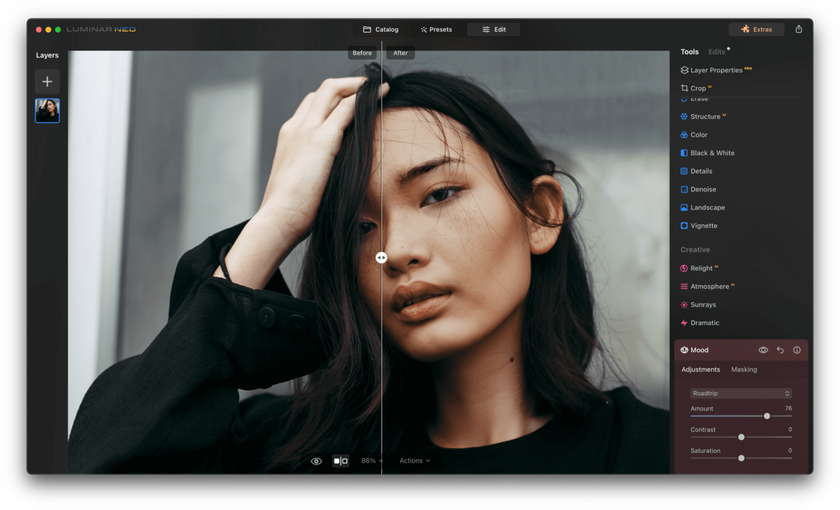 While the objective of retouching is to achieve a smooth and flawless appearance, it's crucial to avoid over-editing and preserve a natural look. Here are some tips to help you succeed:
- Be Subtle: Less is often more when it comes to retouching. It's always better to err on the side of under-editing rather than over-editing. Subtle enhancements can make a significant difference without creating a fake or plastic appearance.
- Maintain Texture: Achieving smoothness doesn't mean entirely eliminating texture. It's vital to preserve some natural texture to maintain realism. Tools like Luminar Neo's 'Skin AI' automatically smooth the surface while retaining its natural texture.
- Utilize Appropriate Tools: Employ tools specifically designed for retouching. These tools usually have built-in features to preserve natural texture while smoothing imperfections.
- Consider Your Subject: Keep in mind your subject's age and natural texture. It's essential to be respectful and realistic. For instance, it's normal for an older individual to have some wrinkles, and entirely removing them can appear unnatural.
- Inspect Your Work: Frequently switch between the before and after view to inspect your work. This will help you maintain perspective and prevent over-editing.
Keep in mind the purpose of skin retouching is to amplify your subject's inherent beauty, not to transform them into someone unrecognizable!
Conclusion
Achieving smoothness in your images is achievable even for beginners with the right preparation, tools, and techniques. It's crucial to comprehend the importance of skincare and makeup, accurately capture the image, and utilize potent editing tools like Luminar Neo while preserving a natural appearance.
Be subtle, maintain natural texture, and honor your subject's inherent features. Remember, the ultimate goal is to enhance your subject's beauty, not to transform them into someone unrecognizable. With practice and experimentation, you can find the needed balance and attain optimal results!
Happy editing! The journey to mastering any skill involves a learning curve, so be patient with yourself, keep experimenting, and don't be afraid to make mistakes along the way!


