How To Fix Blurry Pictures On iPhone: Easy Guide
December 16, 2024

This post guides you through practical methods to fix blurry iPhone photos! It's a must-read for anyone looking to enhance their picture quality and avoid common pitfalls that lead to poor image clarity!
Hey there! Did you notice that, sometimes, your iPhone photos come out a bit blurry? This guide will walk you through some straightforward methods on how to make a blurry picture clear on an iPhone!
Let’s jump in and clear things up!
Why Your iPhone Photos Are Blurry
 Let’s get to the bottom of why your iPhone images might be turning out blurry so you can snap clearer, more vivid images!
1. Your Camera Could Shake
Low light often means your iPhone needs a slower shutter speed to capture more light. If your hands shake even slightly during this time, it can result in a blurry photo.
2. You Moved Rapidly
If the subject of your photo moves swiftly, or if you’re moving while taking the shot, motion blur is likely. This is more noticeable in situations where the iPhone’s shutter speed is naturally slower.
3. Your Phone Didn't Focus Accurately
Sometimes, especially in cluttered scenes or where contrast is low, your iPhone might not focus correctly, which makes the main subject blurry.
4. A Smudge on Your Lens
It's easy to overlook, but a dirty lens can greatly affect photo quality.
5. Several Other Factors Might Be at Play
Issues like poor lighting, incorrect camera settings, or an obstructive iPhone case could also result in blurry photos. Moreover, glitches in your camera app could lead to unexpected blurriness.
Up next, we'll look at how to use the iPhone's built-in tools and some third-party apps to sharpen those blurry photos!
Advanced yet easy-to-use photo editor
Get Luminar Neo NowHow to Fix Blurry Pictures on iPhone via Photos App?
Can you unblur a photo on your iPhone without needing any other apps? Yes! Here's how:
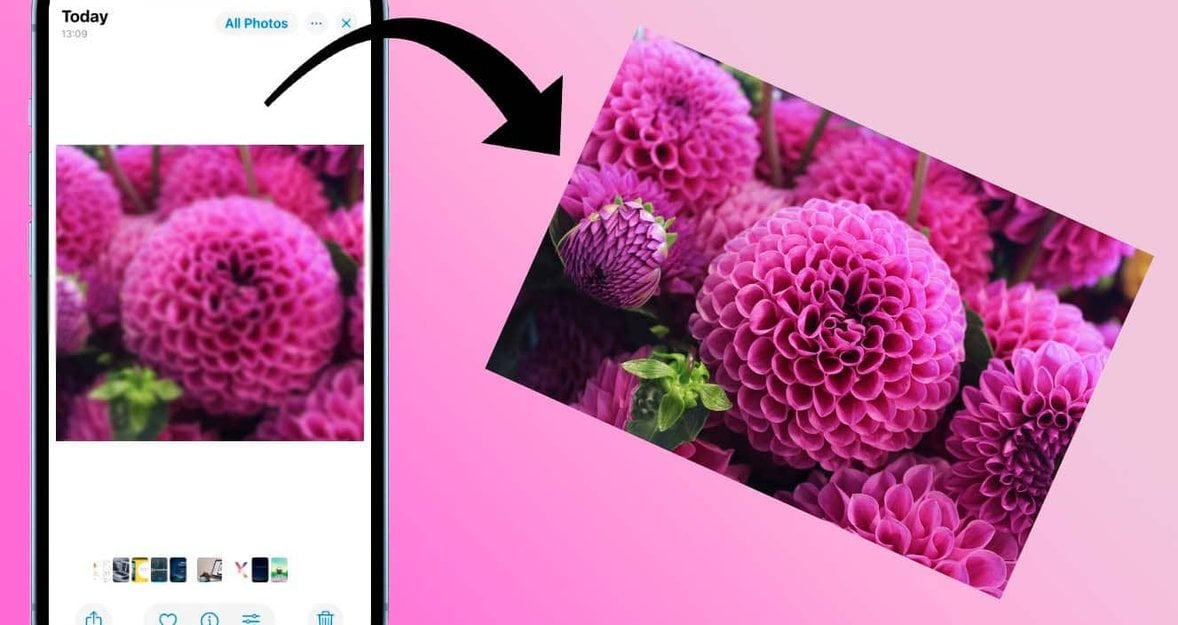
1. Open Your Photos App: Navigate to the Photos app on your iPhone and locate the blurry picture you want to improve.
2. Tap to Edit: Select the image, then hit "Edit" in the top right corner. In the edit mode, swipe right on the bottom menu until you find the "Sharpness" option.
3. Adjust the Sharpness: Drag the sharpness slider until the photo looks better to you. You can also tweak the brightness or contrast here if it helps.
4. Save the Edits: Once you're happy with how it looks, press "Done" to save the changes.
Using Third-Party Apps
If you're looking to learn how to sharpen a photo on your iPhone, third-party apps can also be incredibly useful. Here's a straightforward guide on how to use them to enhance photo clarity and eliminate blurriness!
Luminar Neo

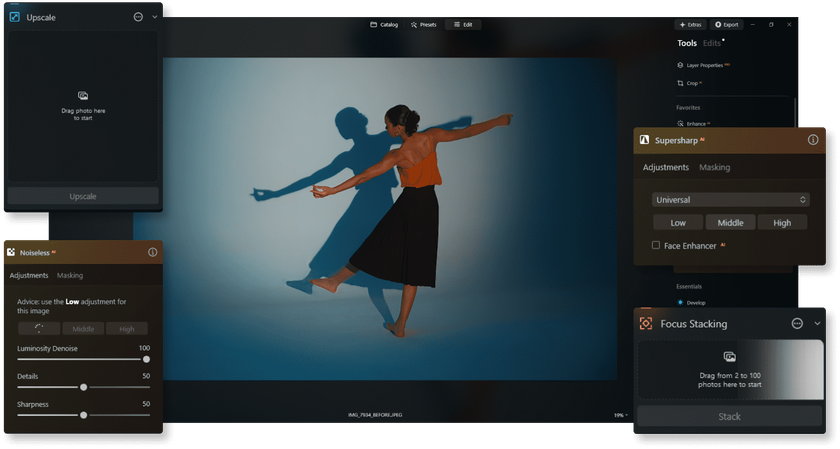
Luminar Neo is a robust editing platform available for MacOS, Windows, and iPad, packed with AI tools that enhance photos quickly and efficiently! Here are the steps that can help you with the blurry pictures:
Open Luminar Neo: Start by opening your photo in Luminar Neo on your MacOS, Windows, or iPad.
Select SuperSharp AI: Look for the SuperSharp AI feature, which helps specifically to unblur photos. You’ll have options to target general blur or motion blur.
Adjust Sharpness Settings: Choose from low, middle, or high sharpness settings depending on how much clarity you need. The AI will process the adjustments to enhance your photo quickly.
Use Background Noise Remover: If your picture is grainy, select the Noiseless AI option. This feature effectively reduces noise without blurring out important details.
Try Focus Stacking for Multiple Photos: If you have several shots of the same scene with different focus points, use the Focus Stacking tool to merge them into one clear image.
Utilize Upscale AI: If you need to improve the resolution of your photo, use Upscale AI to enhance it up to six times its original size without losing clarity.
For those who prefer mobile editing, Luminar Mobile is available for iOS devices with iOS 17 or newer. It offers many of the same powerful features as the desktop version, allowing you to edit photos on the go with precision!
Lightroom Mobile
 Adobe Lightroom is a user-friendly photo editing app packed with professional tools, including a feature to sharpen and clear up blurry pictures. What to do:
Import Your Photo: Start by opening Lightroom Mobile. Import the photo you want to improve into the app.
Access Sharpening Tools: Tap the picture to enter edit mode, then scroll to find the "Detail" option.
Adjust the Sliders: Use the sharpening and noise reduction sliders to refine your image. Feel free to experiment with other adjustments like contrast or clarity until you achieve the look you want.
If you're looking to learn how to fix blurry images in Photoshop at a professional level, check out our detailed post on the topic!
Also read: How To Open RAW Files on Windows, Mac, and Android?
Snapseed
 Snapseed, developed by Google, is a professional photo editing app designed for iPhone users eager to enhance their photography skills. It includes a variety of tools for refining images, such as features for unblurring and smoothing details.
To use Snapseed to sharpen an image:
Import the Photo: Open Snapseed and upload the photo you want to edit.
Access Editing Tools: Tap on 'Tools' and then 'Detail' to access the sharpening options.
Adjust Sharpness: Slide up and down to switch between 'Structure' and 'Sharpening'. Adjust the levels as needed and confirm by tapping the Tick icon.
Refine with Masking: If some areas become too sharp, you can mask them. Go to 'Edit History', tap 'View Edits', select 'Detail', and then the 'Mask' icon. Paint over areas you want to keep less sharp and tap the inverse icon to apply the mask, finishing with the Tick icon.
For further refinement, tools like 'Tonal Contrast' and 'Drama' are available to experiment with, helping you achieve the desired clarity and impact in your images!
Exclusive Tools of Endless Possibilities in One AI Editor
EXPLORE NOW!Online Tools for Fixing Blurry iPhone Images
 If mobile apps haven't done the trick or you prefer not to download anything, online tools can be a great alternative. Just do a quick search for "online photo sharpening" or "fix blurry photos online," and you'll find plenty of websites that allow you to clear up your images directly from your web browser — no downloads necessary!
How to Prevent Blurry Pictures on Your iPhone
 Taking great photos with your iPhone doesn’t have to be hit or miss with these tips!
1. Stabilize Your Phone
Using a tripod can be a game-changer, especially in low light or when you’re zooming in for a shot. Even small, pocket-sized tripods can help eliminate that annoying camera shake.
2. Tweak Your Settings
Get to know your iPhone’s camera settings a bit better:
Focus: Tap on your screen where you want the camera to focus.
Exposure: If things look too bright or too dark, slide your finger up or down to adjust the light balance.
Gridlines: Turning these on can help you keep your shots straight and well-composed.
3. Keep Your Lens Clean
A quick wipe with a microfiber cloth can make a world of difference. Dust and fingerprints can blur your photos more than you might think.
4. Fix Common Problems
If blurry photos keep cropping up:
Try restarting your camera app or your iPhone itself.
Check to see if your case is getting in the way of the lens.
If problems continue, it might be time to talk to Apple Support.
These straightforward steps can help you capture clearer photos more consistently and let you focus more on your photography and less on fixing mistakes!
Conclusion
That's it! You've got the tools and tips to fix blurry pictures on your iPhone. With everything we've covered, you can now confidently make images clearer and improve the quality of your photos. Keep in mind that small steps like stabilizing your camera, cleaning your lens, or tweaking settings can help prevent blurs even before they happen.


