8-Bit vs 16-Bit Photos: What's The Difference
June 12, 2023
The bit depth of color is one of those terms we all encounter on a daily basis, but very few photographers really understand. Photoshop offers 8, 16, and 32-bit image file formats. Sometimes we see files called 24 or 48. In your camera settings, you can find a choice of 12 or 14. What does all this mean and what really matters? Let's work together to understand the difference between 8-bit and 16-bit.
One of the most important parameters in digital photography is color depth. It is often referred to as both pixel depth and bit resolution. This term refers to the number of bits of information contained in a pixel of an image. Bit resolution gives an idea of the amount of color information that is used to characterize each pixel in a picture.
As the color depth increases, so does the amount of color information that the digital image conveys, and the range of colors increases. In other words, the greater the depth, the more accurate and detailed the image is. In this article, we will thoroughly discuss all the advantages and disadvantages of 8-bit color vs 16-bit color, so that you won't have any doubts later on about which variant is better to use.
Defining 8 Bit vs 16 Bit in Digital Imaging

The main difference between 8-bit and 16-bit images is the number of colors they can display. 8-bit images show about 16.7 million colors, good enough for web and simple prints. 16-bit images can show 281 trillion colors, offering more detail and a wider range of colors, ideal for high-quality prints and detailed editing.
Now, let's explain the term "bit depth":
Firstly, discuss what the name means. A bit is a computer's way of storing information as a 1 or a 0. If it were an image pixel, it would be pure black or white. Not very useful.
To describe more complex levels of color, we can combine several bits. Each time we add another bit, the number of possible combinations doubles. One bit has 2 possible values, 0 or 1.
This depth defines the smallest changes you can make, relative to some range of values. If we have enough bits, we have enough gray values to make what appears to be a perfectly smooth gradient from black to white.
8 Bit vs 16 Bit: Understanding Bit Depth and Color Gamut
 Bit depth is crucial in defining the number of possible color values or increments in an image, while color space—or color gamut—determines the range of colors that can be displayed.
When comparing 8-Bit and 16-Bit images, the difference in color representation is stark: an 8-Bit image supports up to 16.7 million colors, whereas a 16-Bit image can display up to 281 trillion colors. This vast increase in bit depth for 16-Bit images allows for more detailed imagery and a broader color spectrum, making them superior for both editing and printing.
A color gamut is the full spectrum of colors visible to the human eye. Since most screens can display a limited range of colors, each device supports one or more color standards that define its color gamut. Although there are surprisingly many different color schemes, there is probably only one that is perfect for your needs. This factor causes even more controversy about 8bit vs 16bit.
Increasing this depth reduces the risk of banding in gradients by creating more increments, and expanding the color space (wider color gamut) allows you to use more extreme tones. But these two parameters interact with each other. The larger the color gamut, the more likely it is that stepped gradients will appear with the same depth.
Comparing 8-Bit to 16-Bit
 So let's compare 8-bit versus 16-bit. It would be handy if all the "bit depths" could be compared directly, but there are some variations in terminology that are useful to understand. Note that the image above is a black-and-white image. A color image usually consists of three channels of red, green, and blue, combinations of which give us the ability to create different colors.
Most cameras will allow you to save files in JPG or RAW. Most importantly, there are huge advantages to using a format with a few extra bits of depth.
Why do we have options for more than 10 bits in our cameras and photoshop? If we never edited photos, there would be no need to add more bits than the human eye can see. However, when we start editing photos, it can be easy for previously hidden differences to begin to show up. This also affects the quality of your images.
As we manipulate the photo, the software makes minor errors or rounding errors in the data more obvious. Increasing the contrast of an image is similar to decreasing the bit depth. If we manipulate the photo hard enough, the smooth gradients will start to show banding or stepping.
An 8-bit image can only contain a maximum of 256 grayscale, while 16-bit images can contain up to 65,536 grayscale.
8 Bit
 Photography software (such as Photoshop and Lightroom) operates on the number of bits per channel. This means that an RGB image in Photoshop will have a total of 24 bits describing one pixel of the image. That's why many people argue about the advantages of RGB 8 bit vs 16 bit.
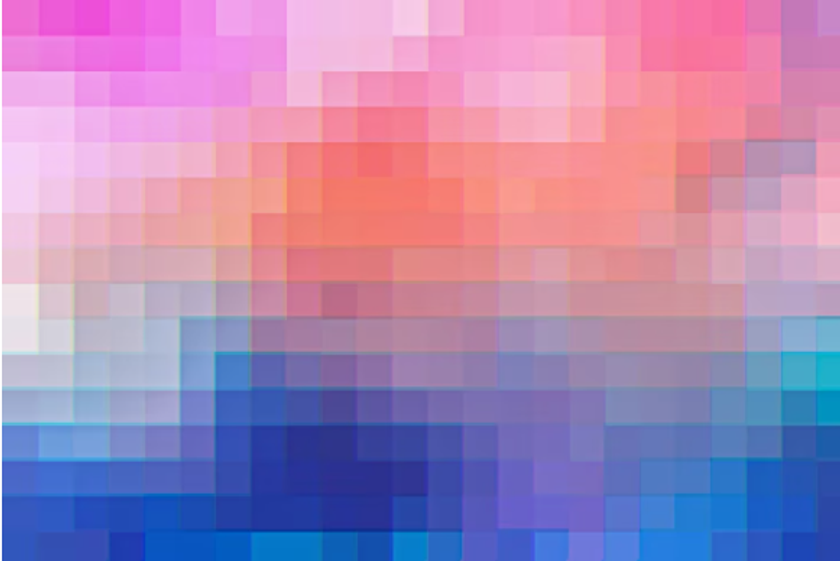
Stepping is the obvious discrete transition from one color or tone to another (instead of a smooth gradient). This is very important when we consider the advantages of 16-bit vs 8-bit. You've already seen the theoretical example with low-bit gradients above. A typical example in the real world would be the various stripes that appear in a clear blue sky.
16 Bit
 A 16-bit image uses 16 bits per channel to store colour information, offering 65,536 possible values per channel for smoother gradients and better colour accuracy. However, Photoshop is fooling us and in fact, it treats 16-bit files as 15 plus 1. So in terms of quality, it would be very fair to say that Adobe's 16-bit mode is really only 15-bit.
Choosing Between 8Bit vs 16Bit for Your Photos
 Exposure correction in post-processing by four steps equates to a loss of just over 4 bits. Adjusting the exposure of RAW files by four steps will rarely have to happen, but it can happen in extreme situations or poorly exposed parts of the image. So, let's talk about 8-bit graphics vs 16-bit.
In reality, you will probably never need many bits for several reasons:
- There aren't many situations where you can encounter a perfect gradient. A clear blue sky is probably the most likely case. In other images, it's much harder to see the disadvantages of 8-bit vs 16-bit depth.
- Color offers more bit depth. If you are processing in black and white, these numbers apply directly to you. But if you are processing in color, you probably have a little more room to maneuver.
- Your camera's accuracy is not as high as we all would like it to be to consider the disadvantages of 8-bit vs 16-bit graphics. In other words, there is always noise in your image. Because of this noise, at a certain color depth, gradient blunders are much harder to see.
- You can remove staggered transitions in post-processing using a combination of blurring and adding noise.
- The extra bits basically only matter for extreme tonal corrections.
Taking all this into account, a 12-bit for the image sounds like a very reasonable level of detail that allows for significant post-processing.
The advantages of the 16-bit mode are the ability to manipulate the image without causing problems. By converting the final edited image to 8-bit, you won't see any difference, and besides, the file size will be much smaller, which is important for faster loading. Make sure that anti-aliasing is turned on in Photoshop. If you are using Lightroom to export to JPG, dithering is used automatically (you have no choice). It helps to add some noise, which should minimize the risk of staggering in the final conversion.
8-bit or 16-bit for printing? What if you are sending your images over the Internet to be printed by a professional lab? Many labs will accept 16-bit files, and this is a great option. However, if the lab requires a JPG or you want to send a smaller file, you may have questions about converting.
If you need to send a JPG, it will be in 8-bit color, but that shouldn't be a problem. In fact, 8-bit data is fine for the final print output. It is best to make all changes (anti-aliasing, color space conversion, sharpening) before converting to 8-bit. If you don't see streaks on your monitor after converting to 8-bit, you should be fine in print as well. However, you can help avoid potential problems by making sure that Photoshop uses dithering to convert.
Changing Image Bit Rate from 8 Bit to 16 Bit in Photoshop
Let's talk now about 8-bit vs 16-bit in Photoshop. For example, to convert bit settings in Photoshop, do one of the following:
- To convert between 8 and 16 bits per channel, select 16 bits/channel or 8 bits/channel in the Picture > Mode menu.
- To convert between 8 or 16 and 32 bits per channel, select 32 bits per channel in the Picture > Mode menu.
Photoshop allows you to do the following with images with 16-bit depth per channel:
- process in grayscale mode, RGB mode, 8-bit or 16-bit CMYK mode, Lab mode, and multichannel color mode;
- use all the tools on the toolbar (except for the Art Brush tool);
- apply color and tone correction commands;
- work with both regular and correction layers;
- apply numerous Photoshop filters suitably.
The new release of Photoshop implements an expanded tonal range and brightness corrections in 16-bit documents with the Precision Preview feature.
To take advantage of certain Photoshop features, such as filters, a 16-bit depth per channel image can be converted to an 8-bit depth per channel image. This way you can clearly see all the advantages of 16bit vs 8bit. It is recommended that you create a copy of the original file using the "Save As" command and work with the copy of the image so that the original file retains the full-color information at 16 bits per channel depth.
To Sum Up
16-bit channels can contain 256 times more values than 8-bit channels. As a result, images with hexadecimal channels are able to display a million colors, and more accurately reproduce color and tonal transitions, and as a consequence, these images have less posterization. Today there is still a lot of controversy about 8-bit color vs 16-bit.
Strangely enough, many people do various experiments with images manipulating eight-bit and sixteen-bit images and sometimes they don't find any difference. As a result, they conclude that it is too much of a waste to use 16bit images, losing disk space and extra CPU time needed to process hexadecimal images. Which, to put it mildly, is not quite the right conclusion.
Obviously, if any serious digital image correction is planned, it is best to perform it over more accurate and richer data. That is, if you can choose to process an image with 8 or 16 bits per channel, you should definitely choose to work with 16-bit color channels.
Advanced yet easy-to-use photo editor
Get Luminar Neo NowIf Photoshop seemed too complicated for you, you can always find a simpler alternative with the same set of professional tools. We recommend trying Luminar Neo from the Skylum developer. With its simple and user-friendly interface, it will be very easy to deal with.


