5 Impressive Portrait Light Setups To Illuminate Your Portraits Best
Last Updated on February 14, 2025
This guide explores seven essential lighting setups to help you highlight unique features, play with light and shadow, and capture the essence of your subject with artistic precision.
Portrait photography is a very delicate art. It calls for capturing the essence of a person's contradictory nature in the rays of light and highlighting the unique features of their face. To make this task less daunting, there are portrait lighting schemes that will help even a beginner develop the sharp eye of an artist.
In this article, you will find descriptions of seven basic lighting setups photography which teach you to play with light and shadow, unraveling the mystery of a person's character.
The Essence of the Story—Light
 Lighting in professional photography, especially in portrait shooting, shapes both the atmosphere and the narrative of the photo, adding dark shades of drama or bright highlights of hope and accentuating certain features of the model.
The best lighting for portrait photography is natural, just before dawn or at sunset. However, it’s not easy to obtain, and it doesn’t always align with our intentions. Artificial light offers more room for creativity. Professionals prefer flash, which is active only during the shot, while beginners use continuous light to see the light pattern right away. Illumination setups that serve as the foundation of portrait photography work for all of them. With the seven types of portrait lighting, you can create true works of art by mixing them together.
1. Split Lighting: The Paradox of Human Nature
 Every person has a dark and light side. Within a person, there is an astonishing combination of opposite elements: they are both a cruel, untamed beast and a flower melting in the palm from tenderness. This polarity of human nature is conveyed through side lighting, which divides the face into dark and light halves, like yin and yang. To create such portrait photography lighting, you should:
Position the light source at a 90-degree angle to the side of the model at face level or higher.
For greater contrast between the dark and light sides, boost the light's brightness and move the light source closer to the model. Minimize the amount of light on the shadowed side.
To create softer shadows, lower the light’s brightness, move the light source farther from the model, or use a reflector angle between 90 and 45 degrees to the model.
With this setup, your portrait can turn out sharp, breathtaking, and, at the same time, mysterious and intriguing.
2. Loop Lighting: The Art of Softness
 Soft shadows on the face produced with loop lighting will highlight the person's character, subtly hinting at the depth hidden behind them. To achieve this effect of studio lighting for portraits, follow these guidelines:
Position the light source at a 45-degree angle to the subject, slightly above eye level and angled slightly downward.
Use a large softbox light or diffused natural lighting for portrait photography (flash, continuous light, or sunlight).
Experiment with different angles and heights of the light source to achieve the desired lighting pattern.
For softer shadows, place a shadow reflector or fill light on the opposite side of the model.
This technique is the simplest among other portrait lighting diagrams and suits different face shapes. The exception may be faced with a crooked nasal septum, but even they can appear masculine and decisive.
3. Rembrandt Lighting: The Triangle of Timeless Art
 The triangle of light on the cheek, formed by the merging shadows of the nose and cheekbones, is a distinctive feature of this style, similar to loop lighting. Named after the Dutch master of light and shadow, Rembrandt, this technique gives the portrait a natural yet dramatic look. The diagram for recreating Rembrandt's triangle is simple:
Action | Explanation |
Position the light source. | Place the light at a 30-degree angle to the subject, slightly above eye level, angled slightly downward. |
Add catchlights to the eye. | Adjust the height and angle of the light depending on the model's face shape. |
Adjust the model’s position when using a fixed light source | If the light source is fixed, change the model's position to achieve the desired effect. |
Diffuse the light source | Use a scrim, softbox, or umbrella to create soft shadow edges. |
Create sharper shadow edges | Attach a grid to your modifier, or avoid using a modifier entirely for sharper shadows. |
Move the light source further from the subject | To avoid harsh light, move the light further away from the subject. |
Place a reflector or second light on the opposite side of the model | Use a reflector or a second light with reduced intensity to fill in the shadow details. |
Control the light on the shadow side | Avoid over-lighting the shadow side to preserve the Rembrandt triangle. |
The triangular light pattern on a person’s cheek serves as a symbol of timeless art and the ongoing creative pursuit to understand human nature.
4. Butterfly Lighting (& Clamshell Lighting): Capturing Lightness
 With this lighting, a butterfly shade appears beneath the nose. Subtle shadows work especially well for models with narrow, defined facial features, accentuating the area below the chin and along the cheekbones. To create the butterfly shadow, you need:
Position the flash with a softbox slightly behind and above the camera, ensuring the model’s eyes catch some reflections.
To adjust the contrast (stronger or softer), move the light source closer to or farther from the model.
If you're aiming for lighter-toned shots, place a reflector or softbox beneath the main light source and tilt its base slightly toward the model. The combined effect of these two modifiers will resemble the shape of a shell.
Soft, even lighting is perfect for beauty and fashion photography, while the butterfly shadow will add delicate, elegant nuances to the images.
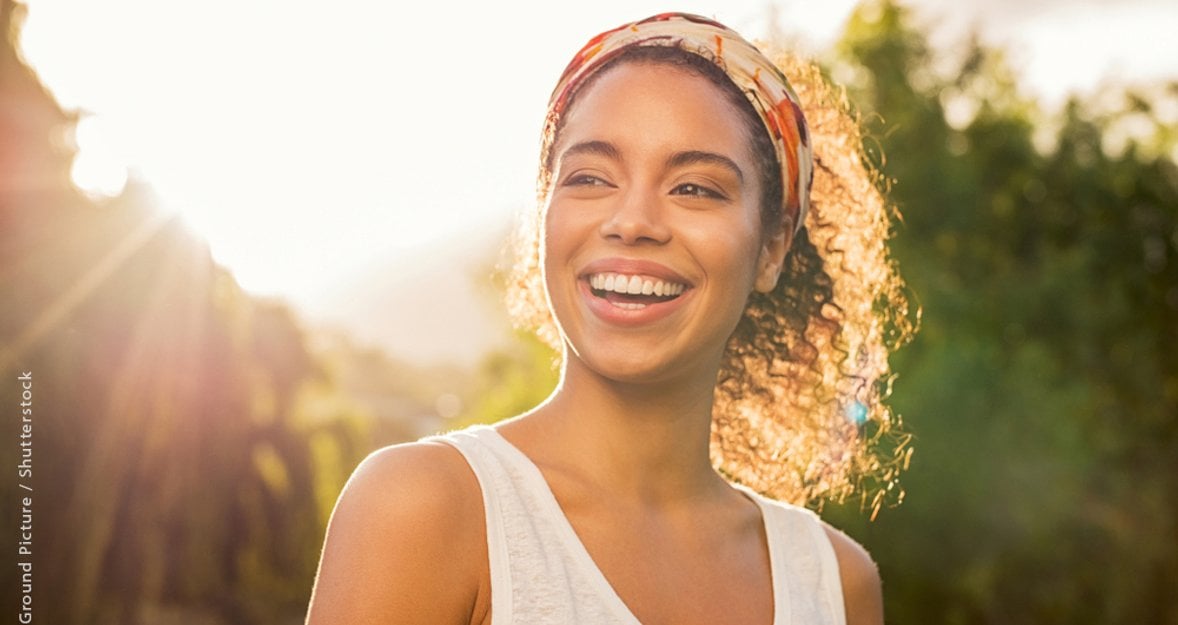
5. Broad Lighting: Showcasing the Bright Side
 Broad Lighting is any of the portrait lighting types mentioned above. It is different in that the model turns more toward the camera, with the bright side of the face facing forward. Therefore, to create a light-filled portrait, you need to turn the model away from the main light source and press the shutter. This technique helps visually widen a narrow face and highlight the cheeks.

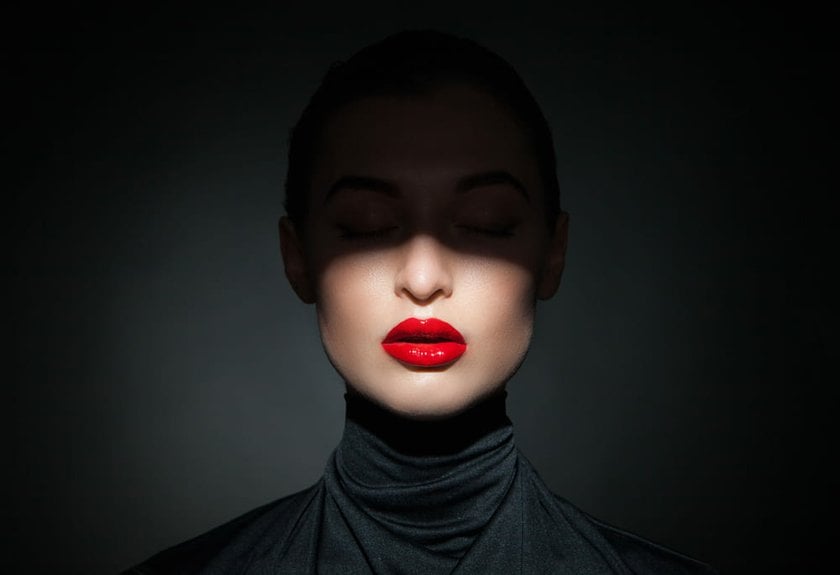
6. Short Lighting: Illuminate the Hidden Side
 To get a photo in the Short Lighting style, turn the model towards the main light source so that the shadowed side of the face is directed at the camera. This kind of lighting setup photography is perfect for creating low-key portraits, adding a sense of mystery and depth. It also slims the face, concealing small imperfections.
7. Back Lighting (Rim Lighting): A Silhouette Rising from the Darkness
 The contours of a human face can be pulled from the darkness using Rim Lighting. To define the model's silhouette, you should:
Position the light source correctly. It should be behind the model.
For a portrait full of tragedy or passion, use a single light source and manually set the exposure for the bright areas or overexpose until everything is black except for the highlights.
Place a second soft light source or reflector between the camera and the model for photos with visible object details to fill in the shadows.
Don’t forget to confirm that the light source is not visible in the frame.
Play with the Lighting
After the shoot is over, you may notice small flaws that can ruin both the photos and your mood. The AI editor Luminar Neo helps you change the type of light source, as well as adjust its brightness and color, completely transforming the atmosphere of your photo.
With this app, you can also experiment with different portrait lighting styles, combining them in various ways. Luminar Neo allows you to add new textures or patterns, expanding the possibilities for your creative expression. This editor will make any beginner photographer feel like a true professional!
Lighting the Path to Growth
Lighting is a main tool alongside the camera when creating portrait photographs. It helps you tell the story of the person sitting in front of you while also demonstrating your creative vision. Therefore, mastering seven basic schemes, as well as studying portrait lighting examples, serves as a strong foundation for both experienced photographers and newcomers.
With an app such as Luminar Neo, you'll always have the tools to refine and broaden your creative horizons. By mixing techniques and testing light patterns and brightness, you can create your own unique photography style.