How To Use iPhone 14 Pro Camera For Breathtaking Shots
September 02
12 min. to read
Got an iPhone 14 Pro? Let’s learn how to snap some fantastic photos with it!
We’ll walk you through some simple adjustments and tips that’ll help you capture stunning images. Whether you’re shooting a sunset or a selfie, follow along to turn those regular shots into real eye-catchers.
Grab your phone, and let’s get started with iPhone 14 pro camera tricks!
New Features

So, it’s time to take a closer look at what the iPhone 14 Pro brings to the table for photo enthusiasts!
Improved Sensors: These new sensors let in more light and capture more detail, which means even in dim lighting, your photos will come out brighter and clearer.
Faster Autofocus: Quick moments won't blur by you. The upgraded autofocus snaps into clarity faster and helps you catch sharp images right when you need them.
Action Mode: Perfect for capturing anything that moves fast. This mode stabilizes your video, so even if you're running alongside your subject, the playback will be smooth.
Dynamic Island: This cool new design feature replaces the old notch at the top. It shows you notifications and what your phone is up to, but in a very non-intrusive way, so you can focus more on your photography.
Always-On Display: This feature keeps important info like time and notifications visible without fully waking up your phone. This is handy for those times when you’re in a shoot and can’t distract yourself but still need to keep in touch.
Getting the Best Out of Your iPhone 14 Pro Camera

Want to take amazing photos with your iPhone 14 Pro? Start by tweaking a few settings to optimize your camera for any situation!
Luminar for Mobile—Download and Edit Instantly
Go to the App StoreFirst things first, turn off Low Power Mode. This mode saves battery but at the cost of your camera's performance, which isn't ideal when you're trying to take great photos.
Next, play with Portrait Mode to adjust depth. This mode isn’t just for people; it works on objects, too, helping your subject stand out with a beautifully blurred background. You can tweak the blur before or after you take the shot.
Be cautious with zoom. Your iPhone 14 Pro can zoom in quite a bit, but zooming can make your photos grainy. It's usually better to just get closer to whatever you're shooting.
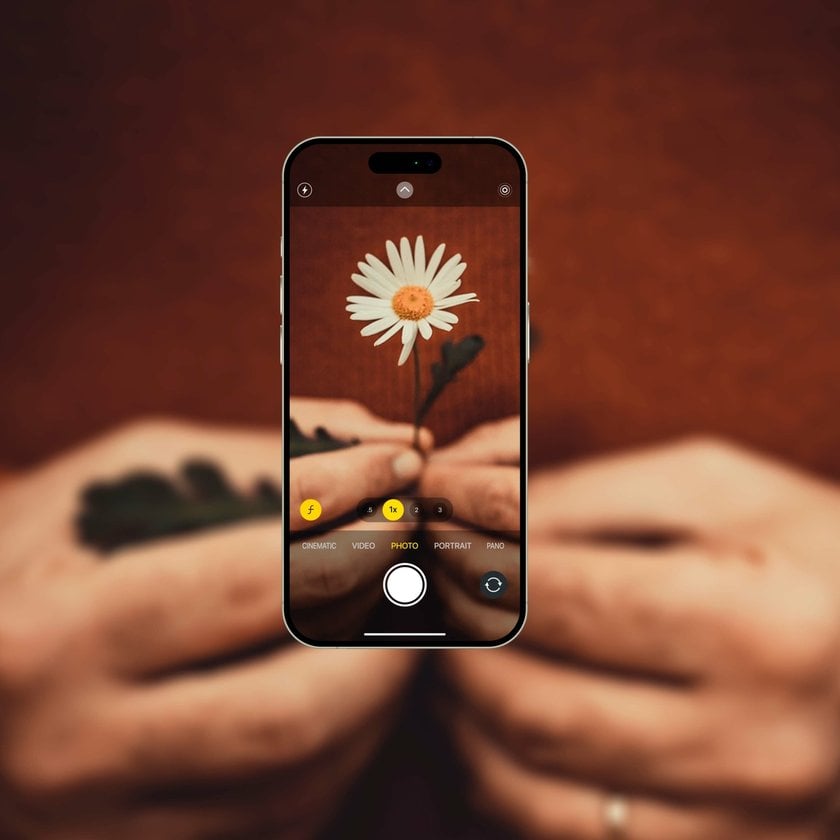
Turn on the Rule of Thirds grid. This simple grid can help you frame your shots like a pro, making sure everything is balanced and lined up right.
Adjust your exposure manually. Swipe up in the camera app to bring up the exposure controls. This is really handy on bright days to keep your photos from getting washed out.
Taking it to the Next Level
If you’re serious about your photography, try shooting in Apple ProRAW or Apple ProRes. These formats capture a lot more detail, which is perfect for editing later on:
Open Settings, go to Camera, then tap Formats.
Enable Apple ProRAW and Apple ProRes. You might also want to set the resolution higher if you’re after super high-quality images.
Keep in mind that these high-quality settings make your files a lot bigger. If you're planning on shooting a lot, maybe think about getting a model with more storage or using cloud storage to keep your phone from filling up.
Ready for Anything
Make sure your camera settings don’t reset every time you use them. In the Camera settings, look for the 'Preserve Settings' option. This saves you from having to redo your setup every time you open the camera app.
And if you like taking close-ups, turn on Macro Control. It automatically switches to a macro lens so you can get stunning detail in small things without fussing with settings.
By setting up your iPhone 14 Pro like this, you'll be ready to capture any moment, turning everyday shots into something truly special!
More iPhone 14 Pro Camera Tips

Quick Photo Capture: To take a photo quickly, hit the shutter button on the screen or use the volume buttons. It's hassle-free and fast.
Video Recording: To record videos, press and hold the shutter button. If you don't want to keep pressing, slide it right to lock the video recording on!
Burst Mode for Action Shots: If things are moving fast, like someone diving into a pool or your dog playing fetch, use burst mode. Slide the shutter button left to start snapping a series of shots back-to-back, ensuring you won't miss any action.
Adjust Exposure: Tap where you want the camera to focus and slide your finger up or down to darken or lighten the shot. This is particularly useful in tricky lighting conditions, such as when taking pictures in both shade and sunlight.
Lock Focus and Exposure: For portraits or any photo where details matter, you can lock the focus and exposure by pressing and holding on your focus point on the screen. This keeps your settings consistent for each shot, ideal when your subject or the lighting isn’t changing much.
Access Additional Settings: Need more control? Tap the small arrow at the top of the camera screen to open more settings like flash options, Live Photos, and exposure tweaks. You can even explore different filters to add flair to your pictures directly from your camera app.
Video Mode Adjustments: Switch to video mode to adjust settings like resolution and frame rate. Whether you want your video smooth at 60 fps or with a cinematic feel at 24 fps, you can set it up with just a few taps!
Action Mode for Videos: Don’t miss out on using the new Action mode, which smooths out your shots, making them look steady — even if you’re moving around. Great for lively scenes, it offers quality video despite not supporting the highest resolution.
These tips can turn your iPhone 14 Pro into a versatile photography tool, ready to capture top-notch photos and videos in all sorts of environments!
Enhancing Your Photos After the Shot

Once you've captured some shots with your iPhone 14 Pro, you might want to spruce them up a bit. Here's how you can do it simply and effectively:
Quick Edits Using Styles
Your iPhone has something called Styles, which are basically like instant filters you can apply right after you take a photo. Just pick one that fits the scene's vibe — whether it's sunny, shadowy, or anything in between — and it’ll tweak your photo to look a bit nicer!
Getting Serious with Editing on Luminar Neo
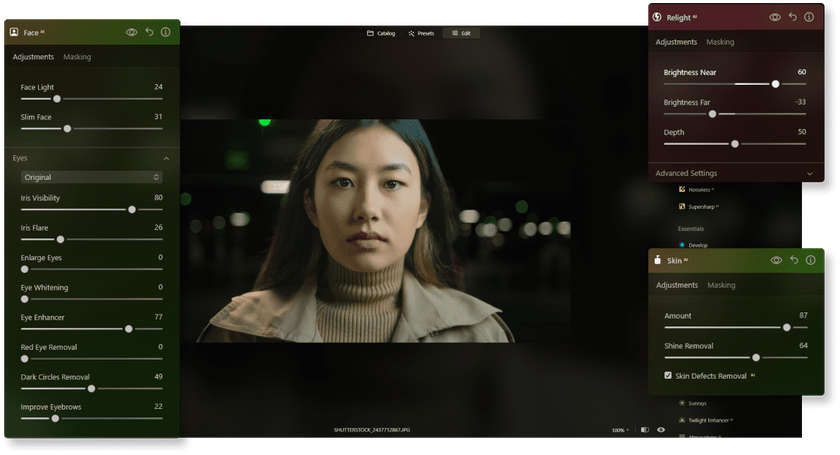
If you're aiming for more polished edits, transfer your photos to a computer or iPad and fire up Luminar Neo, an AI photo editor. This software packs many AI tools that are actually easy to use! It features an outstanding Portrait Photography Editor that effortlessly enhances features like skin and eyes, and adjusts lighting to make every portrait look professional without needing to know a bunch of complex editing techniques.
Another advanced feature is the HDR Photo Editing. If you’re dealing with shots that have both super bright and very dark parts, this tool can blend them into one balanced photo! It ensures every part of your photo looks detailed and vibrant!
Besides these powerful AI tools, Luminar Neo also includes basic functions like the Picture Background Remover. Want to ditch or change the photo’s background? This feature can knock it out fast, saving you from having to painstakingly erase it yourself!
Luminar Neo turns complicated tasks into straightforward ones, helping you enhance your photos quickly and get results that usually require a lot more editing know-how! Explore more AI tools in our software!
Wrapping Up
You've got the tools and tips on how to take good photos with iPhone 14 Pro, so go ahead and start snapping those photos!
If you're into night photography or want some clever ways to use your camera to its fullest, check out our guides on how to take photos of stars on iPhone and iPhone camera tricks. These articles are full of easy-to-follow advice to help you get even more creative with your photography!
Once you've got your photos, why stop there? Enhancing them can make a big difference. Sure, you can tweak them directly on your phone using Styles for a quick touch-up. But if you really want to dig deep and polish your shots, transferring them to a computer or iPad and using Luminar Neo can take them to the next level!
Keep shooting, keep experimenting, and most of all, enjoy capturing amazing moments with your iPhone 14 Pro!


