How to Photoshop Someone into a Picture
April 26
15 min. to read
If, however, you’re here just for a good photo editor without all these super advanced features, then we suggest you give the user-friendly and capable Luminar a try first.
Detailed Guide to Photoshopping Someone into a Picture
Step 1: Choosing the Right Images for Photoshop

Key Considerations When Selecting Images
Visual Compatibility: When selecting photos, ensure both images share similarities in terms of lighting, perspective, and ambiance. It’s easier to combine two photos that naturally fit together than to force two disparate images to work.
Subject Positioning: Look at the angles and positions of subjects. Ensure that their orientation fits the scene where they will be added.
Lighting Direction: The direction and quality of light should be similar in both images. Discrepancies can make the final image look unnatural.
Importance of High-Resolution Photos in Photoshop
Detail Retention: High-resolution photos preserve more details, which ensures that when you edit, the final image remains sharp and clear.
Flexibility in Editing: Higher resolution provides more flexibility to resize and crop an image like a pro or make other adjustments, as there's more data for precise editing.
Avoid Pixelation: High-resolution images prevent pixelation, especially during resizing or intensive editing.
Step 2: Setting Up Your Photos for Photoshop Editing

How to Duplicate the Background Layer
Navigate to Layers Panel: It's typically on the right side of the Photoshop interface.
Duplicate: Right-click on the background layer. From the drop-down menu, select “Duplicate Layer.” This action ensures you have a non-destructive backup of your original image.
Establishing a Clean Workspace in Photoshop
Layer Organization: Rename your layers descriptively, e.g., "Original Background", "Inserted Subject", to avoid confusion during the editing process.
Minimize Clutter: Close any unnecessary panels and ensure your tools and layers panels are easily accessible.
Zoom and Pan: Use the zoom tool (Z) and hand tool (H) to get a clear and close look at areas you're working on.
Step 3: Expertly Cutting Out the Person in Photoshop
Mastery of Photoshop Selection Tools
Lasso Tool: Allows freehand selections, perfect for a quick selection around subjects.
Magnetic Lasso & Polygonal Lasso: Variants of the lasso tool; the magnetic version detects and clings to visible edges, while the polygonal tool lets you make straight-edged selections.
Quick Selection Tool: Great for selecting subjects against contrasting backgrounds. Click and drag to quickly “paint” a selection.
Refining Edges for a More Natural Appearance
Access Refine Edge or Select and Mask: Depending on your Photoshop version, after making your selection, click on "Select and Mask" or "Refine Edge" to fine-tune.
Adjust Edge Settings: Use sliders like "Smooth" to smooth out jagged edges, "Feather" to soften the edge transition, and "Shift Edge" to contract or expand the selection edge.
Output to New Layer with Mask: When satisfied, choose this option to place your refined selection onto a new layer, ensuring the original remains untouched.
Step 4: Seamlessly Integrating the Person into the New Photo

Techniques for Moving and Positioning the Cutout
Using the Move Tool: Once you've isolated the person, select the "Move Tool" from the toolbar or press "V" on the keyboard. This tool lets you drag and reposition the person within the frame.
Perspective & Alignment: Ensure the person's feet align with the ground, horizon, or any other reference point in the background. This will give a sense of depth and anchoring, making the integration more believable.
Resizing and Adjusting Scale to Match the Composition
Accessing the Transform Tool: After selecting the layer with the person, press "Ctrl/Cmd + T" to activate the "Transform" tool.
Proportional Resizing: Drag any corner handle, but hold down the "Shift" key to maintain the original proportions of the person. This prevents any unintended stretching or squishing.
Final Positioning: Once resized, move the person to the perfect spot. This might be near a landmark, with a group of people, or any other strategic position in the photo.
Step 5: Advanced Composition Fine-tuning in Photoshop

How to Match Color and Lighting for a Realistic Look
Color Matching: Navigate to Image > Adjustments > Match Color. Target the background layer to make the person layer adapt its colors accordingly. Adjust the sliders to fine-tune.
Exposure and Contrast: Use the "Levels" or "Curves" adjustment layers to fine-tune the brightness, contrast, and tonal range of the inserted person, making sure they blend seamlessly with the background.
White Balance Adjustment: Go to Image > Adjustments > Color Balance to adjust the white balance. This ensures that the person doesn't look too cool or too warm compared to the background.
Creating and Adjusting Shadows for Depth
Understanding the Light Source: Identify where the primary light source is in the image. This will dictate the direction and length of the shadow.
Drop Shadow Method: Right-click on the person layer and choose "Blending Options". Use the "Drop Shadow" setting to create a basic shadow. Adjust the opacity, distance, and spread for a more natural appearance.
Manual Shadow Painting: Create a new layer below the person. With a soft brush, paint in the shadow, keeping in mind the direction and intensity of the light. Adjust the layer's opacity to ensure the shadow isn't too harsh.
Step 6: Final Touches and Quality Assurance in Photoshop
Reviewing and Refining the Final Image
Zoom in and examine the edges of the inserted person.
Check the color balance and lighting one final time.
Review the image for anomalies or errors.
Use the "History" panel in Photoshop to compare edits.
Saving Your Edited Photo in the Right Format
Save for online use as a JPEG or PNG. Preserve editing capabilities with a PSD (Photoshop Document) save. Optimize image size without compromising quality using "Save for Web."
Discovering Alternatives to Photoshop: Exploring Luminar Neo

Why Choose Luminar Neo as a Photoshop Alternative?
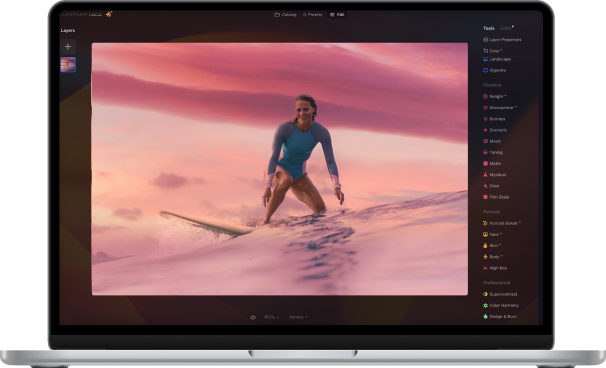
Photoshop, while a powerhouse for photo editing, can often be complex and time-consuming. For those looking for an alternative that offers a more user-friendly interface without compromising on the quality of edits, Luminar Neo presents itself as a viable option. It allows users to achieve results similar to Photoshop, and its intuitive design and easy-to-use tools make the process much quicker and more streamlined. Especially when the goal is to merge photos or adjust ambiances between two images, Luminar Neo can simplify the task.
Advantages of Utilizing Luminar Neo for Photo Manipulation
Considering the benefits of Luminar Neo and its ability to produce natural-looking results in a fraction of the time, it's clear why many are exploring it as an alternative to Photoshop. Whether you're a novice looking to delve into the world of photo editing or a seasoned professional seeking a more efficient workflow, Luminar Neo offers a solution tailored to your needs. Let’s take a closer look!
Simplified User Experience: Unlike Photoshop's myriad of tools and panels, Luminar Neo offers a more straightforward interface, making it accessible even to those new to photo editing.
Advanced Editing Capabilities: Even though Luminar Neo is designed to be more user-friendly, it doesn't skimp on powerful features. You can overlay images, change skies, adjust colors, and more with just a few clicks.
Adaptive Learning: Luminar Neo's AI-enhanced tools learn from your editing patterns, streamlining repetitive tasks and speeding up your workflow. This feature and its user-friendly interface make it an ideal free photo editor for beginners (7 days trial period).
Cost-Efficient: Instead of opting for professional retouching services, Luminar Neo provides a more cost-effective solution by allowing users to achieve professional-level edits at a fraction of the price.
Integrated Solutions: Beyond photo manipulation, Luminar Neo offers a range of solutions, from basic photo corrections to more intricate edits, ensuring all your editing needs are met within one platform.
If you don’t want to photoshop someone into pictures on your own, you can buy a Pro Photo Retouching Package and get image editing up to 24 photos at an affordable price and according to your requirements.
So what are you waiting for? Luminar Neo offers a 7-day free trial, making it one of the best free Photoshop alternatives. Discover the simplicity and natural results of adding a person to an empty landscape!
Advanced yet easy-to-use photo editor
Get Luminar Neo NowConcluding Thoughts on Adding Someone into a Photo Using Photoshop
Manipulating images using Photoshop is both an art and a skill that requires practice and patience. The process of adding someone to a photo may seem daunting at first, but with the right tools and techniques, you can achieve realistic results. Pay attention to the details: matching lighting, ensuring correct scale, and harmonizing colors. Additionally, discovering alternative tools like Luminar Neo offers users more avenues to explore and achieve their desired edits. As with any skill, practice is vital. Over time and with consistent effort, you'll master the art of photo manipulation, turning any imaginative scenario into a visual reality.
If you want to learn more about other free apps, check out our article Best Free Photo Editing Apps for Mac.
FAQ
How to photoshop someone Into a picture on iPhone for free?
Download a free photo editing app like Snapseed from the App Store.
Open the app and load the background picture.
Import the person’s image as an overlay or sticker.
Use the app’s tools to adjust the size, position, and blending of the overlay.
Save your edited image.
How to add someone to a picture without Photoshop?
If you're looking for an alternative to Photoshop, Luminar Neo is a great option. Luminar Neo is a user-friendly photo editing software offering a range of photo manipulation tools. With its intuitive interface, you can easily add someone to a picture. It provides easy-to-use tools that simplify the process, allowing for quick adjustments to color, exposure, and overlays, such as adding different skies to your landscapes. The software is designed to give you a more natural and refined look in less time than Photoshop's more complex controls.
How to photoshop someone into a picture on an iPhone?
You can use apps like Superimpose, PicsArt, or Adobe Photoshop Mix on an iPhone. These apps allow you to remove a person from one photo and merge them into another. The process typically involves selecting the person, refining the edges, and then integrating them into the desired image, adjusting lighting and scale as needed.
How do I merge a person into another picture?
Begin by selecting the person you want to merge with using a tool like a lasso or pen tool. Once selected, copy and paste them onto the desired image. Adjust the size, positioning, and orientation to ensure they fit naturally into the new scene. Refine the edges, match the lighting and colors, and make any necessary adjustments for a seamless integration.


