How To Make A Photo Transparent: Tips For Flawless Edits
May 24
13 min. to read
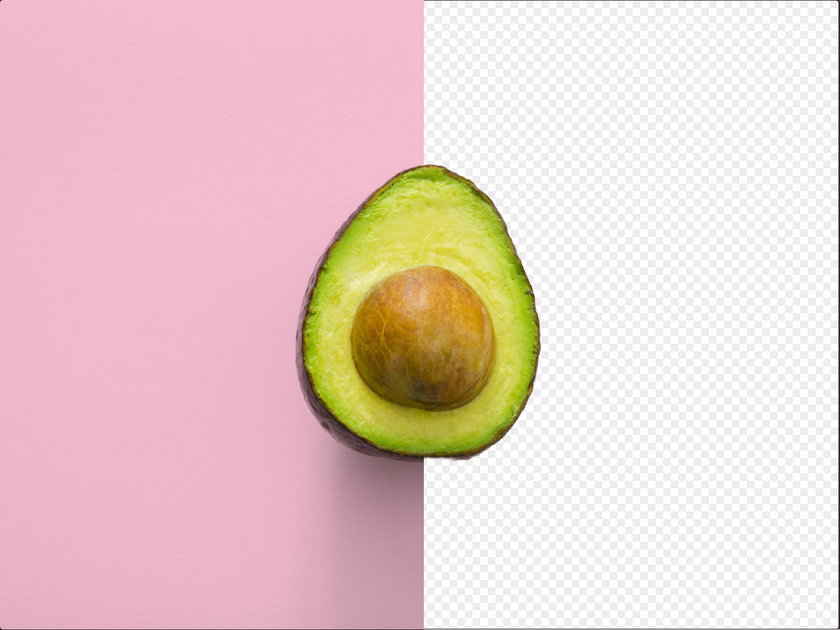
Are you looking to remove the background from a photo? You've found the perfect guide! Transparent backgrounds can dramatically enhance photos, making them versatile for logos, designs, and more.
This post will lead you through straightforward methods to achieve that clean, transparent look. From beginner-friendly online tools to professional software like Adobe Photoshop, and even convenient mobile apps, we've got you covered. Ever asked yourself, "How do I make a picture transparent?" By following this guide, you'll discover how to easily make your photos pop with transparency.
Let's explore how to edit a transparent image, covering everything from web-based tools to advanced software and mobile apps!
Start with Online Tools

There are plenty of online tools available, but keep in mind they usually can't match the quality of specialized software and are best for quick, one-time tasks. If you're looking for something more advanced for professional photo editing, you'll find some great software options in the next paragraph.
Just need to make a photo transparent? We've rounded up some online tools below that can help you with that:
1. Online Background Remover

Making the snapshot setting transparent can be simple with tools like Online Background Remover. This tool uses AI technology to automatically distinguish and remove the backdrop from your photo. It allows for manual adjustments with Erase and Keep tools for finer detail work. If you decide to add a photo scenery instead, it offers solid colors, designer templates, and the option to upload your own.
Pros | Cons |
|
|
Here's how to make the background of a picture transparent:
Getting Started: Visit the official Online Background Remover site and upload your image by clicking “Upload Image.”
Automatic Removal: The backdrop is instantly removed by the tool.
Finalizing: If you're happy with the result, hit the “Download” button to save your transparent photo.
2.LunaPic
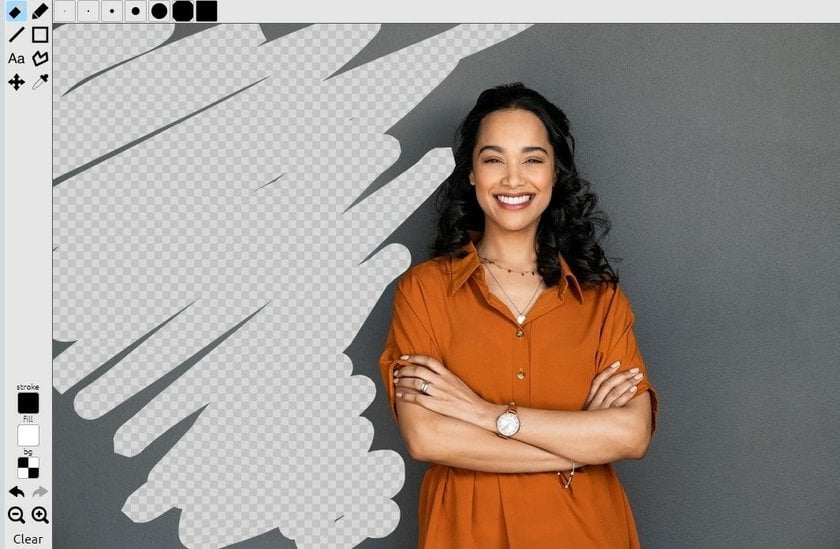
LunaPic is another excellent free tool for creating transparent images online. It doesn't require sign-up and is completely free. You can upload images from your computer, social media, cloud storage, or directly from websites. It offers a comprehensive suite of editing tools but may present a learning curve for new users.
Pros | Cons |
|
|
Here's a quick guide on how to make an image transparent with LunaPic:
Uploading: Go to LunaPic’s website and upload your photo.
Making Transparent: Select “Edit” > “Transparent Background” and click on the background color in your image to make it transparent.
Manual Adjustments: Use the “Eraser” tool for any manual corrections to remove unwanted areas.
3. Online PNG Tools
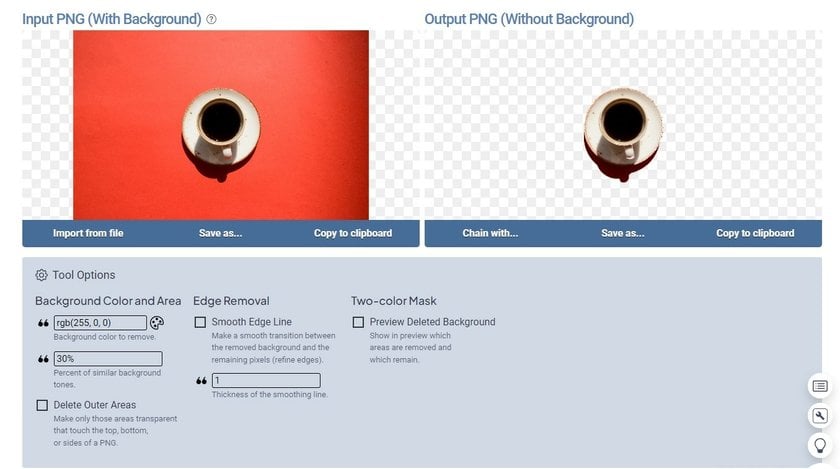
For those seeking simplicity, Onlinepngtools is a straightforward option that automatically makes your photo scenery transparent. It identifies and replaces the background and similar tones with transparency.
Pros | Cons |
|
|
Here’s how to use Online PNG Tools:
Importing Your Photo: Navigate to the Onlinepngtools website and upload your photo by clicking the gray square.
Automatic Transparency: The tool instantly makes your image backdrop transparent.
Downloading: Click “Save as” to download your photo with a transparent background.
Advanced yet easy-to-use photo editor
Get Luminar Neo Now
Advanced to Professional Software

Professional photo editing software offers powerful tools that greatly enhance your editing capabilities. These programs allow for precise control with features like layering, masking, and retouching, and they support high-quality RAW files for better detail retention. They also improve workflow efficiency with customizable presets and batch processing. Plus, investing in professional software typically includes access to regular updates and technical support, ensuring you stay current and supported as you work.
Below, we've gathered a list of editing tools that not only help you make your photos transparent but also enhance the overall appearance of your images with minimal effort.
Luminar Neo
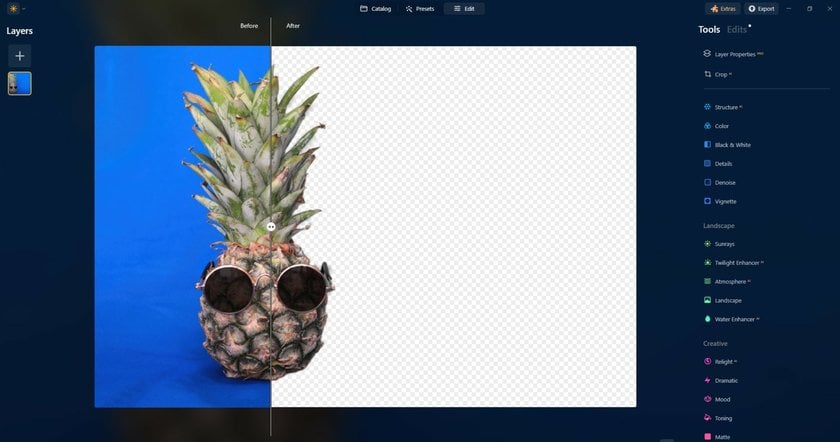
Luminar Neo transforms photo editing with its Background Removal AI Extension, simplifying the task of making images transparent. Tailored for both professional photographers and hobbyists, Luminar Neo features AI technology and an intuitive interface that enables automatic background removal in just a few clicks.
Here’s why Luminar Neo is a must-have for your edits:
AI-Powered: Automatically detects and isolates the subject, making the background transparent without manual masking.
Creative Freedom: With the background removed, you can easily place your subject against new backdrops, layer multiple images, or create intricate photomontages.
User-Friendly: Luminar Neo’s intuitive design makes it accessible for all skill levels, emphasizing creativity over complexity.
To make an image transparent in Luminar Neo:
Open the Background Removal AI Extension: This tool automatically removes the background from your image.
Adjust or Revert Changes: If needed, use the Undo feature to revert any changes. For more precise editing, utilize layers to fine-tune your image.
Save the Image: Ensure transparency is preserved by saving your edited image in formats like PNG or TIFF, which support transparent backgrounds.
Remove Portrait Background in One Click with Luminar Neo
Try it Now!Adobe Photoshop
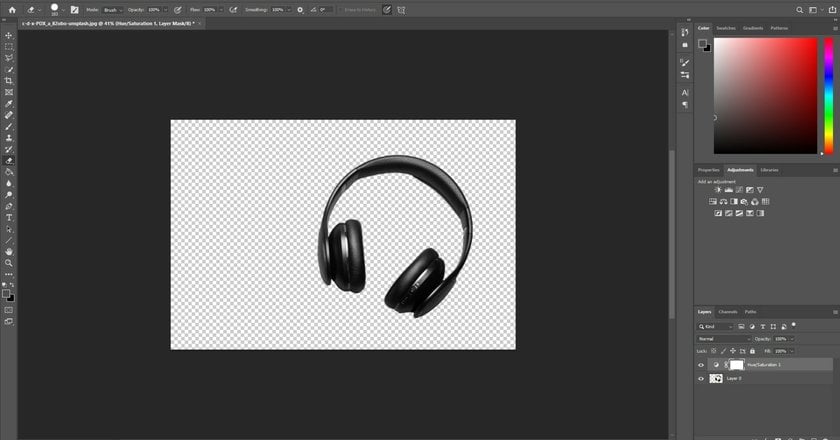
Discover the dual advantages of Adobe Photoshop in making image backdrops transparent, combining the convenience of AI with the precision of manual control. Photoshop excels at isolating subjects from their scenery, transforming ordinary photos into professional-grade materials.
While making a photo transparent in Photoshop requires more effort, the results are worth it. We'll guide you through the steps to perform this task effectively:
Open your image in Photoshop: Navigate to Window > Layers to display the Layers panel.
Duplicate the original image: Use Control+A (PC) or Command+A (Mac) to select the entire image, then copy and paste it onto a new layer for editing.
Hide the original background: Click the eye icon beside the original layer to hide it, focusing on your duplicate.
Apply 'Remove Background': In the Properties panel, find Quick Actions and select Remove Background to let Photoshop’s AI do the heavy lifting.
Fine-tune with AI and manual adjustments: Adobe Sensei, Photoshop's AI, will analyze and remove the backdrop. For any necessary tweaks, manual tools like the eraser and mask layers are at your disposal.
Save your transparent image: Ensure you save your work as a PSD or PNG file to maintain transparency.
Mastering these tools can significantly enhance your photo editing skills, ensuring your images stand out with clean, transparent backgrounds suitable for various applications. Additionally, consider checking out the Luminar Neo plugin for Photoshop to streamline your photo editing process further.
Use Mobile Apps for Transparent Backgrounds

There are many apps, such as PicsArt, Luminar for iPad, and PhotoDirector, on Google Play or the Apple Store. Just search for "background remover" to discover more options. These apps are perfect for quick photo edits, whether for social media or personal projects. Mobile apps simplify the process of changing photo backgrounds to transparent. These apps are great because:
It uses AI to remove backgrounds with just one tap.
Offers lots of new backgrounds to choose from.
Lets you fix small mistakes with an eraser tool.
It’s easy to use.
Bonus Tips for Editing Transparent Images

Creating transparent images is just the beginning. To ensure your edits look professional and integrate seamlessly with your projects, keep these tips in mind:
Choose the Right Tool for the Job: Different tasks may require different tools. Use simple online tools for quick edits, and turn to software like Adobe Photoshop for complex projects.
Maintain High Resolution: When making a background transparent, ensure your image remains high resolution to avoid pixelation, especially important for print projects.
Pay Attention to Edges: Clean up the edges after removing the background. Soften sharp edges where necessary to make the subject blend naturally with the new background.
Use Layer Masks in Advanced Editing: If you're using Photoshop, utilize layer masks instead of erasing. This non-destructive method allows you to hide and reveal parts of your image without permanently deleting anything.
Experiment with Different Backgrounds: Test how your transparent image looks on various backgrounds to ensure it looks good in all potential settings.
Save in the Right Format: To preserve transparency, save your edited image as a PNG. This format supports transparent backgrounds, unlike JPEG.
Keep Original Files: Always save a copy of your original image. If you need to go back and make changes, having the original file can be a lifesaver.
Wrap-Up

Knowing how to make a photo see-through is a neat trick for any creative project. With straightforward tools like Canva, powerful programs such as Adobe Photoshop or Luminar Neo, and handy mobile apps like PhotoDirector, achieving that transparent look is straightforward. Whether you're at home or on the move, editing is at your fingertips!
And if you're curious about more photo editing tips, dive into our guides on how to make a photo bigger without messing up its quality and how to minimize picture size for quick sharing!
Each new technique you learn opens up more possibilities to play around and get things done with your pictures!


